
88towmanche
-
Posts
230 -
Joined
-
Last visited
Content Type
Profiles
Forums
Gallery
Everything posted by 88towmanche
-
88 4X4 Longbed Pioneer - 4.0 5 spd
88towmanche replied to 88towmanche's topic in Member Projects: Your Comanches
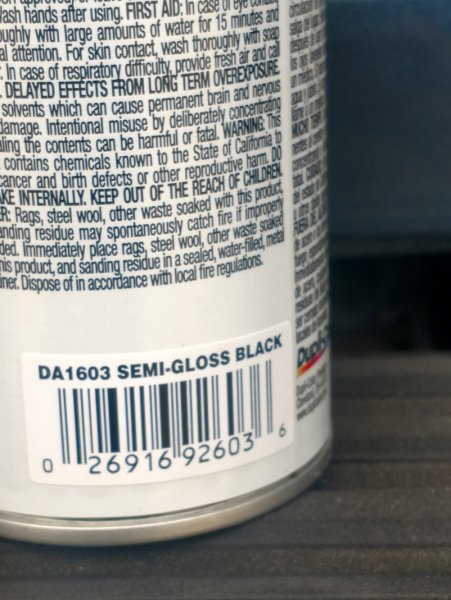
Which rattle can paint did you use for the bumper? Is that a semi-flat finish? Duplicolor Semi-Gloss Black
-
88 4X4 Longbed Pioneer - 4.0 5 spd
88towmanche replied to 88towmanche's topic in Member Projects: Your Comanches
Yeah, man I really liked how it looked on your truck - DIY Raptor has been getting a lot of good reviews, but not sure if I can block out enough time to do it right (prep is everything), going to get a quote on the Rhino and then weigh cost/benefit of having done vs. screwing it up myself. -
88 4X4 Longbed Pioneer - 4.0 5 spd
88towmanche replied to 88towmanche's topic in Member Projects: Your Comanches
Duplicolor for the bumper - think it was semi gloss (or satin) - will check the can tonight. -
88 4X4 Longbed Pioneer - 4.0 5 spd
88towmanche replied to 88towmanche's topic in Member Projects: Your Comanches
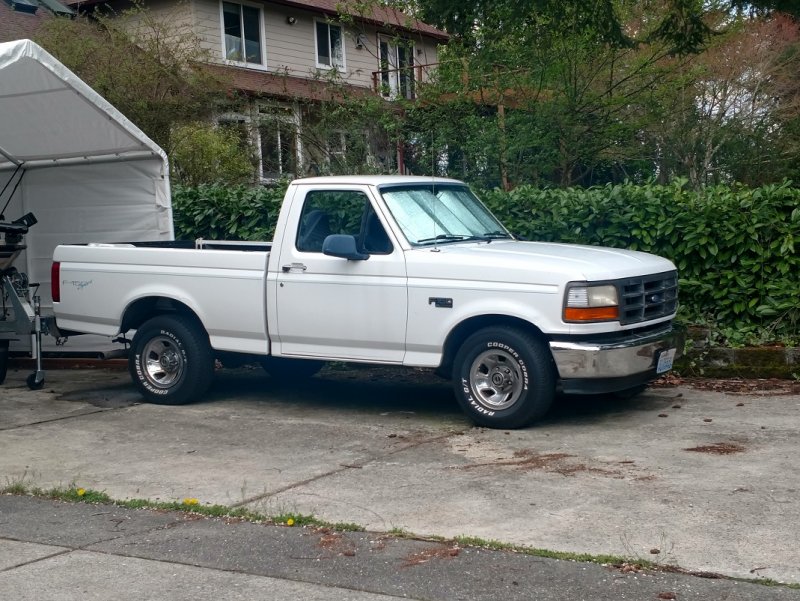
Sold the old tow vehicle - had this F150 for last 10 years, both kids learned to drive using this truck - took the abuse in stride. 1996 Ford F150 - straight 6, 5 spd - base model (no headliner or carpet, crank windows and manual locks) but it had A/C and dual tanks - not a Ford guy but that was a damn fine truck, hated to sell it but need 4x4 for getting in and out of some of the launches around here.
-
88 4X4 Longbed Pioneer - 4.0 5 spd
88towmanche replied to 88towmanche's topic in Member Projects: Your Comanches
Did a check run taking the boat down to the launch and back (did not launch) - truck really pulls the boat very well - didn't see speeds over 35mph as I had the canopy up on the boat, but this is going to be a nice set up. Have not wired up the trailer lights yet - going to do that in conjunction with all of Cruiser's tips on cleaning up the grounds and still have to swap out the factory cables with the set from Meanlemmons. Brakes are inadequate as they are for towing - they work fine, but need upgrade - going to do the booster upgrade out of a 95-96 XJ and see if that inspires a little more confidence.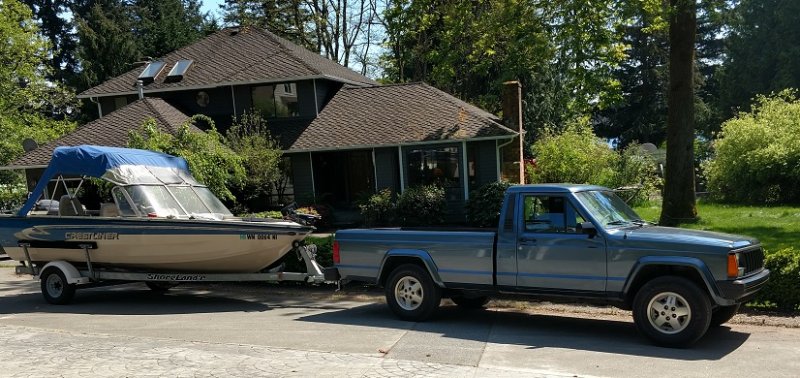
-
88 4X4 Longbed Pioneer - 4.0 5 spd
88towmanche replied to 88towmanche's topic in Member Projects: Your Comanches
Nope - will check it out, thnx -
88 4X4 Longbed Pioneer - 4.0 5 spd
88towmanche replied to 88towmanche's topic in Member Projects: Your Comanches
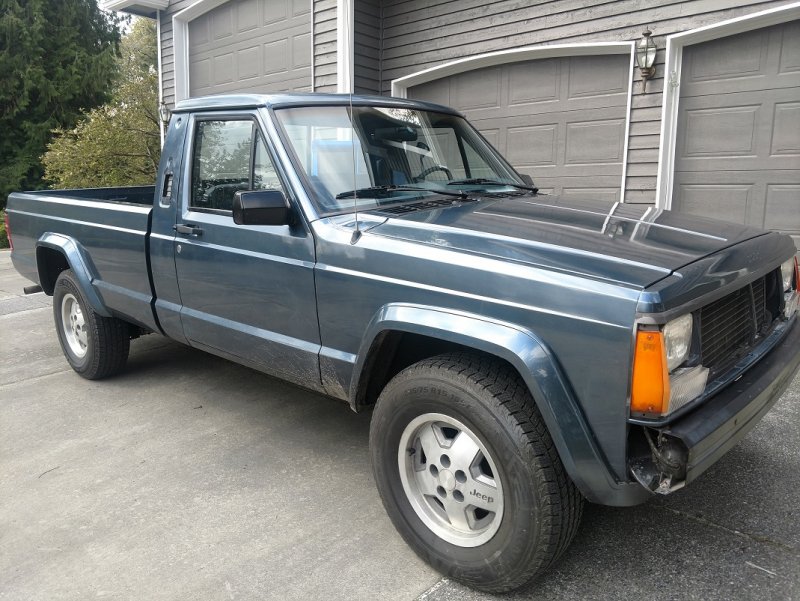
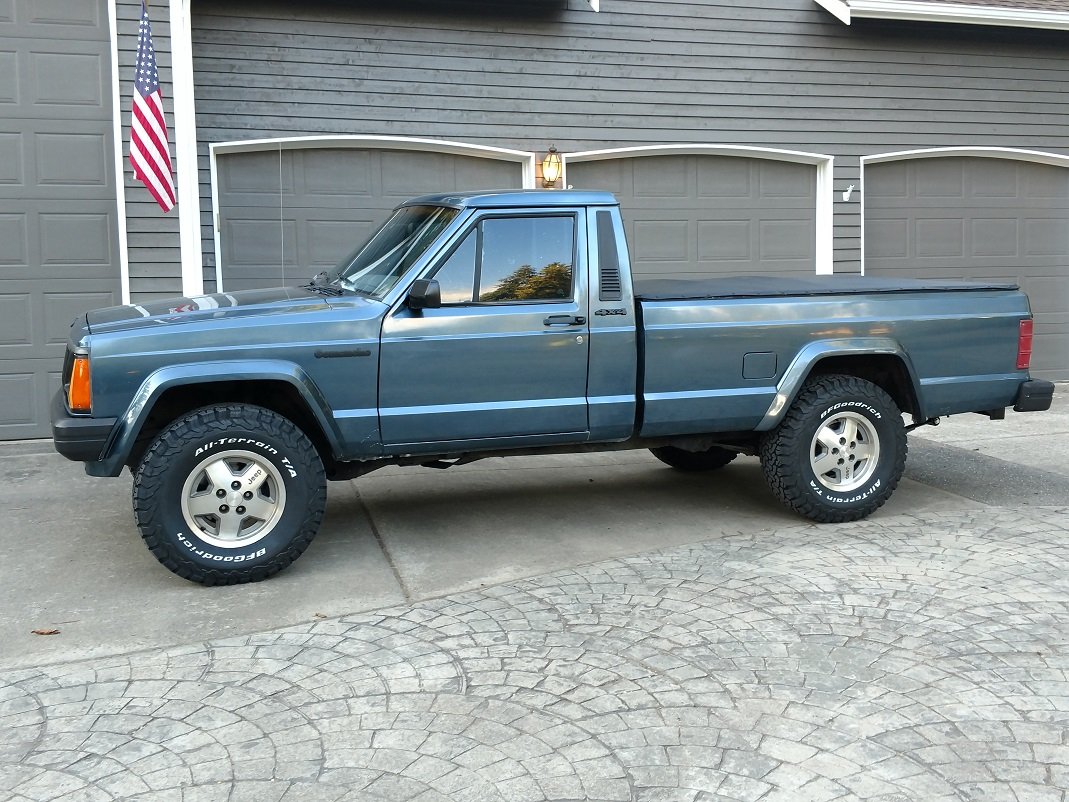
Using plastidip to on the badges & emblems - like the black n blue look on this rig. Thinking it might look good with the black molding back on after the paint hardens another couple weeks - maybe not, like how it looks now. Next up: bedliner - Rhino or Linex? (not of fan of the DIY bedliners - seen some ok ones, seen a lot of bad ones)
-
88 4X4 Longbed Pioneer - 4.0 5 spd
88towmanche replied to 88towmanche's topic in Member Projects: Your Comanches
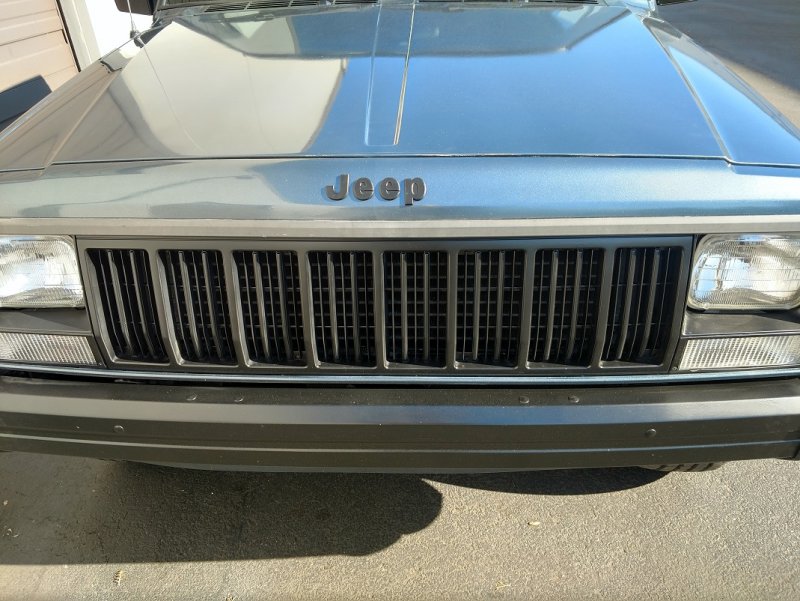
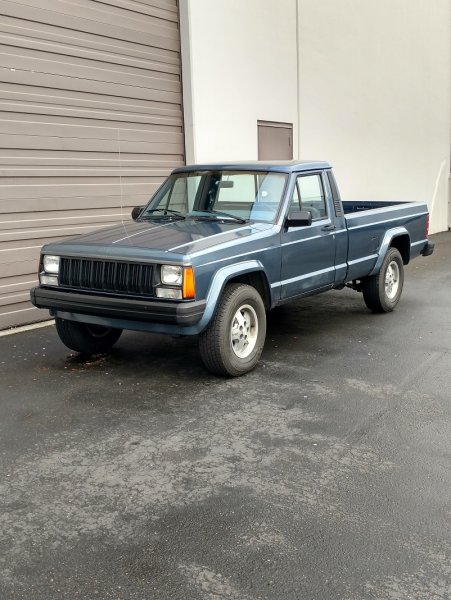
Rattle can front bumper, grill and bezel Think I am going to plasti-dip all the emblems black and just go with the whole truck Black n Blue - maybe not the rims, not sure I want that look. Can see where the paint shop did a piss poor job buffing out the clear coat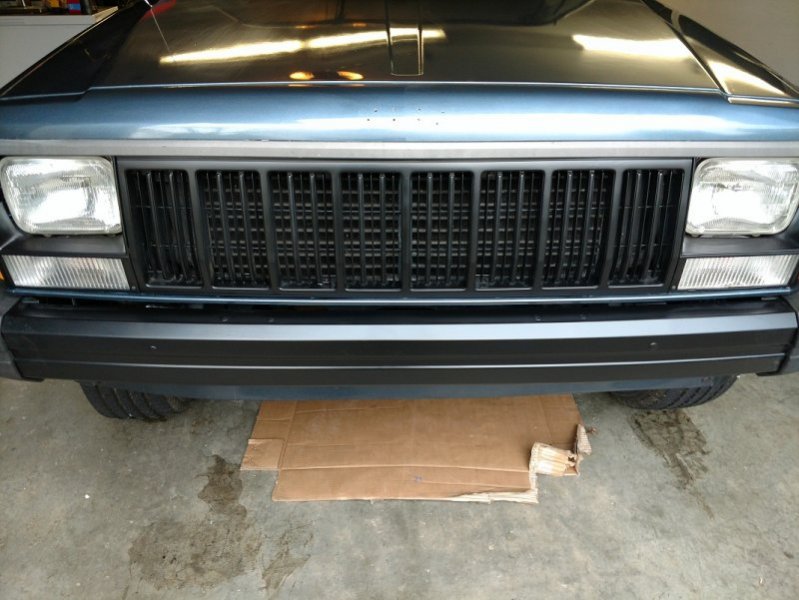
-
88 4X4 Longbed Pioneer - 4.0 5 spd
88towmanche replied to 88towmanche's topic in Member Projects: Your Comanches
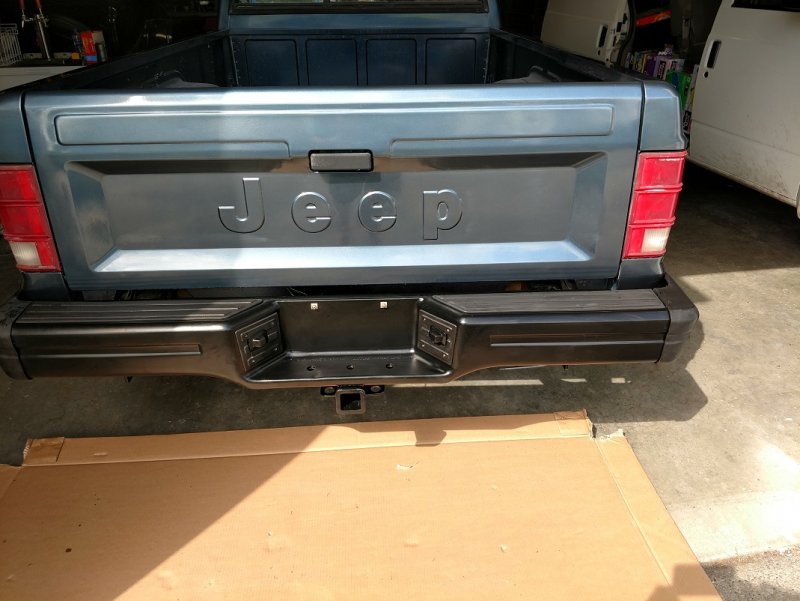
Rattle can step with Krusty hitch
-
88 4X4 Longbed Pioneer - 4.0 5 spd
88towmanche replied to 88towmanche's topic in Member Projects: Your Comanches
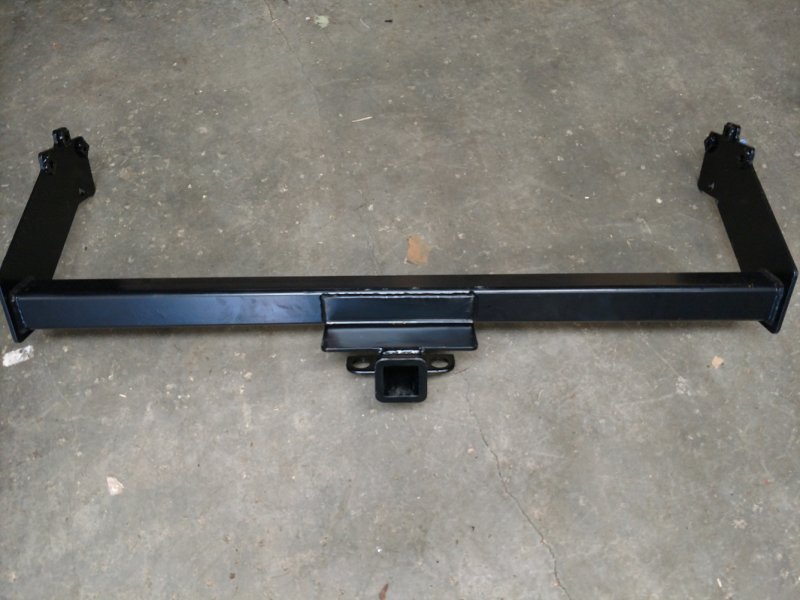
Back from paint. Good coverage - said they used over a gallon of clear - got some issues where they didn't finish buffing out, still going over the whole truck, may take it back in to have them address a few things or may just take care of myself. Rear step came out ok with rattle can - Krustyballer hitch lined right up and bolted right in.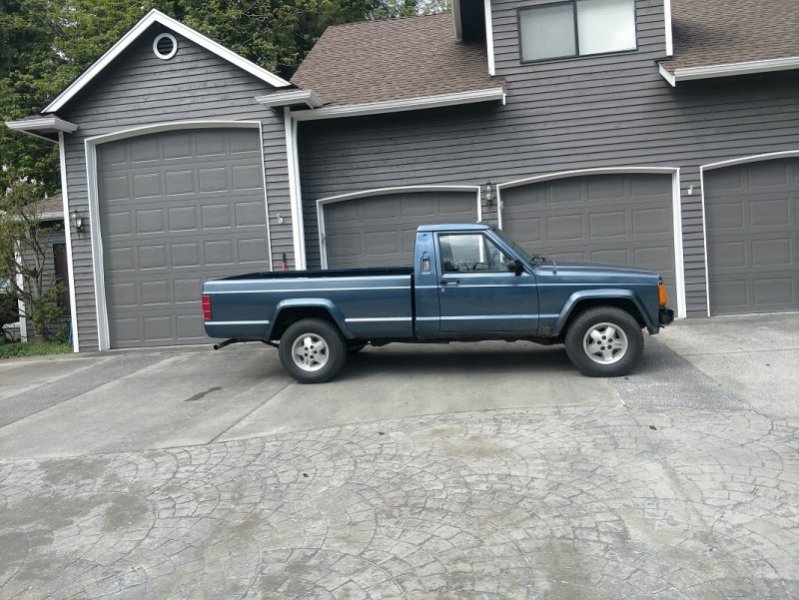

-
88 4X4 Longbed Pioneer - 4.0 5 spd
88towmanche replied to 88towmanche's topic in Member Projects: Your Comanches
Still waiting on getting truck back from paint - did get Krustyballer's hitch back from powder coat - that is one nice piece of work - thanks again Krusty! Pulled apart the rear step and was going to try and strip it (also for powder coat) - used a Harbor freight spot blaster and 25lbs of blast media - got about 1/8 of the bumper stripped, made a hell of a mess and lost 2hrs of time - now think I'll leave stripping it to the pros - it's weird, part of that bumper almost looks like it was blue at one time, but think what is on there now may be powder coat or one hell of a tough paint.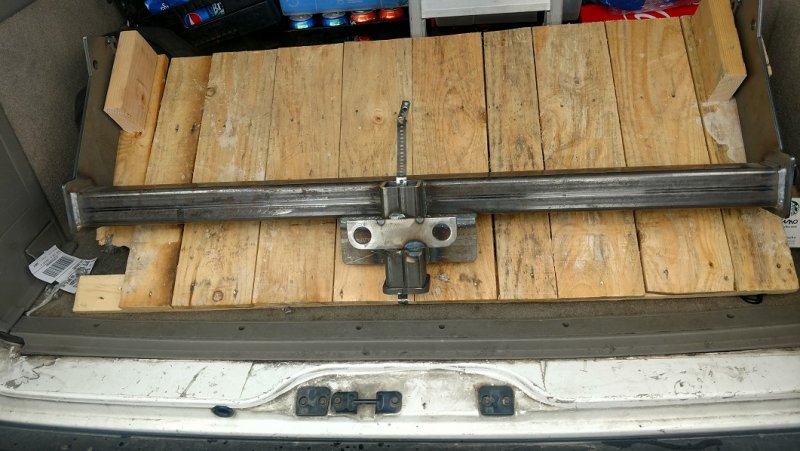
-
Seattle - be a long drive to pick it up.
-
I've got one! Complete with no-drill clamps and screws... No idea what it is worth or how to ship it without breaking the bank, but it's not going back in my truck (don't like over the rail liners)

-
88 4X4 Longbed Pioneer - 4.0 5 spd
88towmanche replied to 88towmanche's topic in Member Projects: Your Comanches
What's the best stuff to clean up the bumper end caps? Mothers? -
88 4X4 Longbed Pioneer - 4.0 5 spd
88towmanche replied to 88towmanche's topic in Member Projects: Your Comanches
Shout out to Krustyballer - got one of his hitches last week & dropped off powder coat, should have back today or tomorrow. Paint shop now says truck won't be done until next week.....good thing it's not the DD yet....turns out the painter none too happy about pulling the fender flares and the resultant snapping of 90% of the studs - he's going to fix with stainless hardware, but adds time to the project (and wants to up the $$$ for the hassle) - still coming in under budget so I agreed to a 20% bump - he also found a couple more dings that I missed and I think is frustrated with the hassle of pulling 30 yr old door panels to get the handles and locks off...his quote was really low to begin with and the guy does quality work...lol I told him that for extorting the extra $$$ he should double the number of coats of clear Question about that rear bumper - I was just going to rattle can it flat black, but now thinking I could take it apart, sand blast it and drop it off for powder coat to match the hitch. Don't have a blast cabinet, but do have a cheapo HF spot blaster and a big 80 gallon compressor - could strip that down to bare metal pretty quick, will have to see what the powder coat guys think... Or...what about having the shop paint the rear bumper to body match like the front? Anyone do that with a rear step bumper - think it would look ok?

-
88 4X4 Longbed Pioneer - 4.0 5 spd
88towmanche replied to 88towmanche's topic in Member Projects: Your Comanches
Agree - found this guy's shop a few years ago, doesn't advertise, doesn't answer the phone, doesn't speak much english - but does quality work. Think it is all a one man show (have seen a couple helpers there but they looked more like hangers-on than employees) Maaco said they could knock it out in a couple days....been there done that. -
88 4X4 Longbed Pioneer - 4.0 5 spd
88towmanche replied to 88towmanche's topic in Member Projects: Your Comanches
Yep, took him at his word he could take care of it - he's done good work for me in the past... -
88 4X4 Longbed Pioneer - 4.0 5 spd
88towmanche replied to 88towmanche's topic in Member Projects: Your Comanches
What is the fix? Is there a way to replace the studs or do you just glue the flares back on.... -
88 4X4 Longbed Pioneer - 4.0 5 spd
88towmanche replied to 88towmanche's topic in Member Projects: Your Comanches
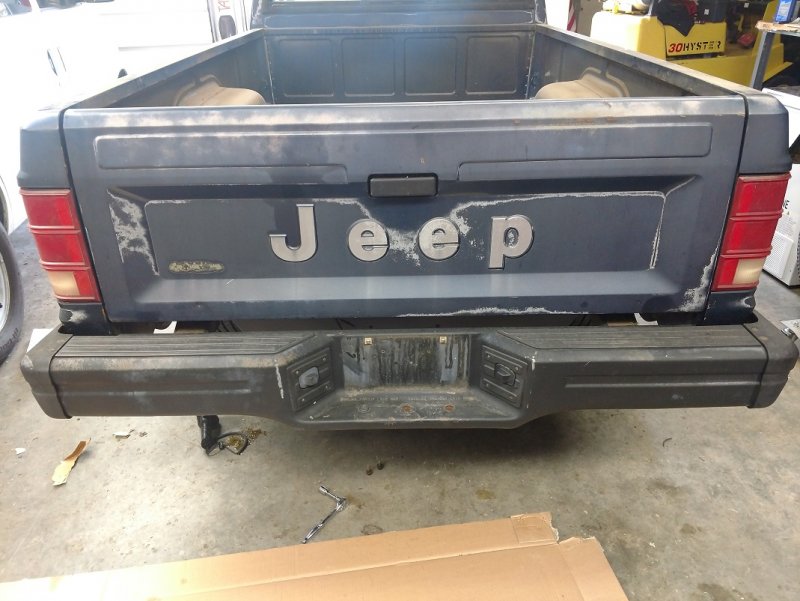
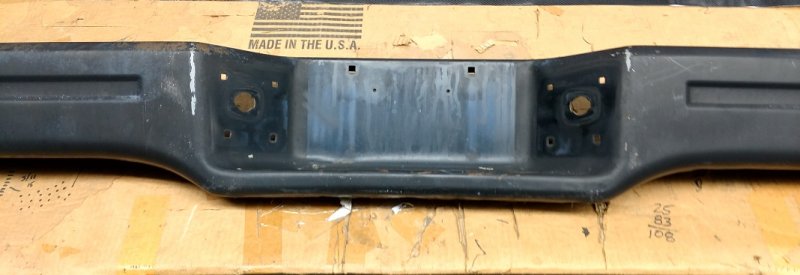
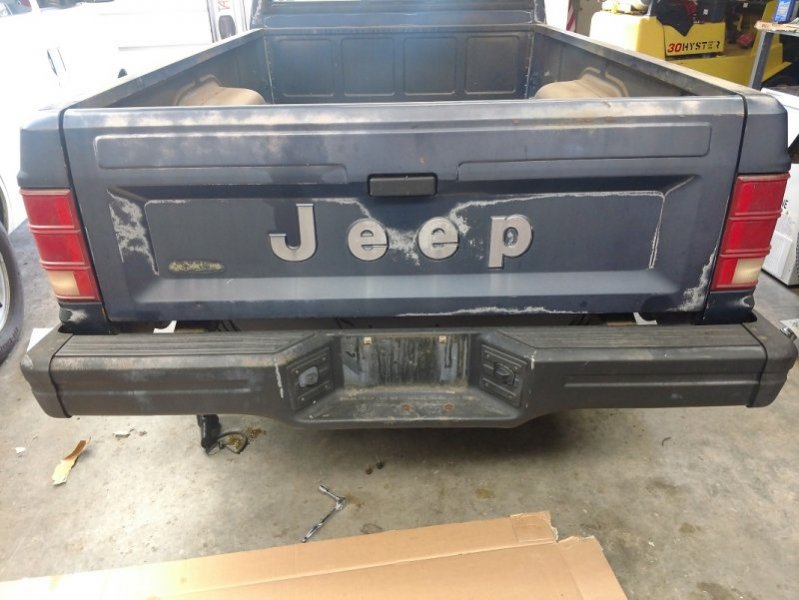
Dropped the truck off at the paint shop this morning Took out the factory bedliner - pretty sure it's been on there for 30 years, you can see paint loss where it has been rubbing, but no rust and no dents. Figured out how to get the end caps off the front bumper - my meathooks are WAY to big to fit in there easily, but eventually got them off. Rear step bumper - this looks factory to me, anyone confirm? Unbolted no problem - didn't even have to use a breaker bar, standard 3/8 ratchet - gotta love not having to deal with rust (too much) Heat gun took the Hockey sticks right off - got it debadged and de-hockey stickered ready for paint. Wussed out on trying to remove the flares - tried one nut after soaking in PB Blaster and snapped the stud right off - that is now the paint guys problem. Should get it back this weekend.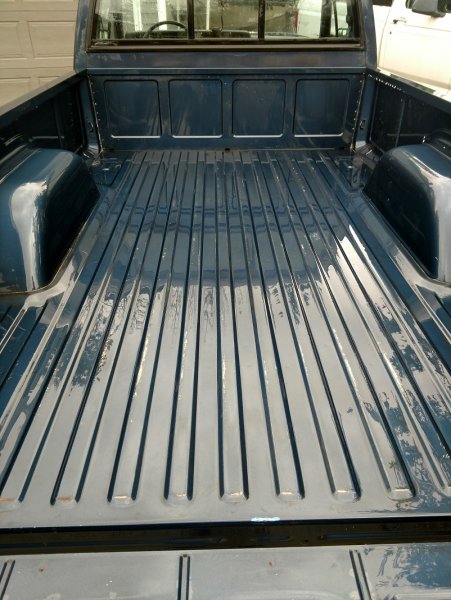


-
88 4X4 Longbed Pioneer - 4.0 5 spd
88towmanche replied to 88towmanche's topic in Member Projects: Your Comanches
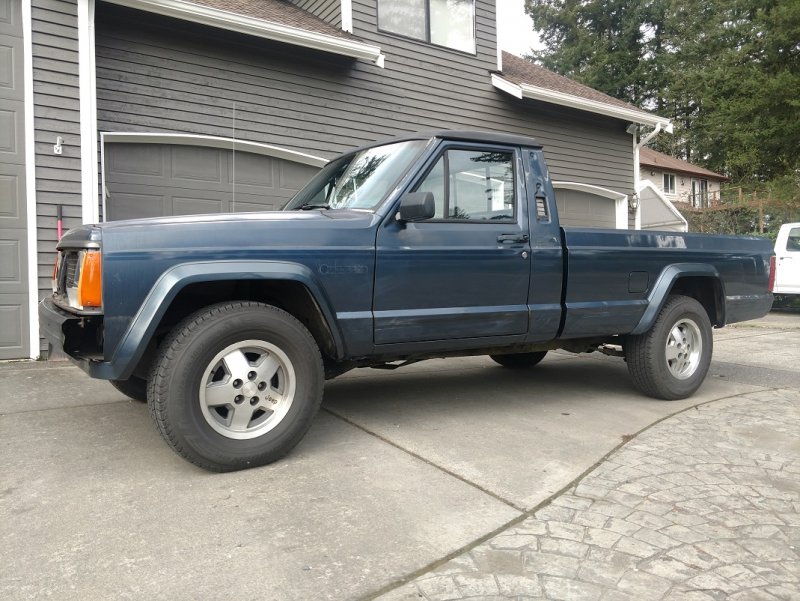
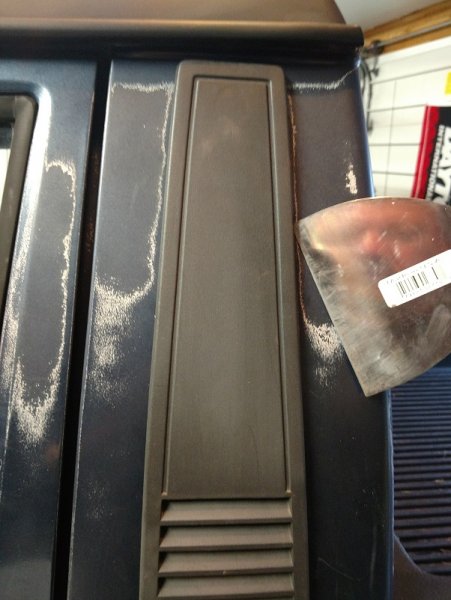
Like driving this truck around - lot of opinions from friends & family on how to proceed with resto/upgrades..... Fishing & golf buddies like the current roached paint & are lobbying to leave as is - truck is super straight everything lines up correctly, stance is good (not sagging in the front or rear)....good looking survivor Daughters want to rattle can it themselves - yeah right, not going to drive around in some hipster millennial "this is a unique" painted truck (they mean well, and are fairly good artists but....nope) Brother says Line-X the whole thing and be done with it..... Like the idea but couldn't bring myself to do it to such and original intact truck. Wife says paint it, would rather see it restored than left as is (she's spent a couple decades bouncing around in wore-out trucks with me and not looking for a nostalgia trip) So, paint is happening sooner than later (she know where I sleep) - went and negotiated with my paint guy, goes in next week. Sticking with factory Baltic Blue (or as close as he can get) base coat/clear coat. To keep costs down, agreed to pull as much stuff off this weekend as possible - started last night with the emblems and cab vent covers. Emblems (not the jeep one on the front - still have that to do) are just stuck on with adhesive - 3" putty knife popped those right off. The vent covers are held on with pins on key hole slots - there is a little seal that runs around the outside edge that was kind of stuck to the cab (30 years will do that) so went carefully around with the putty knife to break that lose and they popped right off. Debating on putting the Pioneer hockey sticks decal back on after paint, will see.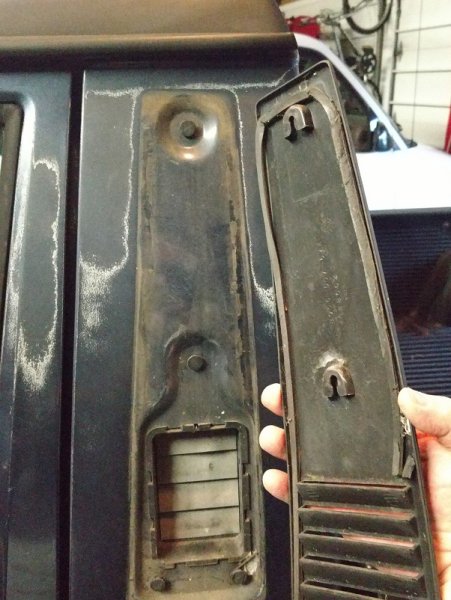
-
88 4X4 Longbed Pioneer - 4.0 5 spd
88towmanche replied to 88towmanche's topic in Member Projects: Your Comanches
Truck matches up well with the boat... Don't have a hitch yet, stuck a 2" ball on the bumper and pulled the boat out of the shed to get at the mower - despite the limited towing capacity of the Comanche, think this set up is light enough to drag around the state in a futile attempt to catch the very last Chinook..... Boat is 17' Crestliner Superhawk - hull weight 1100 lbs, Neverrude Etech 115 hp motor is 300 lbs, 'rude kicker 75 lbs, fuel, gear & beer another 200 and the trailer clocks in at ~750 lbs...haven't run it across a scale yet, but figure total pulled weight is right around 2500 lbs. Tongue weight is around 200 Haven't had it on the road yet (not with a bumper hitch) but just moving it around the property can't even hardly feel it back there - been dragging fishing boats around here for 30+ years, towed my first boat all over hell with a CJ - (don't do that by the way - very bad idea, somehow managed to avoid disaster but CJ is a terrible towing rig) and expect this rig will do ok. Can see in the pic - sanded all the surface rust off the roof, rattle canned some etching primer and then some flat black over that - not my best work, but just didn't want to look at the rust - will get cleaned up when it goes in for paint next month. Going to keep the original color - Baltic blue.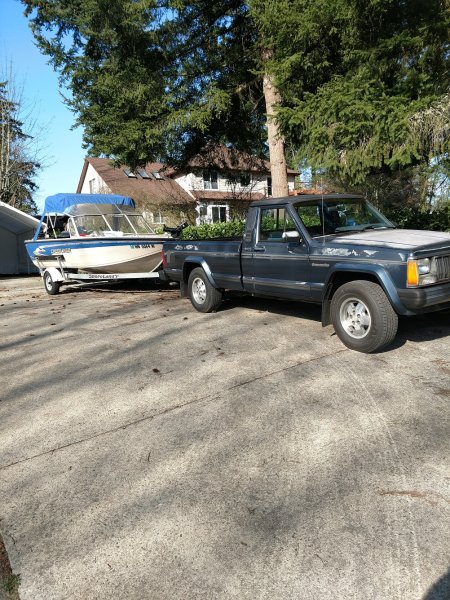
-
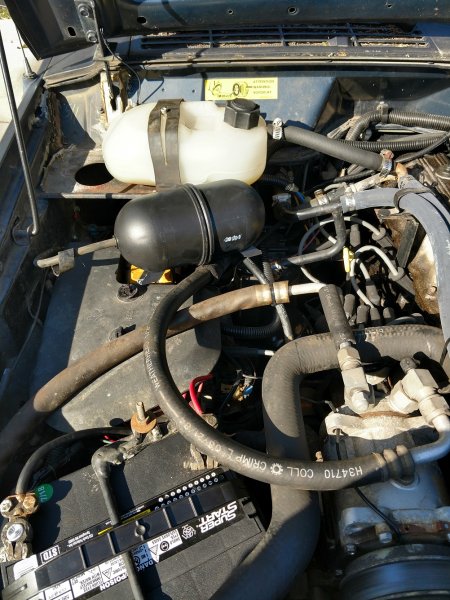
Yep - that picture says it all - pretty sure that is the reservoir I am supposed to have, the one currently on the truck looks like that one, but only has a single fitting or port to attach vac lines to - the one in the picture has 4 - 2 at each end. Think I can get by with my single port one by tee-ing all the lines together for now? SC
-
Copy - but the oblong one I have now has only one input port/fitting - the pictures show the factory one with multiple ports (for the two chambers) - I will look for a correct replacement, but for now, think it will work if I just tee all the lines together and run them into that single port? SC
-
Hi, Fixing up a 1988 Pioneer LB 4x4 4.0 5 spd Truck is in pretty good shape, but need to correct a few issues: HVAC only blows to vents (suspect Vacuum leaks) CC not working (also suspect Vacuum leaks) Ordered the two Dorman vacuum harnesses - 46003 & 46004 but not sure those are going to fix this problem: PO threw a football/blimp reservoir up on top of the motor (see pic) which looks new, but I don't think it has enough ports - from what I have read in the threads and a few pictures, the one that should be in my truck has either two or four ports that lines go to..... Specifically trying to fix the HVAC thing first - there is one the small diameter hard vacuum lines running down toward where the factory reservoir was - it is broken off near the front of the compartment - am guessing that went to the reservoir along with the larger line that is now attached to the current reservoir. I think that may the line that controls the blend doors...can't find it on any schematic. Question: can I just use tees from Napa or wherever to bring all the correct lines to the current reservoir I have with just the one port (or fitting)? Or do I need to find and exact match to the original reservoir (which I do not have) with multiple ports and make sure each line goes to it's respective place? Appreciate any help. SC
-
88 4X4 Longbed Pioneer - 4.0 5 spd
88towmanche replied to 88towmanche's topic in Member Projects: Your Comanches
Ok, looks like PO just put a new reservoir in there trying to fix HVAC issues (only blows through defrost - had that happen on an Astro van and it was vacuum problems) - will look and see if the original reservoir is still down there. Windshield washer - thanks, that's on me never even checked to see if the washer worked. TPS connector - well this one is a manual so guess I know why it didn't make any difference plugging it.... Appreciated.