Search the Community
Showing results for tags 'rx-131'.
Found 1 result
-
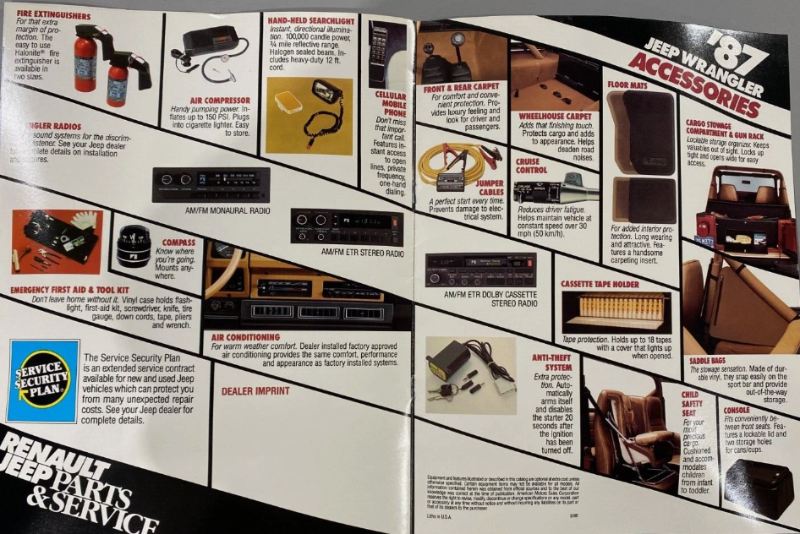
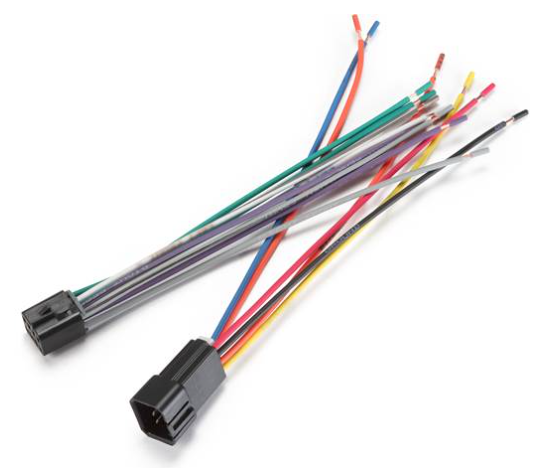
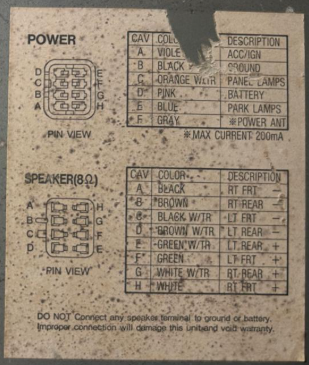
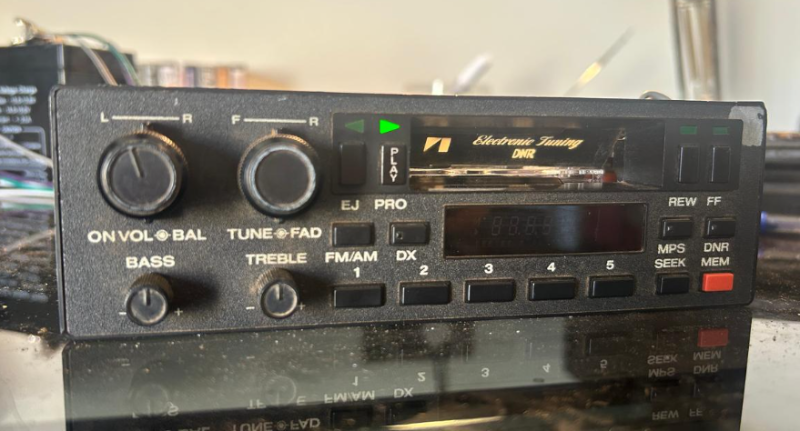
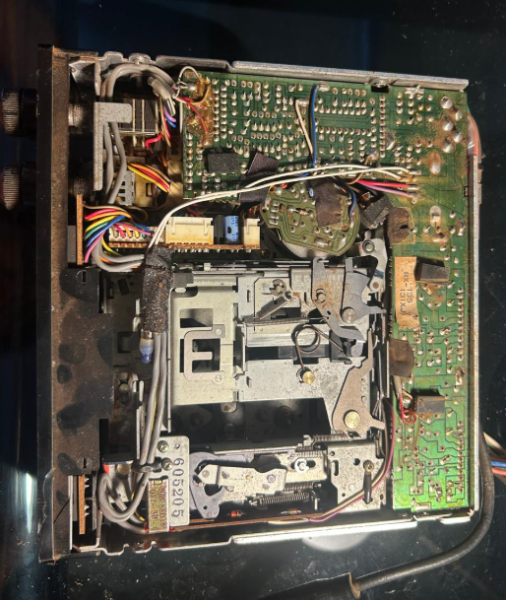
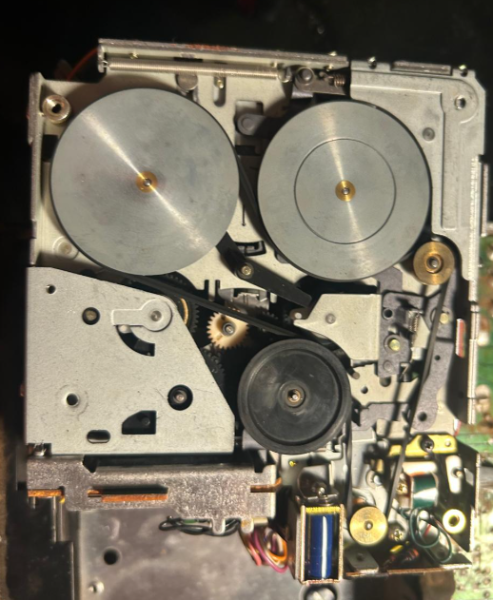
The RX-135/RX-131 radio was a nice factory option in Jeeps from roughly 1984 through to 1987. Although it was a bit of an expensive option, it's a really good quality radio made by electronic tuning in Japan. They were very durable and simple. The RX-161/RX-141 was a similar design and had the red memory button positioned in the top right instead of the bottom right. These are great-looking radios and have a cassette deck. Now, if you find one in decent condition in the yard or on ebay don't trash it, you can send it to me :) or you can try to fix it. If they're dry and haven't been messed with, they can usually be brought back to working condition with just a bit of work. First, for the connectors, these radios have 2 harnesses, one for the power and one for the speakers. Usually, you won't have the two connectors present, so from what I know, there is one company that sells the connector set new for 15 bucks. It's from Crunchfield, and here is the link. https://www.crutchfield.com/S-QvSfNxfUQAL/p_120701000/Metra-70-1000-Receiver-Wiring-Harness.html Now, after you plug into the two connectors, go ahead and set up a small 12V battery. You want the ground wire on the negative and the battery on the positive. Then, to power up the radio, connect the AC/ignition wire to the positive; this is as if you're opening the key contact. The radio should power on with a beautiful green panel. If you want to simulate turning on the lights in the truck, connect the panel lamp wires to the positive also. Your back light behind the radio and also the tiny blue bulb on the top should illuminate. If it doesnt you can try replacing the tiny bulb. To get sound, connect a matching pair from the speaker connector to the positive and negative terminals of a speaker. So left front-ve and left front +ve, for example. You can shove a paperclip in the antenna if that helps get better signal. Now we want our cassette deck working because playing cassettes is cool af in my opinion. If the deck doesn't accept the tape, pull back the black tab on the top of the deck to simulate it taking a cassette. This cassette take-up and eject function are all moved by springs. so make sure they're all lubricated with a tiny bit of WD40 and give the mechanism a small tap if it's seized. If your radio takes the cassette but doesn't play or spin at all, you should start with the belt. Open up the back of the radio and look for 5 small screws in the holes. These hold the deck in place. The two top screws might be behind the black backing foam, so you might have to peel that back to get to them. Try not to strip these screw heads. Once the screws are out, the deck itself should be able to get lifted up from the right side with some gentle persuasion. you don't need to disconnect any white connectors for it to slip out. But if you want to make it easier, you can. If the belt is snapped, worn out or loose, you can replace it. A belt of 1.5mm to 2mm thickness and a 140mm to 150 mm fold length should be fine. It is just the one belt and routed like this in the picture below. The two gold wheels are driven by the motor and control the speed of the belt. Now, if you get the cassette belt working and the tape playing, but it sounds like a chipmonk here's the fix. A really common issue with Jeep radios is that the pinch roller gets dried out and has no grip on it. Its job is to pinch the tape against the capstan and get the tape moving at a nice speed for the music to play clearly. If the roller is too dry, the tape starts to slip and gets pulled through way too fast. So to fix this, get a cotton swap and some isopropanol alcohol and really get aggressive with rubbing the roller. You can also rub down the cassette head: the shiny silver square plate. Keep doing this until the speed settles down when you play a cassette. 1382424822_WhatsAppVideo2025-09-22at09_44_59.mp4