ghinmi
-
Posts
92 -
Joined
-
Last visited
Content Type
Profiles
Forums
Gallery
Everything posted by ghinmi
-
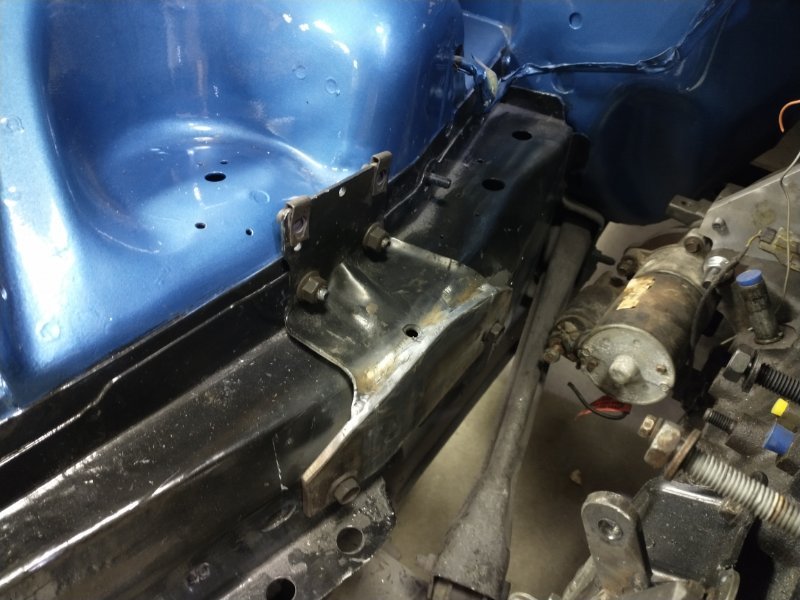
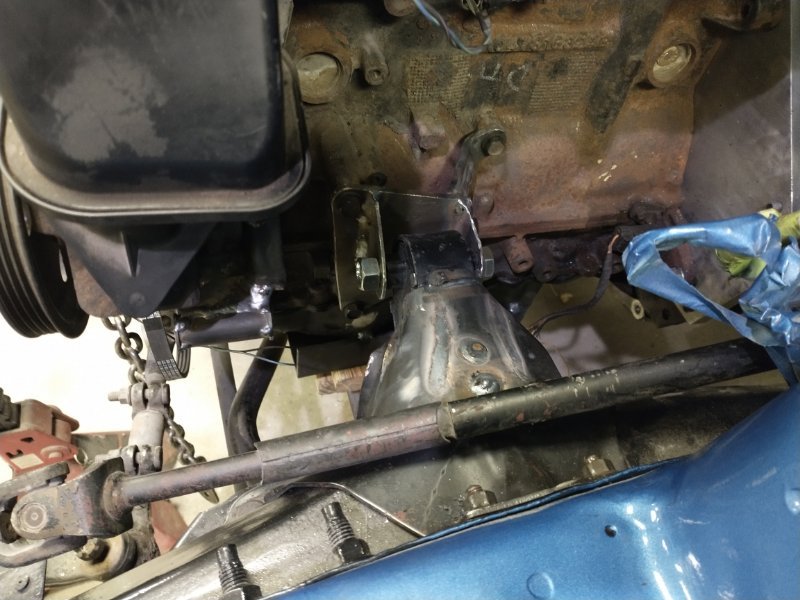
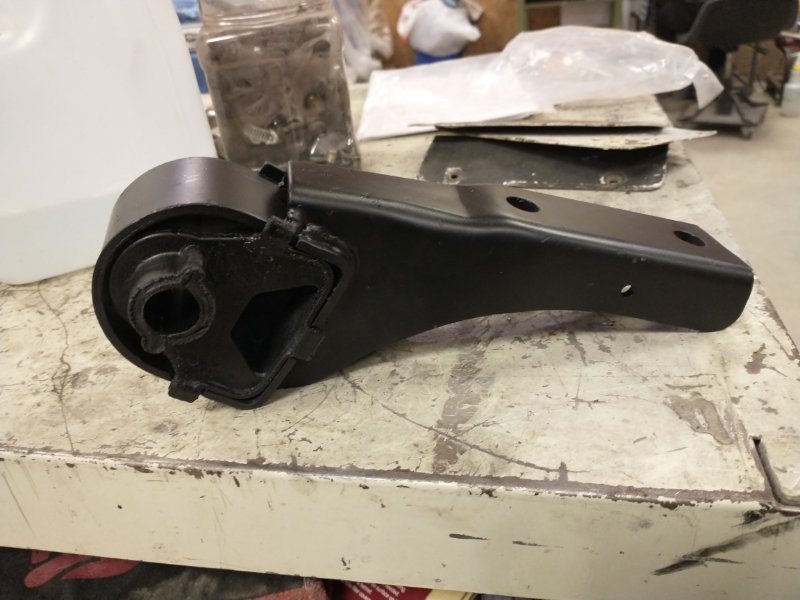
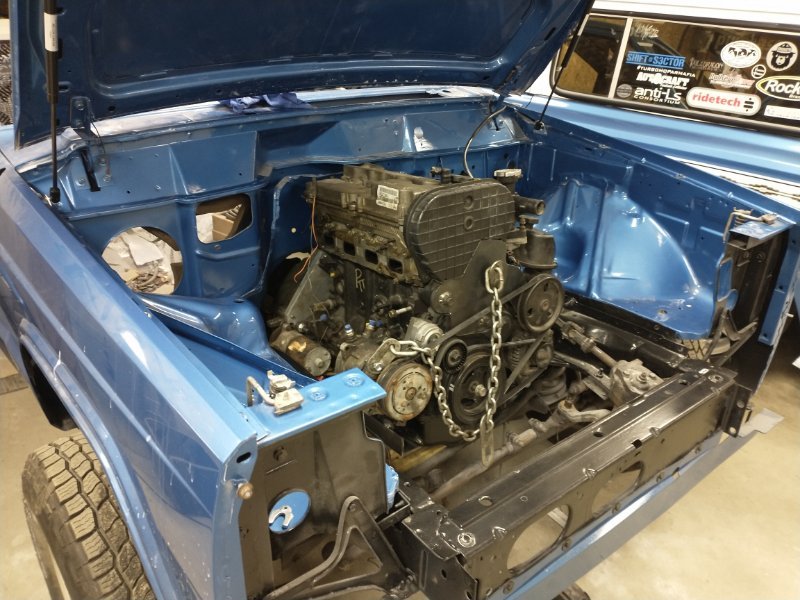
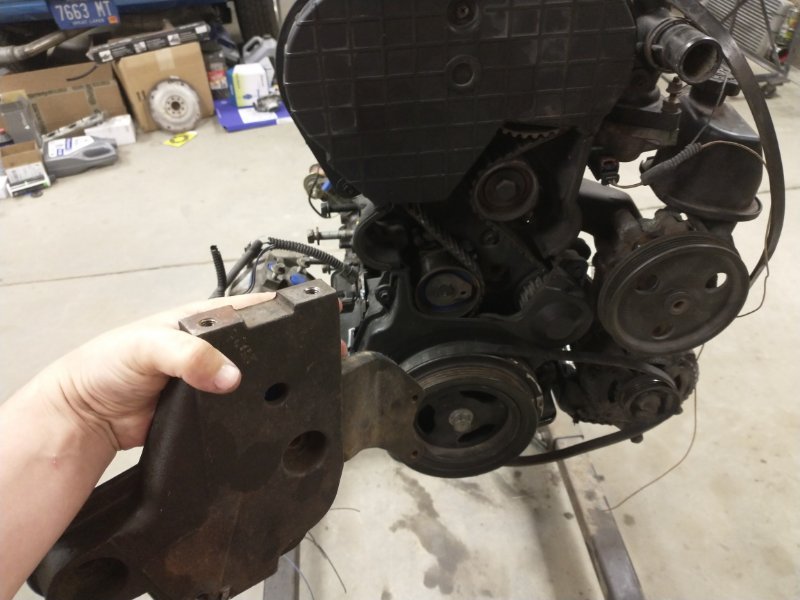
Made good progress on the engine mounts. They're a combination of the factory 4 cylinder Jeep frame horns and 4 cylinder Dakota horns. I'll be urethane filling the Dakota units to stiffen them up. Driver side mount was easy. Passenger side mount is more tricky because it has to clear the AC compressor and still leave room for the downpipe to pass between it and the starter. Using just the top part of the Jeep frame horn and part of the Dakota and the rest will be scratch built. Engine side mount will be tied into the custom ac compressor mount. You can also see the starter to suspension clearance issue in this photo.
-
Thanks guys! Yes, it is pretty far back compared to a stock 4 cylinder truck for numerous reasons. Weight distribution as you pointed out is a big deal. Being a truck it's already front heavy so anything I can do helps. But also the further back I mount it, the more room I get in front of the engine for piping, intercooler, radiator, etc. And the further back I can get it the bigger I can make the sump on the oil pan without getting into the axle. And will also allow me to lower the truck more than is typical because the oil pan is behind the steering linkage. It's just a whole bunch of positives with very few downsides.
-
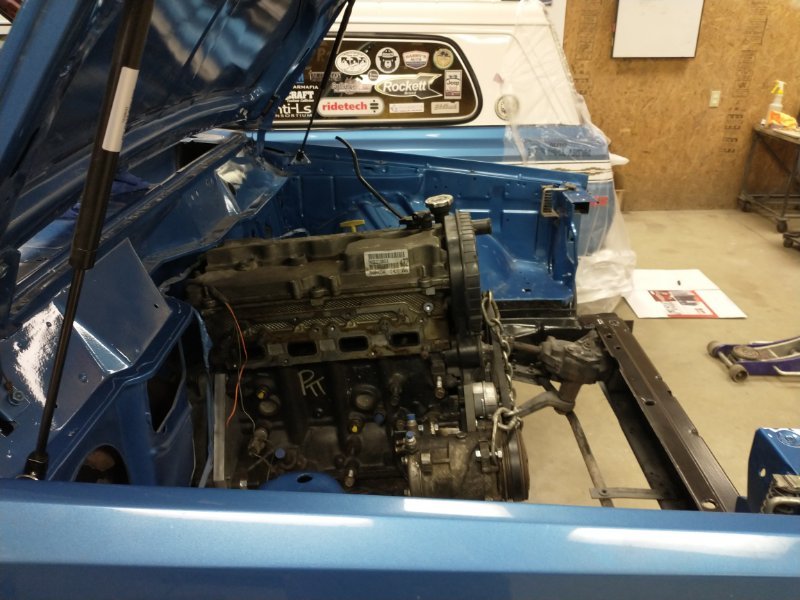
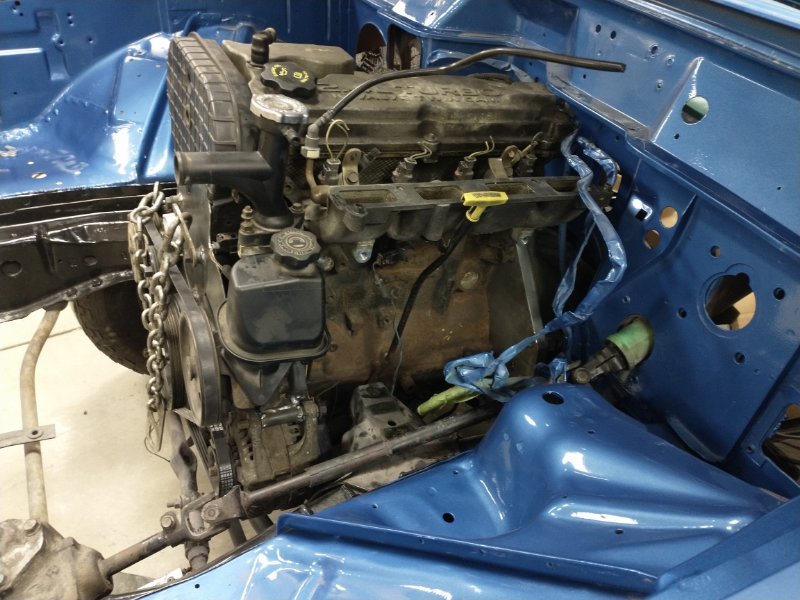
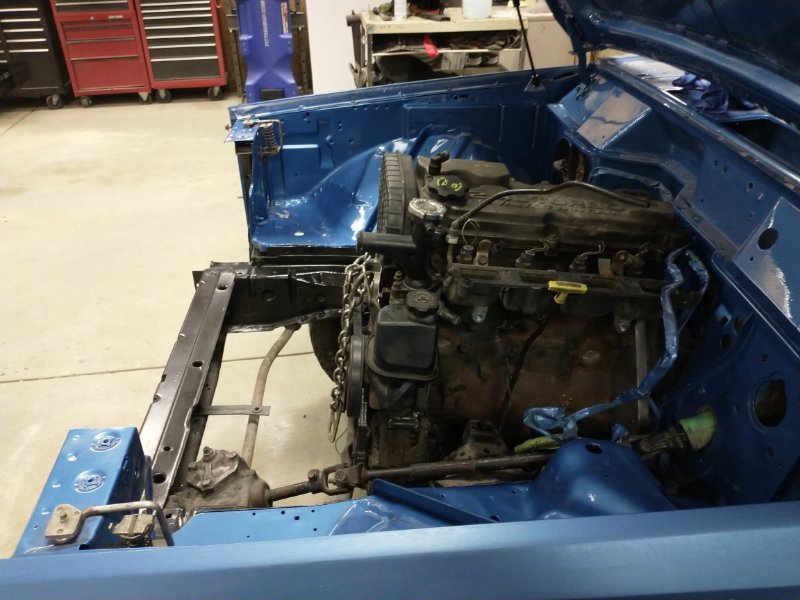
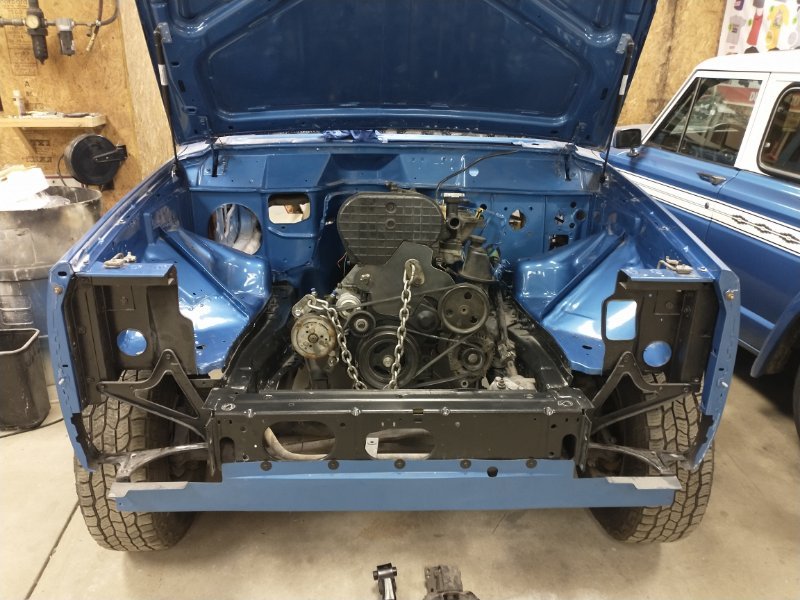
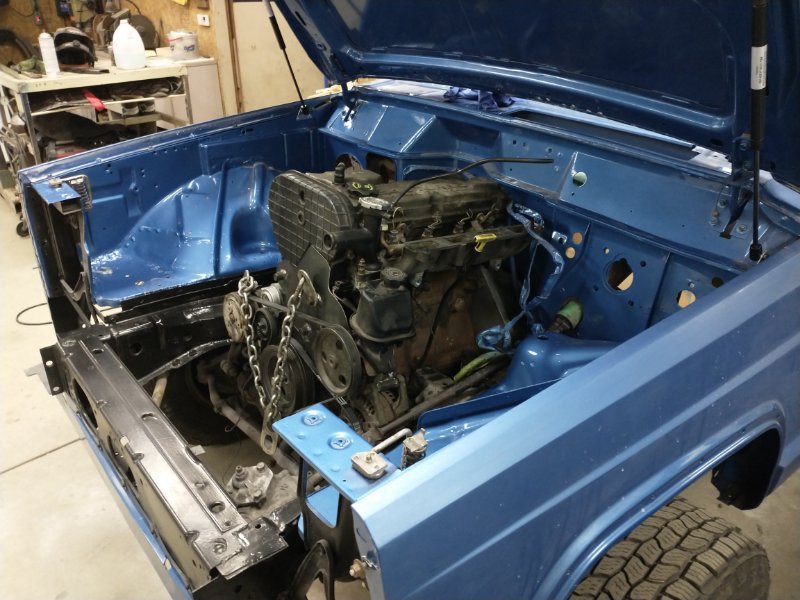
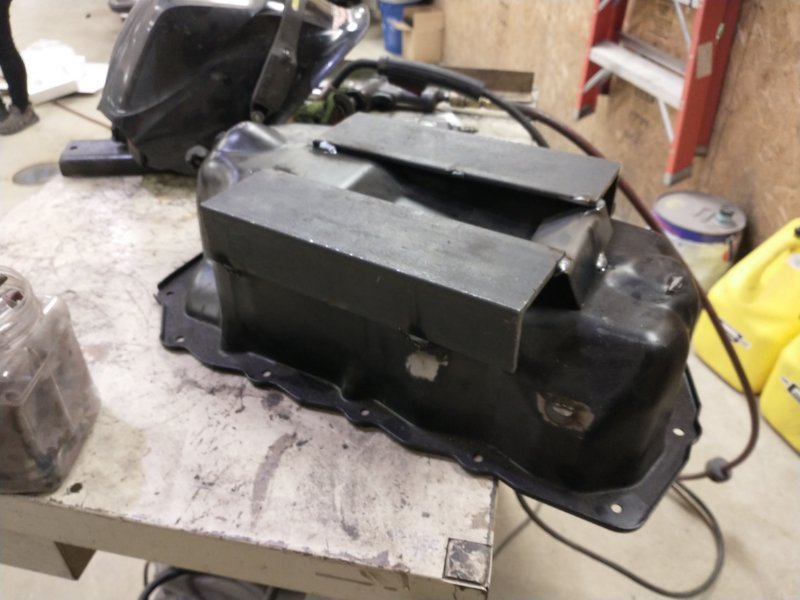
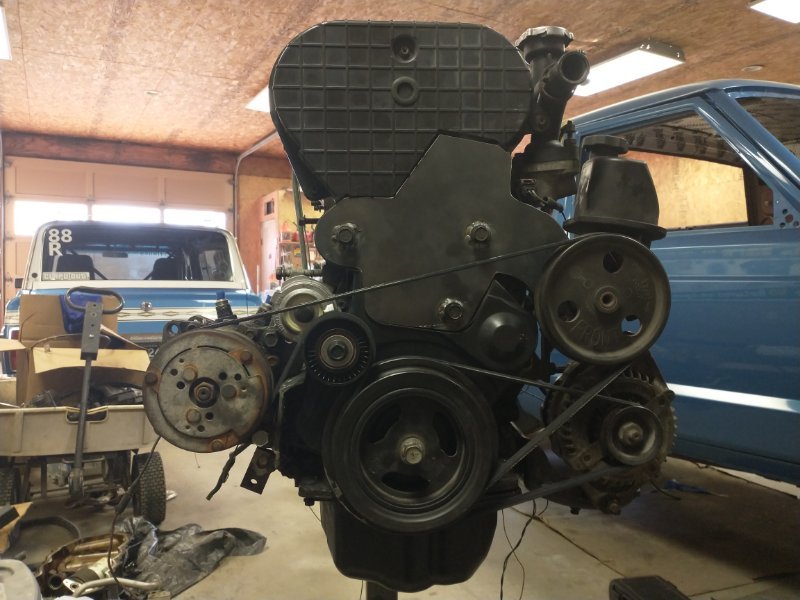
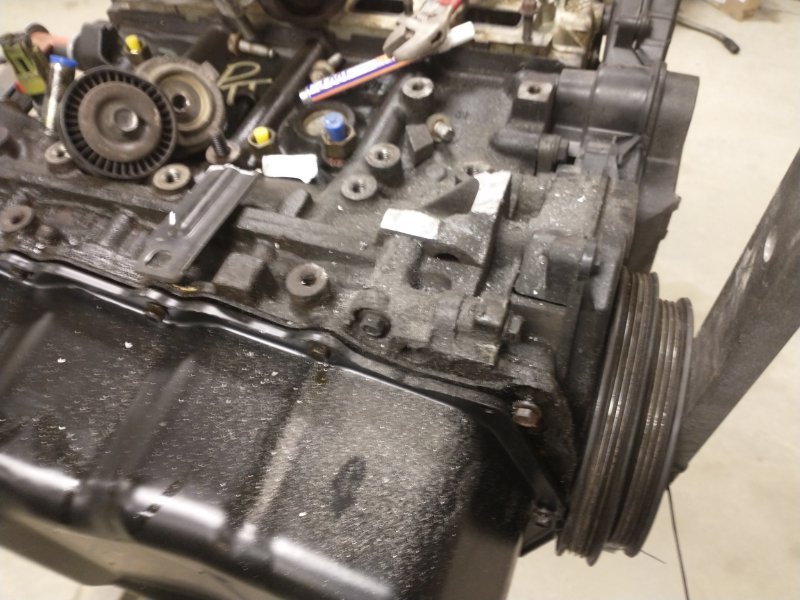
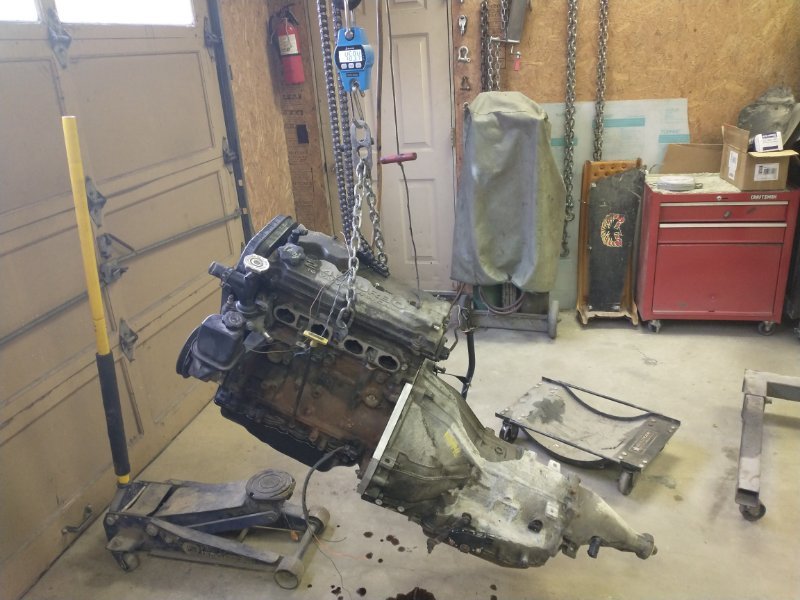
For fitment if the engine/trans it really helps to have a flat and square bottom on the oil pan. All of the factory 2.4 pans are lumpy bumpy messes. So now the Jeep Liberty pan is temporarily flat. After many hours of shimming, checking, clearancing, refiguring, etc, this is where I have settled on final placement. Motor is offset 1" off center to the passenger side with the transmission output remaining centered. The AC compressor clears. Won't have any issues with steering or axle at stock ride height. Clears the hood. Slight notch needed on the firewall pinch seam. The alternator clears currently but I will trim some for future belt adjustment. The biggie is the passenger upper control arm to starter clearance. Will need something custom there. Next to build is engine and transmission mounts.
-
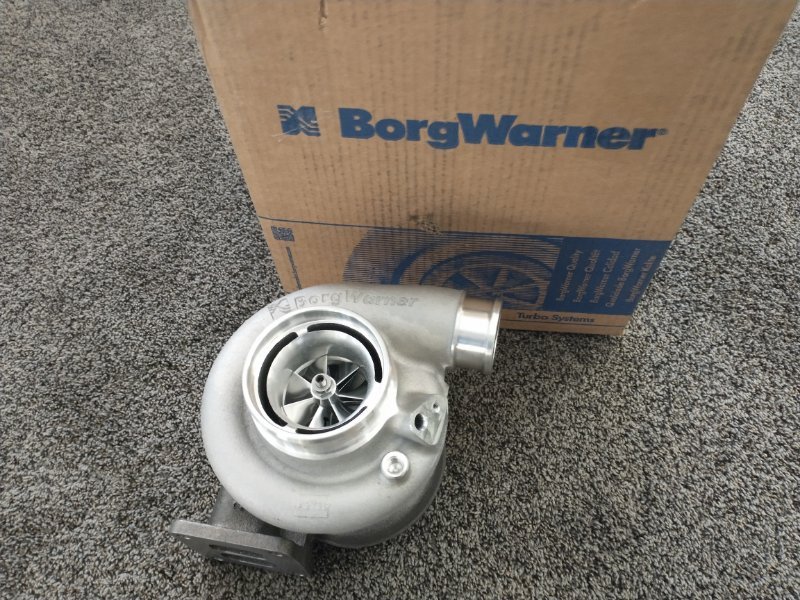
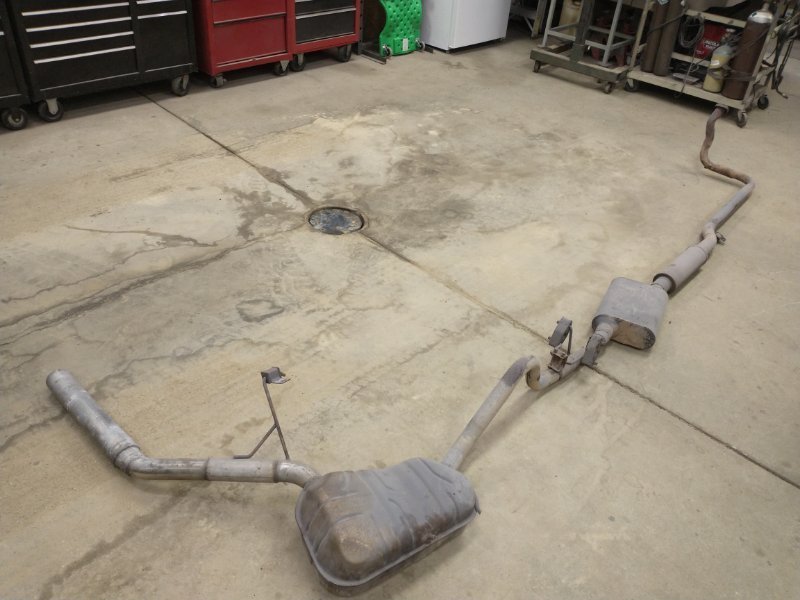
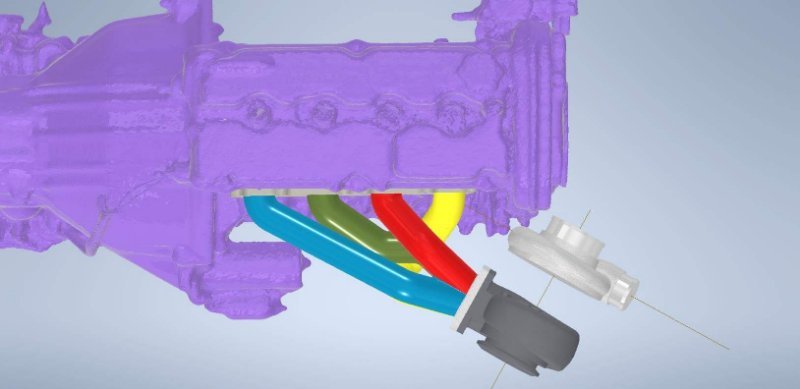
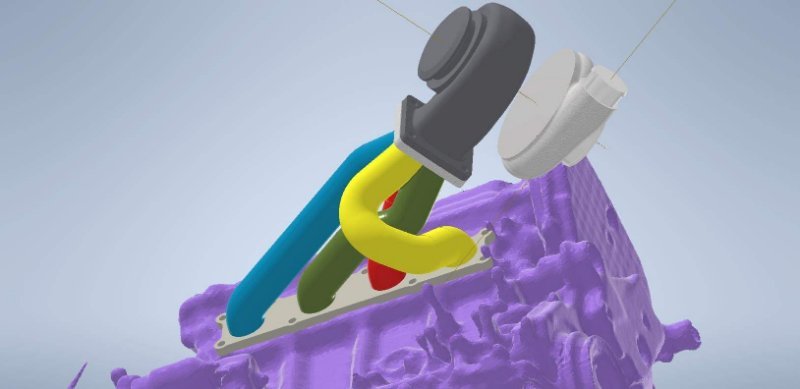
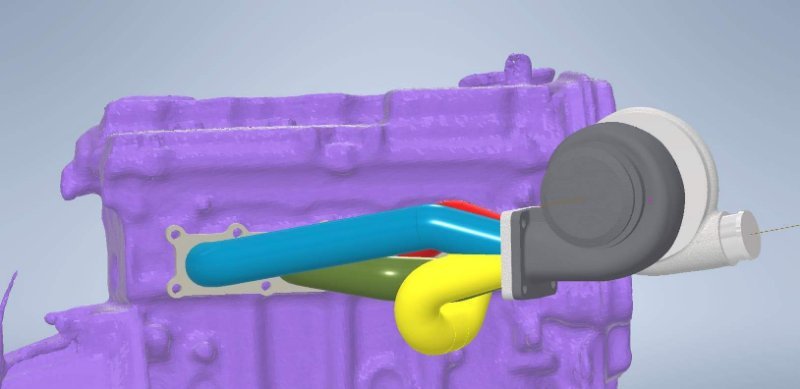
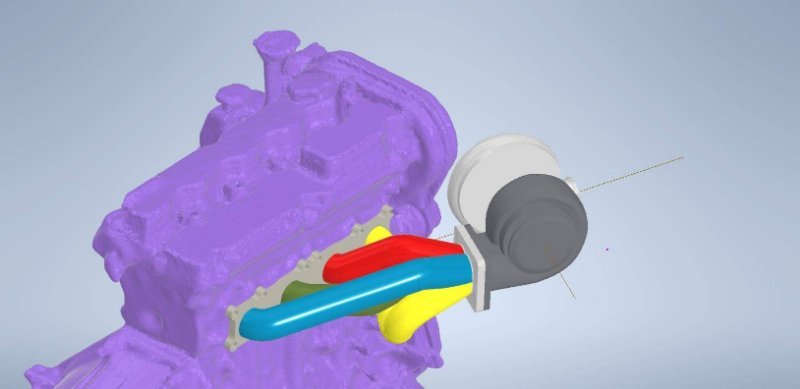
Got tired of tripping over the busted up drain covers in the barn and made some new ones. Had to put nice paint on them. Cut the old exhaust off of the Comanche to free up space. Must have been super quiet, 3 mufflers behind the 2.5 4 banger. Whoever made it did a really nice job but unfortunately won't be right for my application. Also, you can see my nice drain covers are already not so nice, haha. Black Friday had some deals so I scooped up a lot of the turbo stuff. Got a s257sxe with a .83 divided t4 housing, gen 3 VS 44mm wastegate, etc. Also got parts to build the header. Forgot to take pictures of most of it but did get the turbo. This is where the scans are going to save a tremendous amount of time. I've always built headers by eyeballing where the turbo should be and trying to connect the dots. With this being a twin scroll header things get complicated in a hurry. While I do have tons of space, trying to connect #1 and #4 to one half of the turbo and #2 and #3 to the other half really eats up space if you don't have a solid game plan. With it all modelled up, I'll be able to cut all the elbows to the right angles and the straights to the right lengths ahead of time. And fixture up both flanges on the welding table so I don't have to fabricate with it in the truck.

-
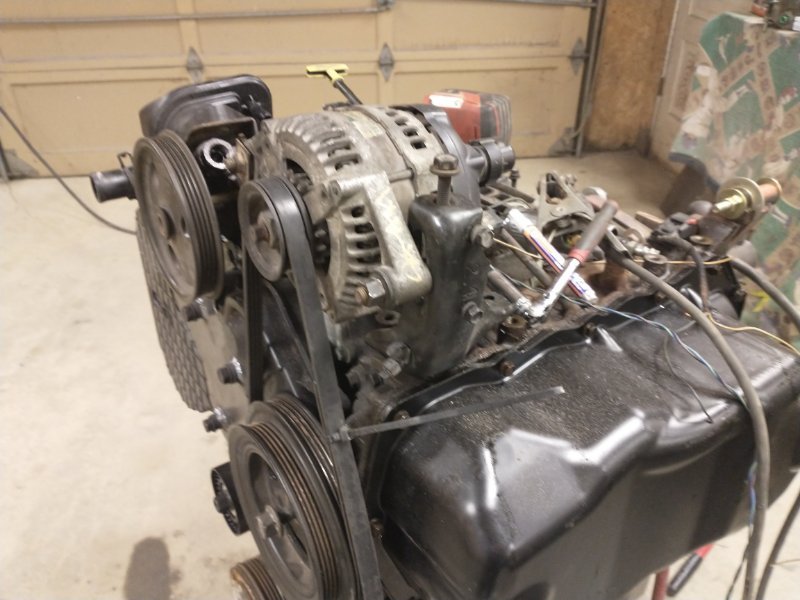
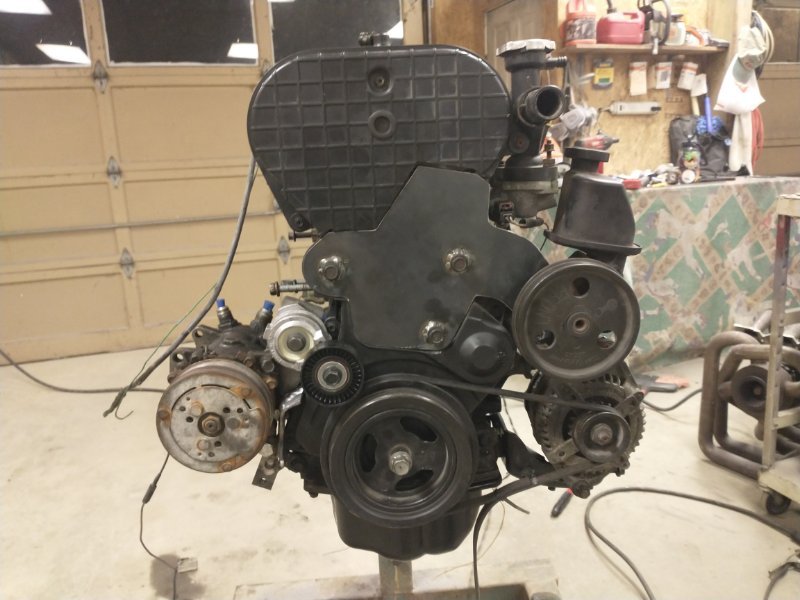
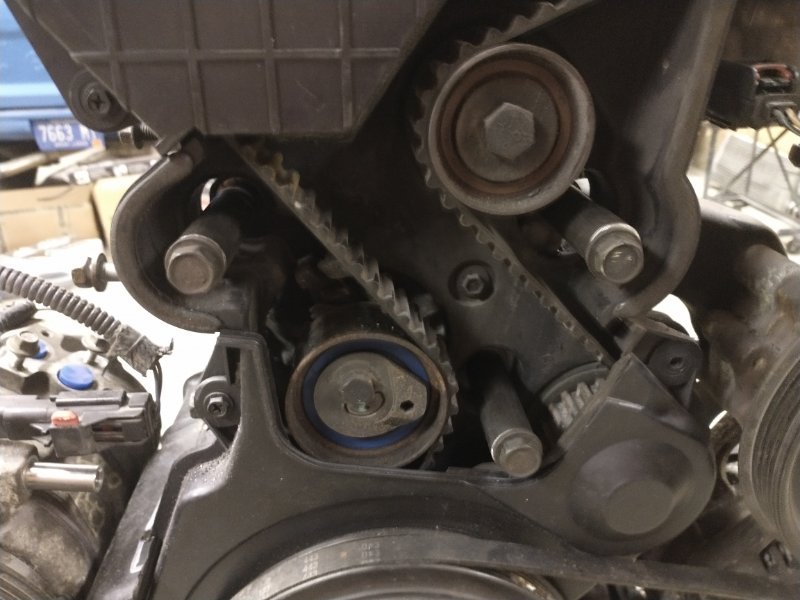
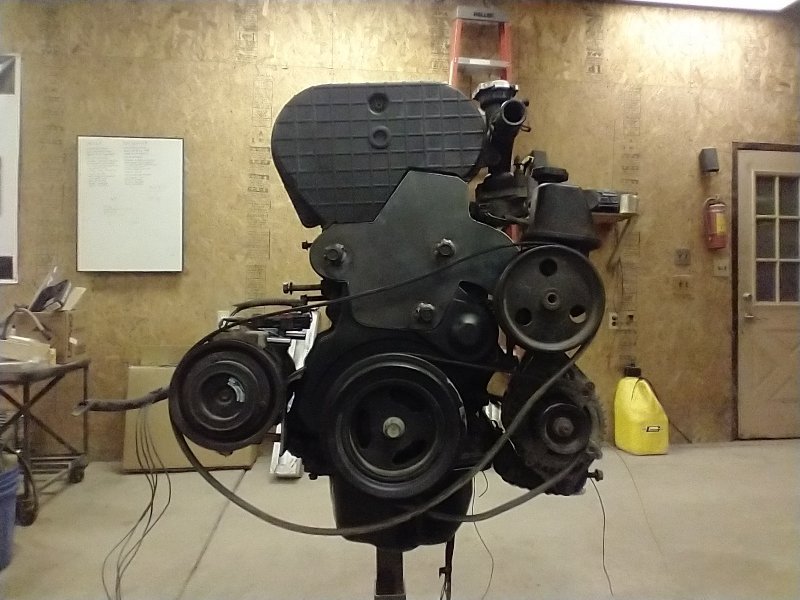
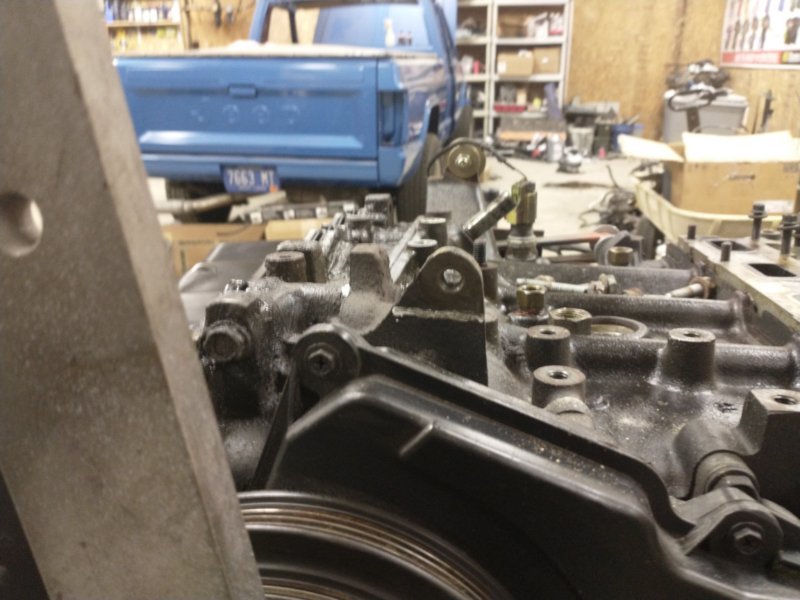
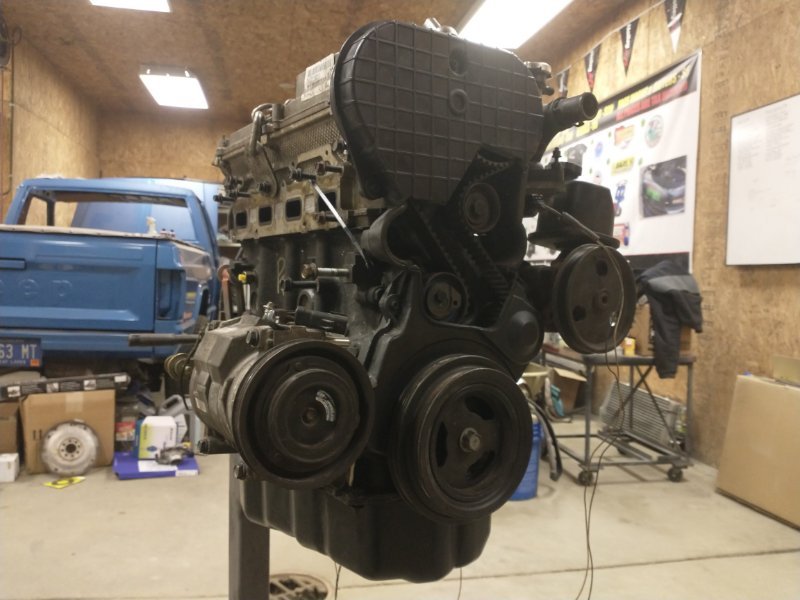
Yay! The belts are the right length and they fit! It doesn't look like much but the accessory drive was so much work. Between locating things so it'll all fit in the truck, leaving room for the turbo, belt wrap, tensioner range of motion, and just plain getting everything square so it doesn't throw belts. What a job.
-
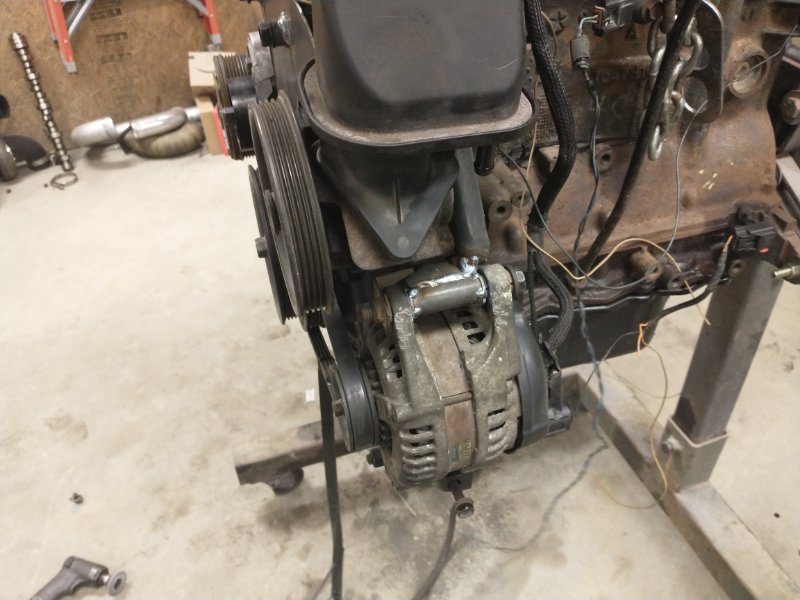
Final accessory locations. Super happy with how low I was able to package them and how light weigh the mounts are. The alternator mount is the original one but flipped and moved to the other side and down low. Then a homebrew pivot for the top. Next session I'll get the mounts final welded and smoothed out. Belts should be here today to lock in final clocking on the tensioner and such.
-
Also, slightly off topic but it's the reason why not much progress was made this weekend. Ran the last autocross of the season with the Cherokee. The changes I made in August worked out great. Finished second out of 11 cars in CAM-T and 14th PAX out of 92 cars. Very happy with the showing. Hopefully the Comanche does just as well.
-
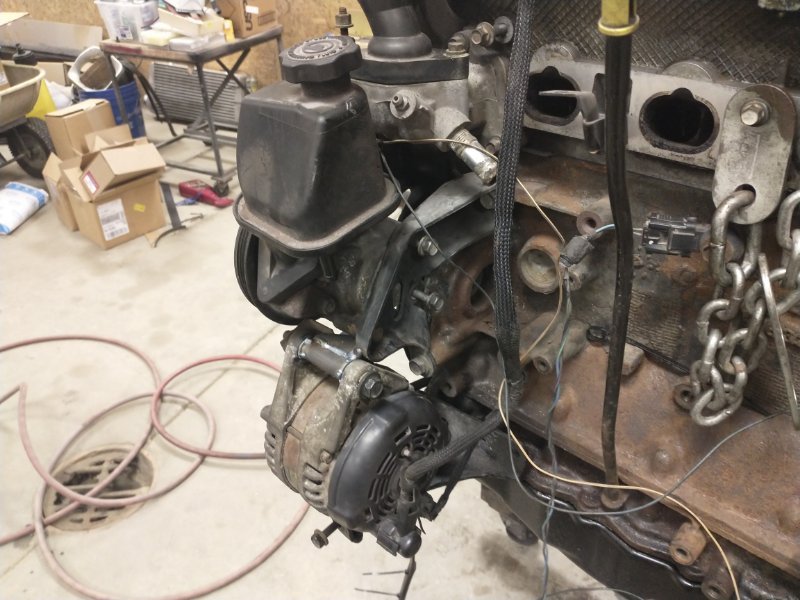
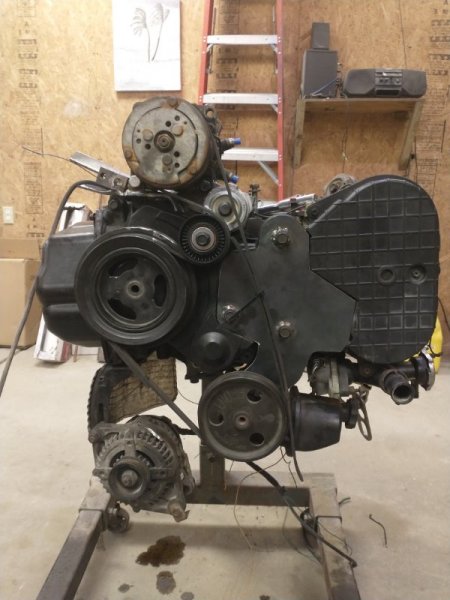
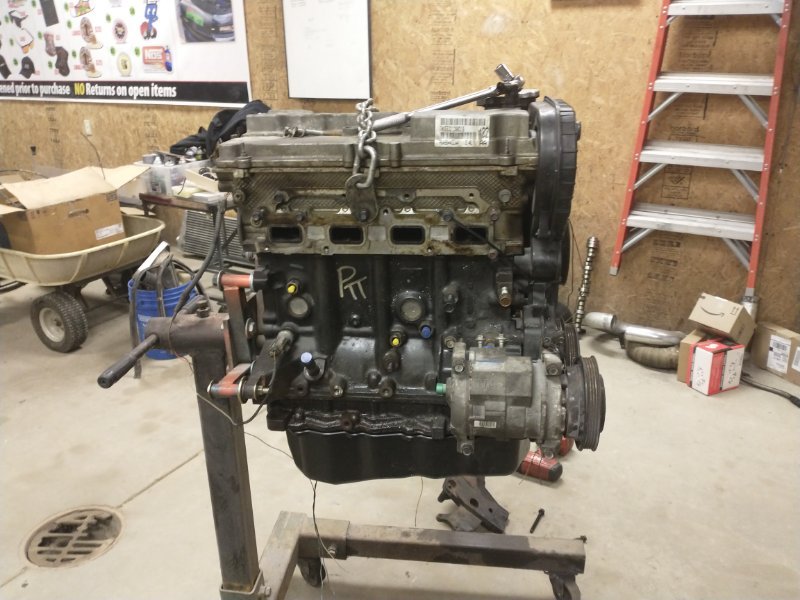
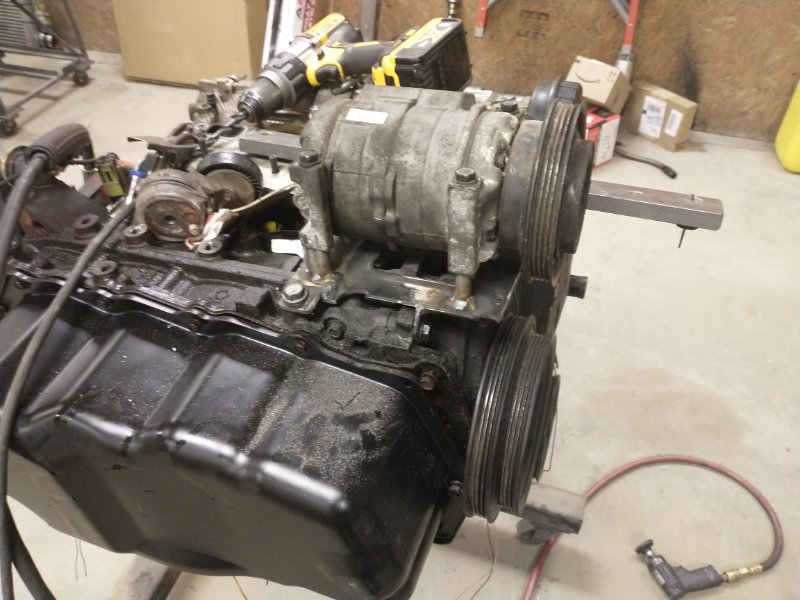
Didn't take photos like I should have. But made the decision to use the factory Jeep AC compressor instead of the PT Cruiser. The hose connections are common flare type and I can use factory replacement hoses. So I had to re-do the mount. Then spent way too much time getting the tensioner situation figured out. I was able to squeak a factory PT Cruiser tensioner just above the compressor. Good belt wrap around the crank pulley. Looks like I'll be able to use a supercharger belt from a V6 Tacoma to drive the power steering pump and compressor. Waiting for that to show up before I finalize the clocking of the tensioner. Next will be the alternator mount, then the oil pan. And then maybe I'll be able to test fit the engine and transmission into the Jeep.
-
Thanks everyone! It will be an auto for the time being but I'm a stick shift guy at heart so it could end up with one eventually. Any of the Ford units will bolt right up. As far as power, I'm hoping for 400 to the wheels to start. If it's boring at that level I'll have to build up the engine.
-
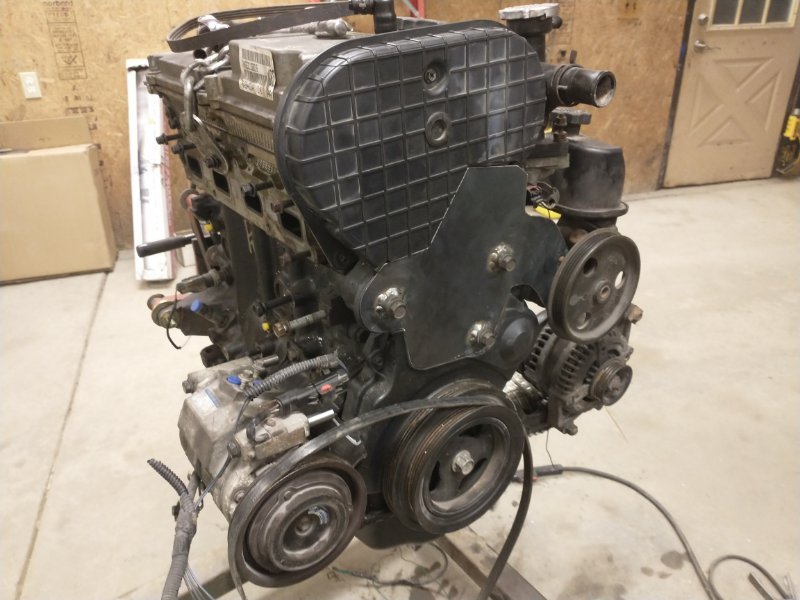
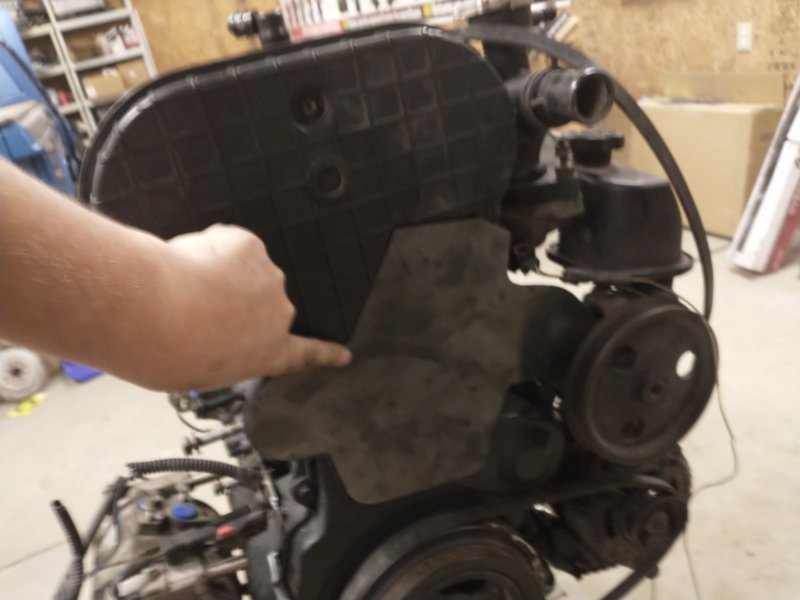
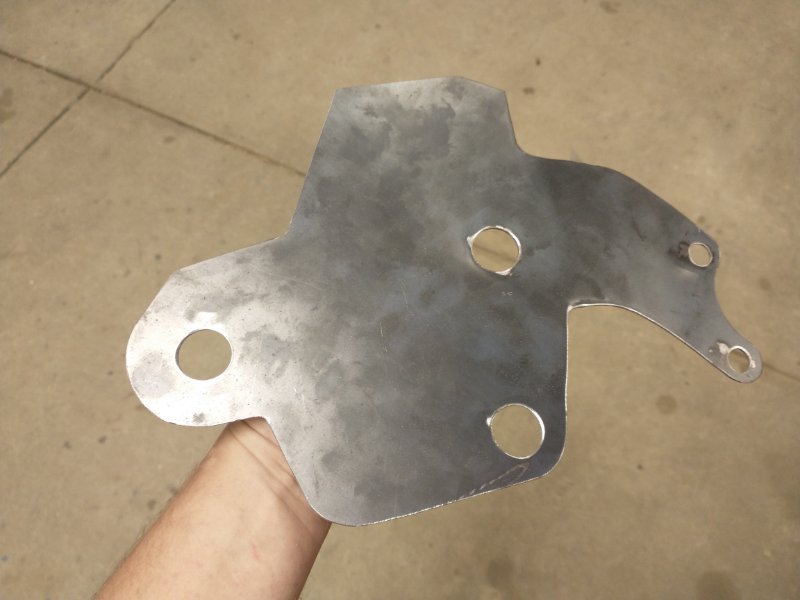
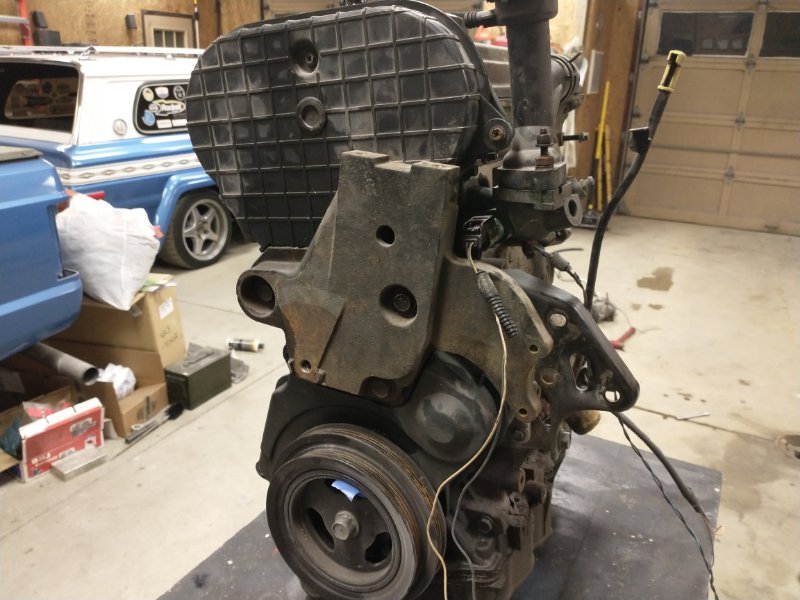
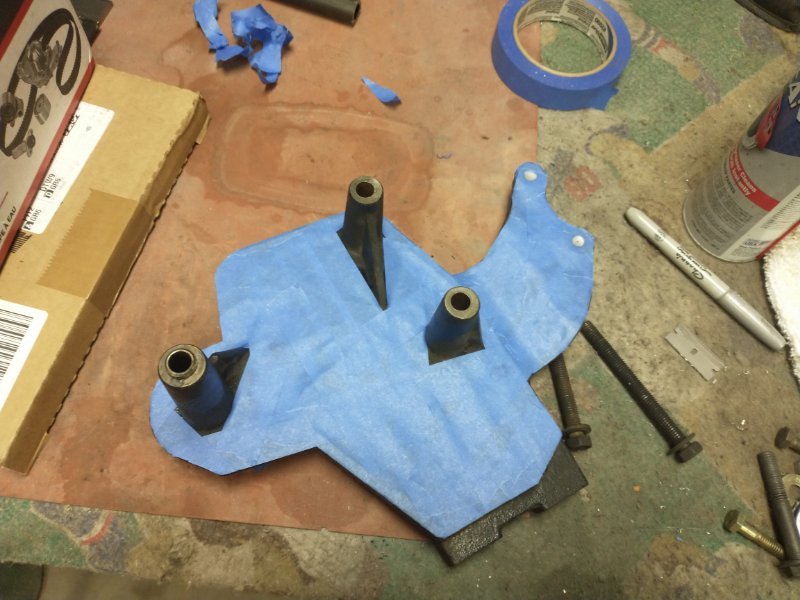
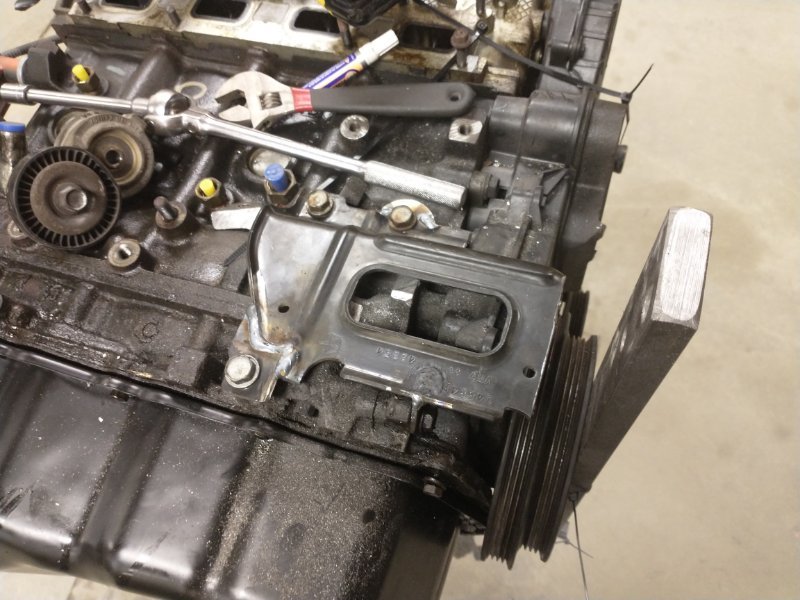
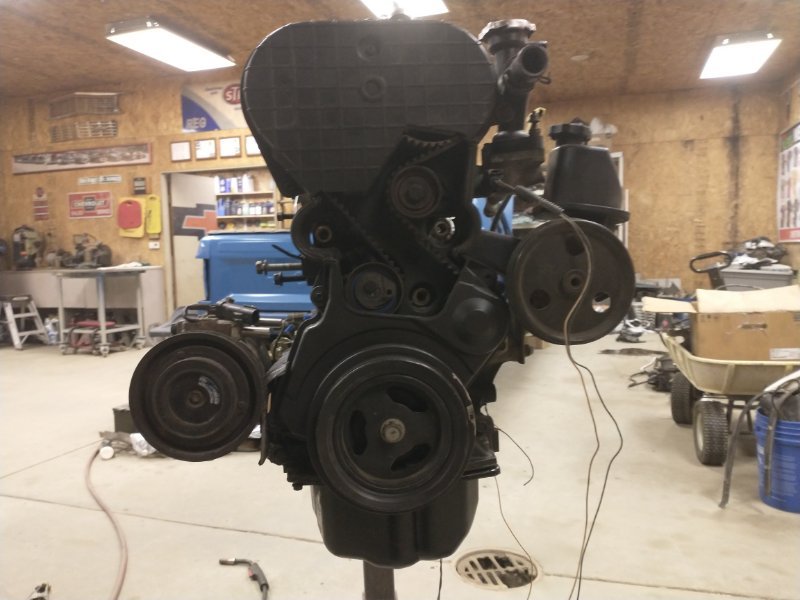
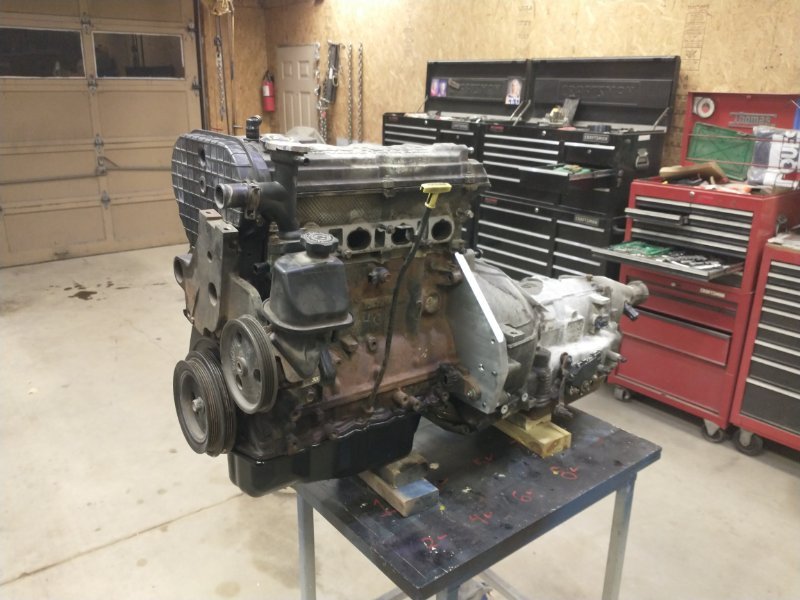
The factory front cover was a big heavy ugly cast iron piece because it pulled triple duty as an engine mount, power steering pump support, and dust cover. It's gotta go because it's in the way of the future belt routing. It doesn't need to be structural anymore and I can make it look a lot better. I made a tape pattern of the original and transferred it to 1/16 steel. Bent to shape for power steering pump support. Standoffs made from 3/4" tube and bolted on. Holes for the standoffs transferred into the plate. Welded up and installed. Much cleaner and I will be able to attach the new idler pulley to it. And saved another 8.2 lbs off the front of the engine which is a great bonus.
-
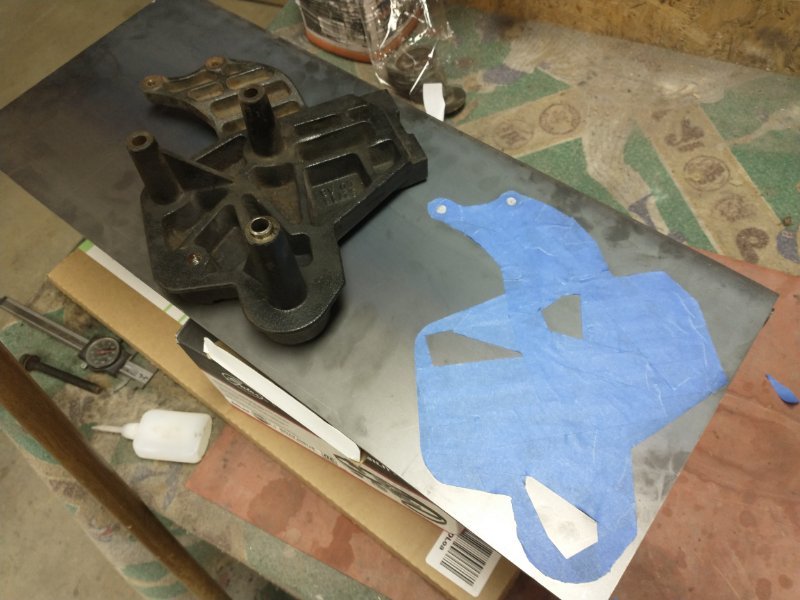
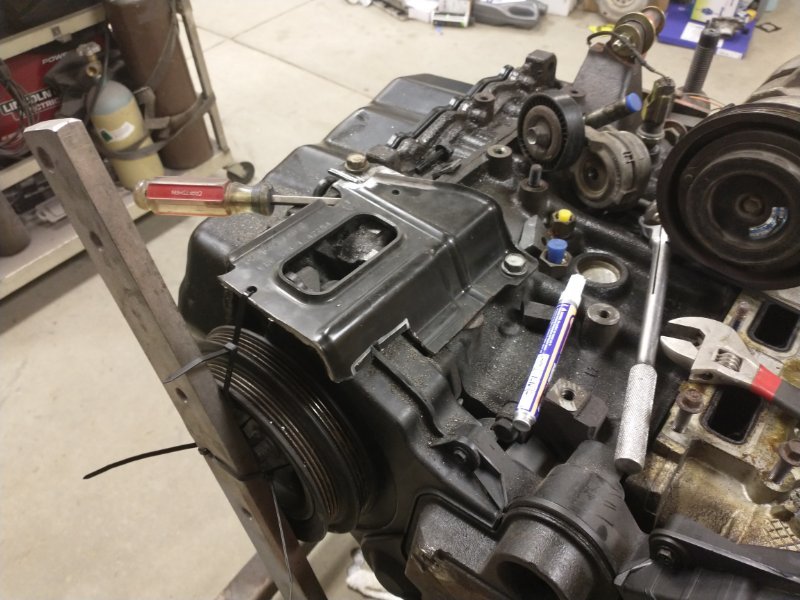
Tonight's activity was trying to figure out an AC compressor mount. I was unhappy with the front wheel drive accessory mounts and locations. The AC compressor was mounted low on the driver's side and would become the lowest point on the front of the engine after the oil pan is modified. It also would be pretty close to the steering box/shaft. And the brackets for everything were heavy cast iron pieces. The solution in my mind is swapping the alternator and the AC compressor places. This is a dual belt engine with one running the compressor and power steering with a spring loaded tensioner and a second manually tensioned belt for the alternator. Swapping the accessories makes for interesting belt routing but I have a well thought out solution. So on to the compressor mount. I found an unused bracket (I think it's the intake manifold support?) That was a really good start. Set into place with a little clearancing and cutting a couple tabs off of the block. Gives me a nice flat surface to weld the standoffs to and mount the compressor. I need to grab a couple pieces of steel tomorrow to attach the other two bolts to but it's really sturdy already. And most importantly gets the compressor out of the way of everything.
-
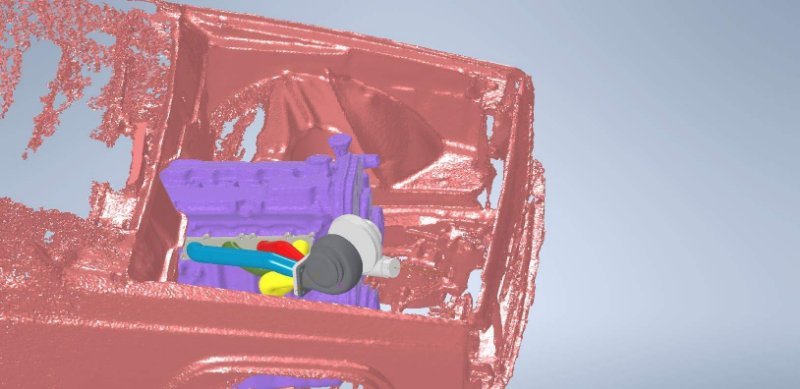
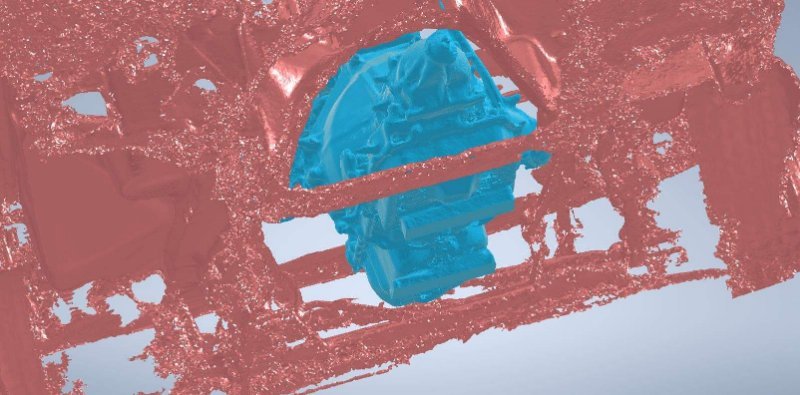
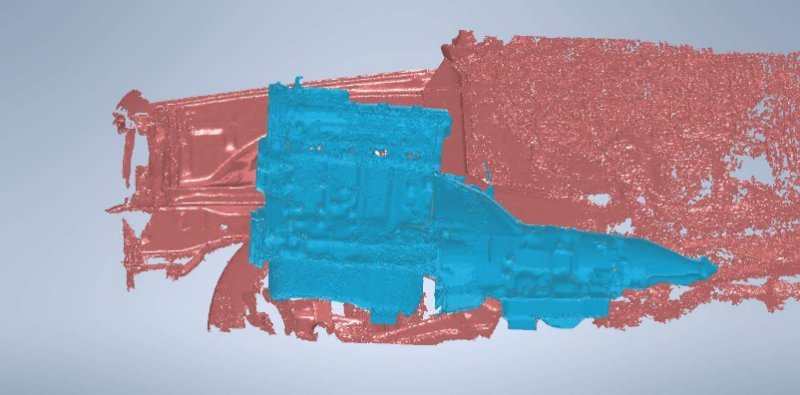
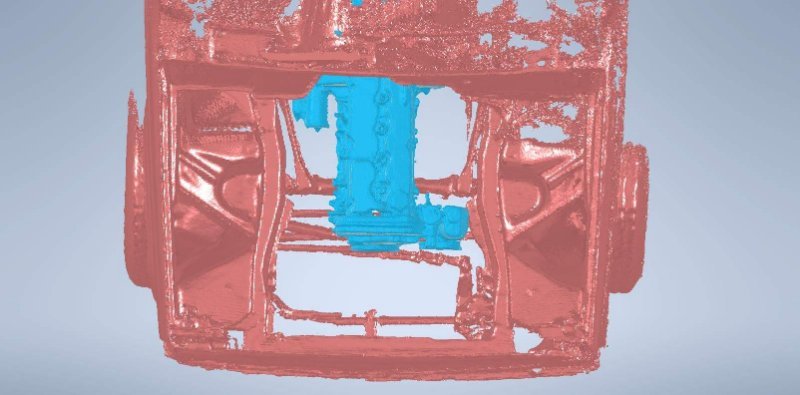
It's a super budget setup. Skanect software with a 360 Kinect sensor.
-
I have it mocked up at 3-4 degrees, I can't remember. I'm using the scans to get it close and further out where the problem areas are. Then actual physical fit will be determined when it all gets welded together.
-
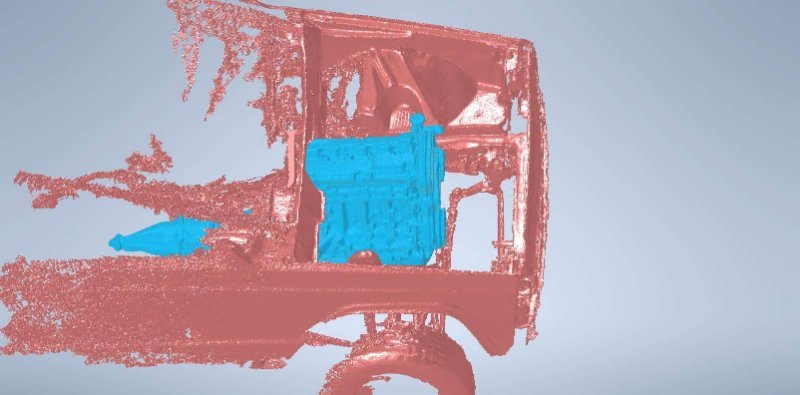
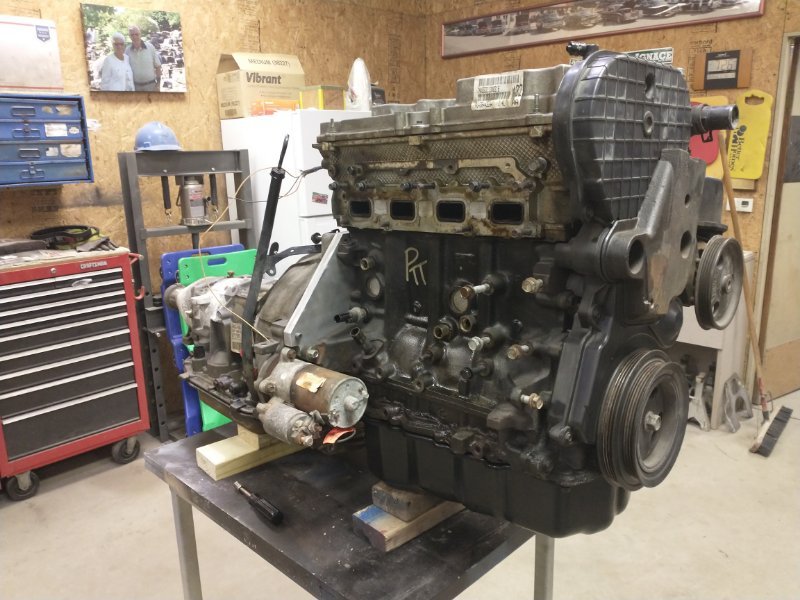
With the motor and transmission together I could get everything scanned and start doing preliminary fitups. So much room for activities. Last picture shows that I can still get to the bellhousing bolts easily.

-
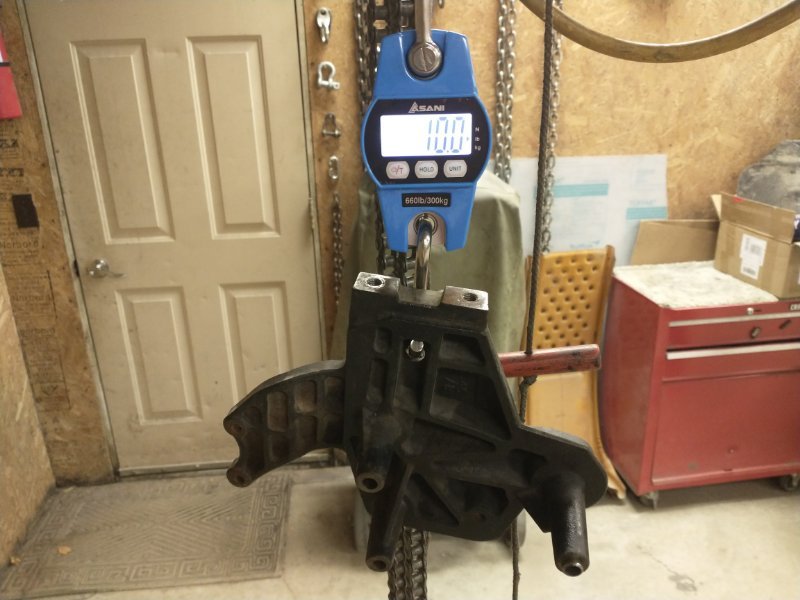
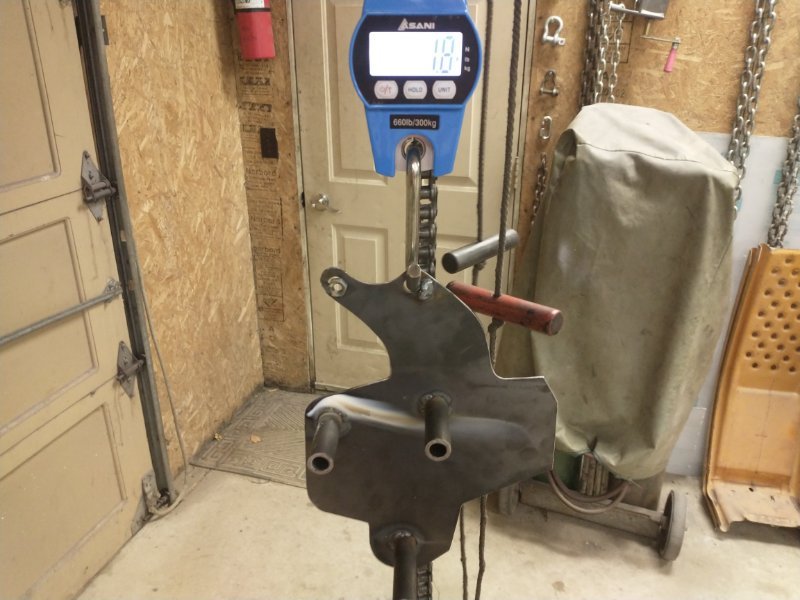
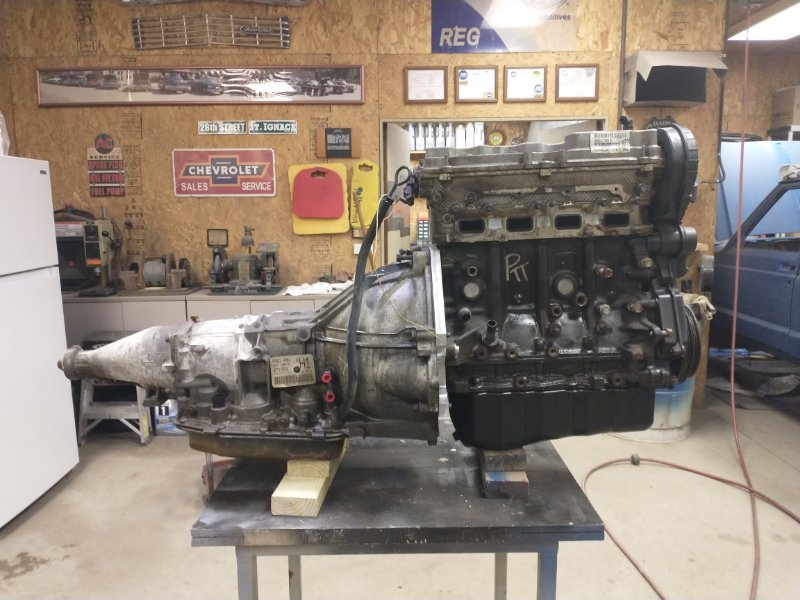
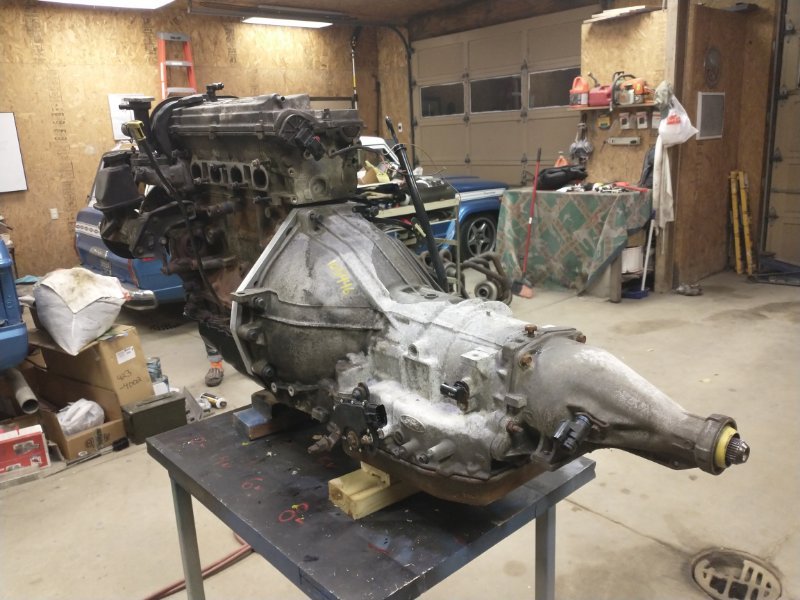
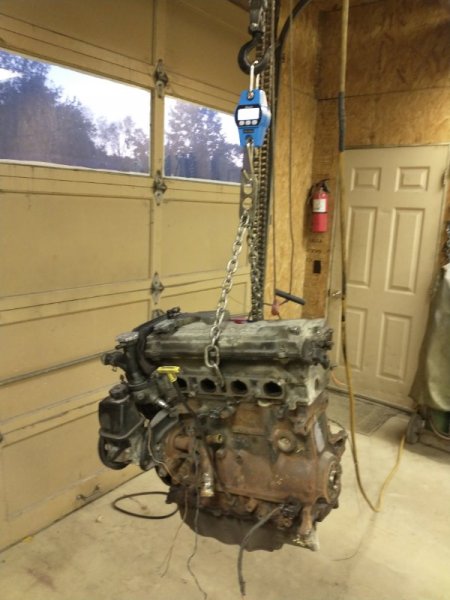
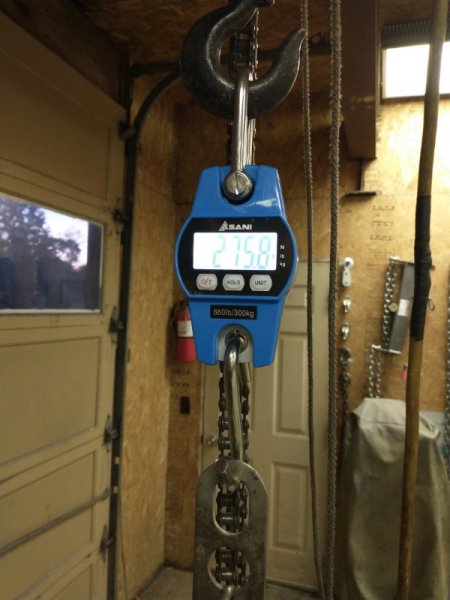
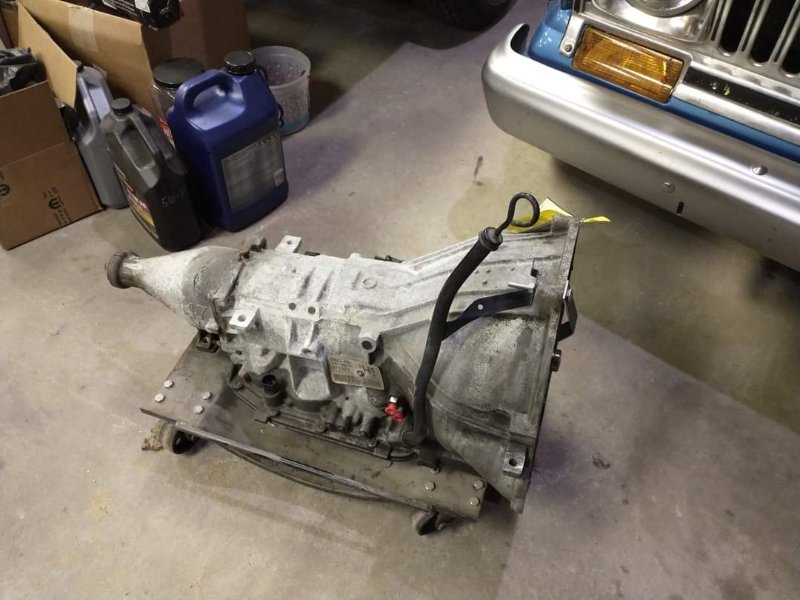
The adapter plate fitup went pretty smoothly. Need to mow a little bit off of one spot to make oil pan removal easier down the road. I still have to make the flexplate adapter but that's less pressing, I can start mocking things up now. Hung the whole thing from the scale and was pretty happy to see 469 lbs. That's with the SFI flexplate and heavy stock torque converter. But without the intake, exhaust/turbo and most accessories. I expect it to be no more than 550 lbs fully dressed.

-
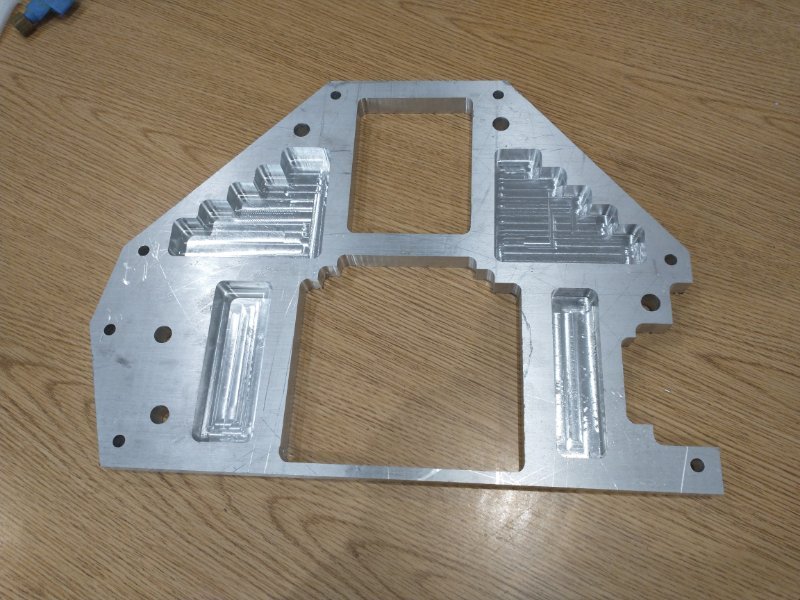
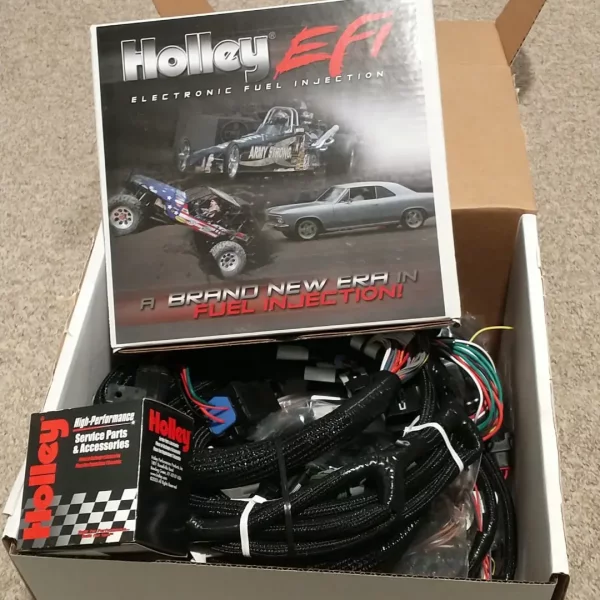
Thanks guys! Engine management will be Holley Terminator X. Doing full sequential coil on plug, drive by wire, trans control, boost control, flex fuel, etc. And yes, it will be 2wd. I'm going to do a complete redesign of the suspension. I don't have any particular reason in general for the 2.4 motor. I could've slammed one of my hemis in there but things get tight and I'm also trying to keep weight off the front end. Anything inline 6 was off the table because XJ/MJ were never originally intended to have inline 6s so they fit like poopy. And are heavy. Basically left me with a 4 cylinder which are completely new to me. Never owned or wrenched on anything with less than a V8. It was a tossup between Honda and this. So here we aare Also got the adapter plate most of the way done last night. It needs some holes tapped and whatnot but it's actually looking like something. As always, weight is a factor. It's just under 5 lbs after starting with a 23 lb plate.

-
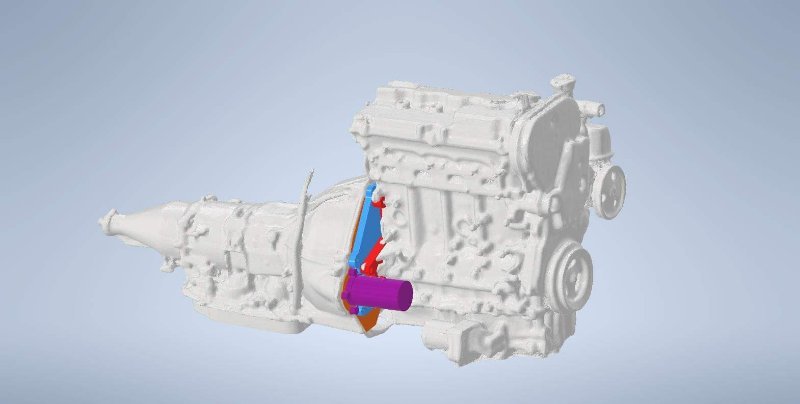
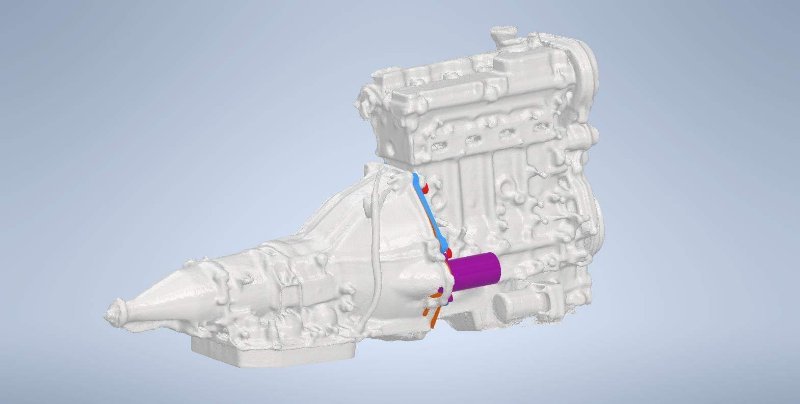
Block and crank adapter design. This adapts turbododge 2.2/2.5 and 2.0/2.4 to any modular Ford transmission using a lightly modified Ford 8 bolt flexplate or flywheel for the corresponding transmission. It also uses the ford starter, block separator, and dust shield. Transmission had to be clocked 3 degrees for the starter to clear the block. Also, took a weight on the bare long block after balance shaft delete (with power steering pump). Not too bad!

-
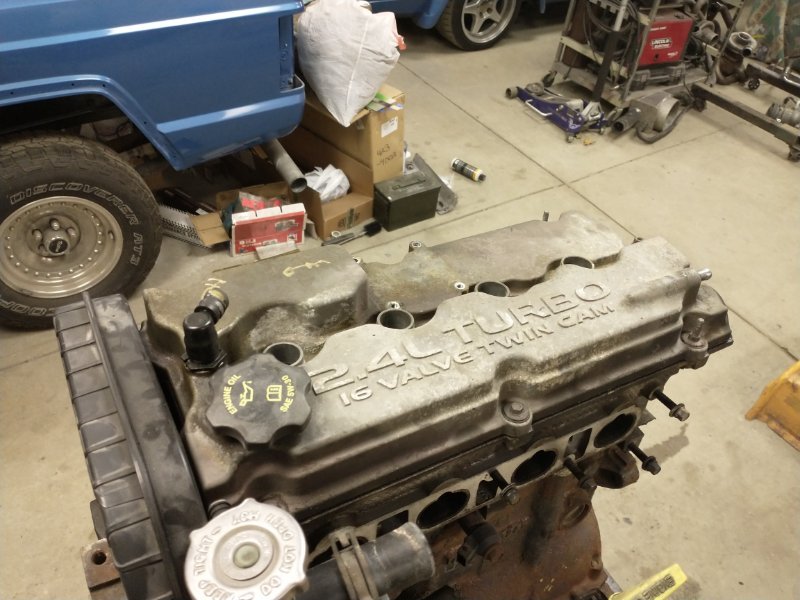
It's getting to be tinkering season again. Here's the reason I'm calling it the SRT Comanche. It's getting a 2.4 turbo from a PT Cruiser which is identical to the SRT4 Neon. I'll be doing major reconfiguring to make it a rear wheel drive application. I have sourced a Ford 4r70w transmission from a Crown Vic that I'll be adapting. I also have purchased some low end scanning equipment that will be useful in determining fitment in the truck and designing mounts/brackets.


-
-
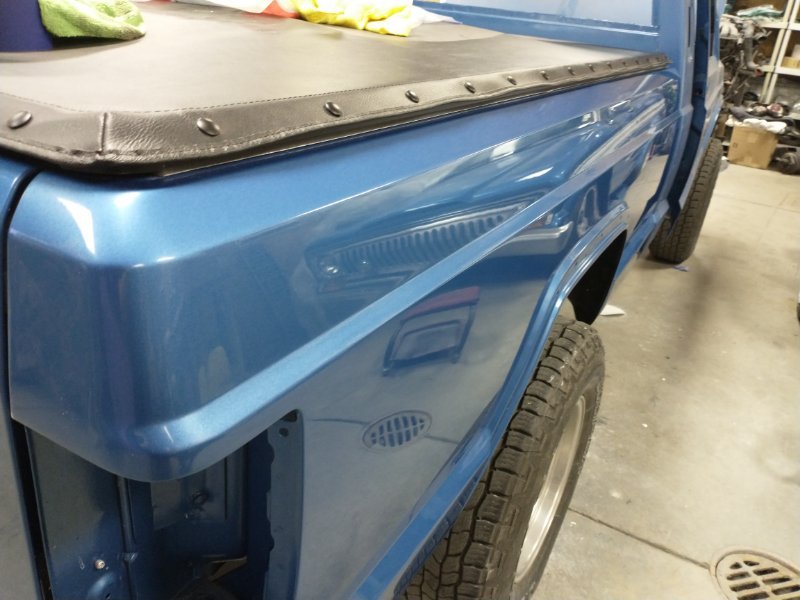
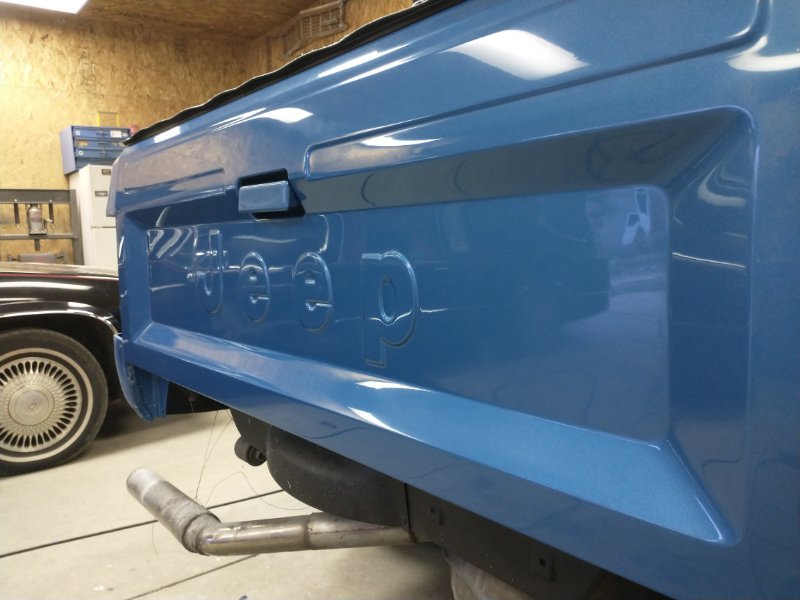
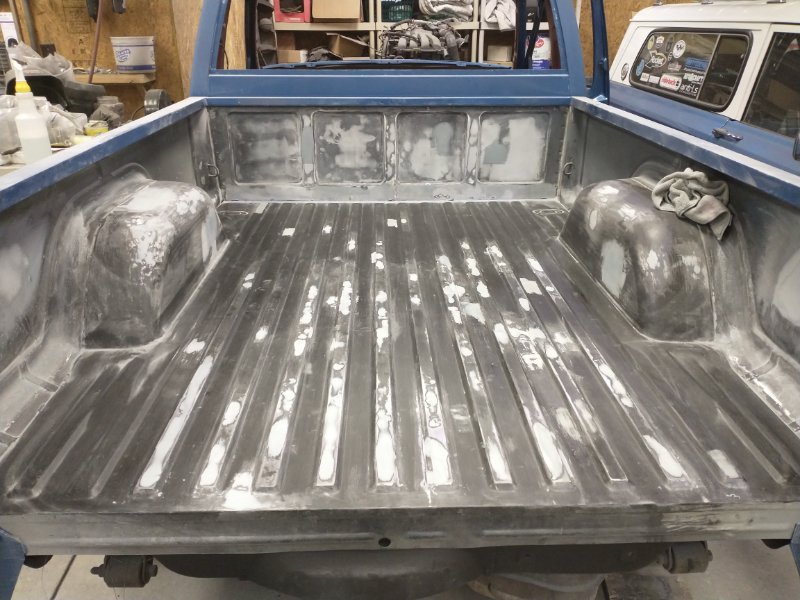
Been sanding and buffing a lot. But very happy with the results so far. Bed and tailgate are ready for prime time. VID_20220512_210444638.mp4
-
Absolutely!
-
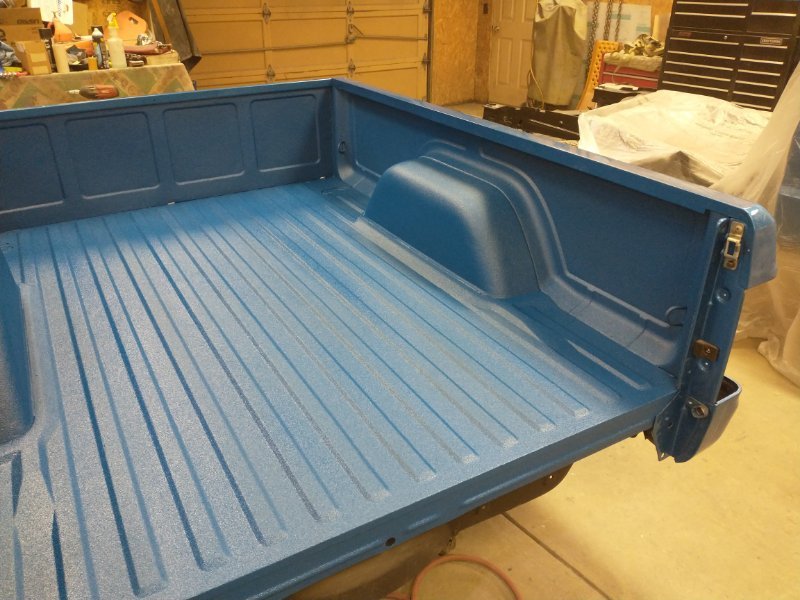
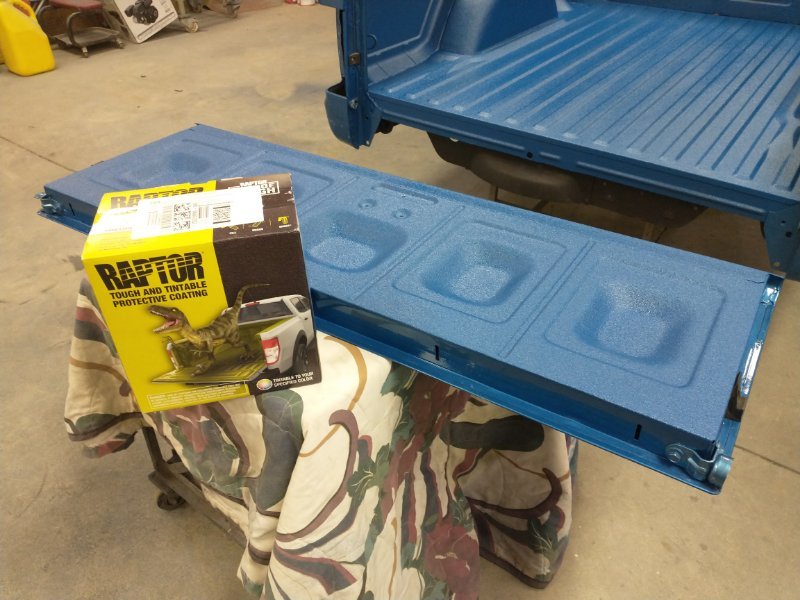
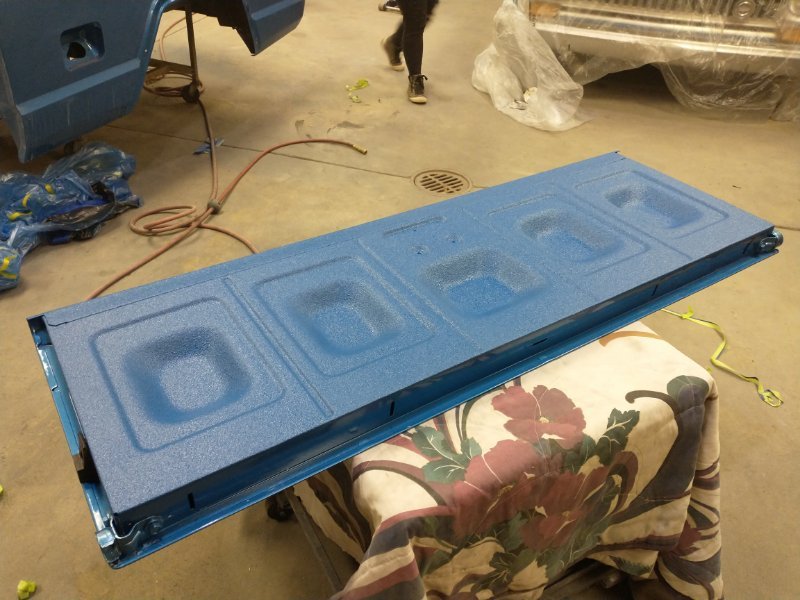
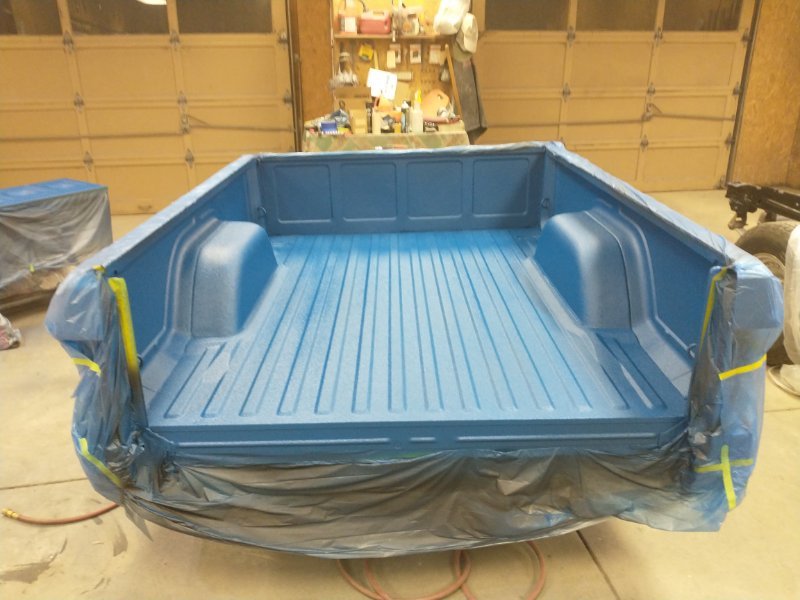
Thank you! It's not difficult to do better than factory, they left a lot to be desired. Also, got the bed liner sprayed in finally! Color matched right on the money. The hours and hours of straightening the bed were all worth it. And the raptor liner was awesome to work with. Sprayed a coat of back epoxy primer first for adhesion and to darken the color. Did a coverage coat of tinted raptor thinned 15% out of a 1.8 tip in my primer gun, followed by a texture coat at 60 psi and 18ish inches from the supplied gun, and finally a dust coat to even out the texture. Used every ounce of the one gallon kit.
-
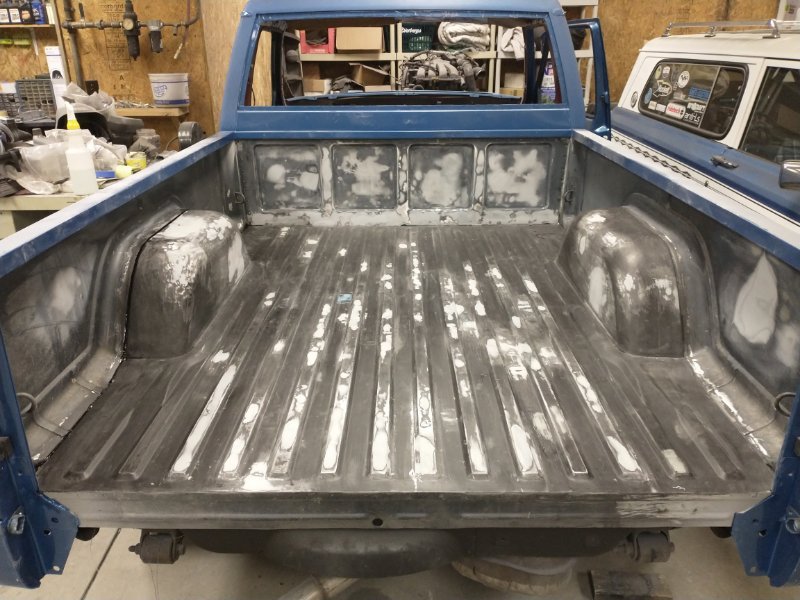
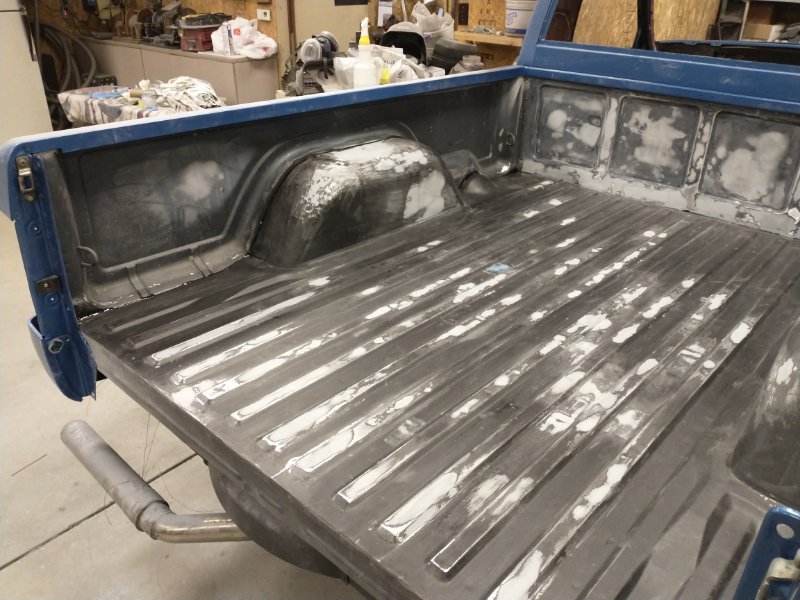
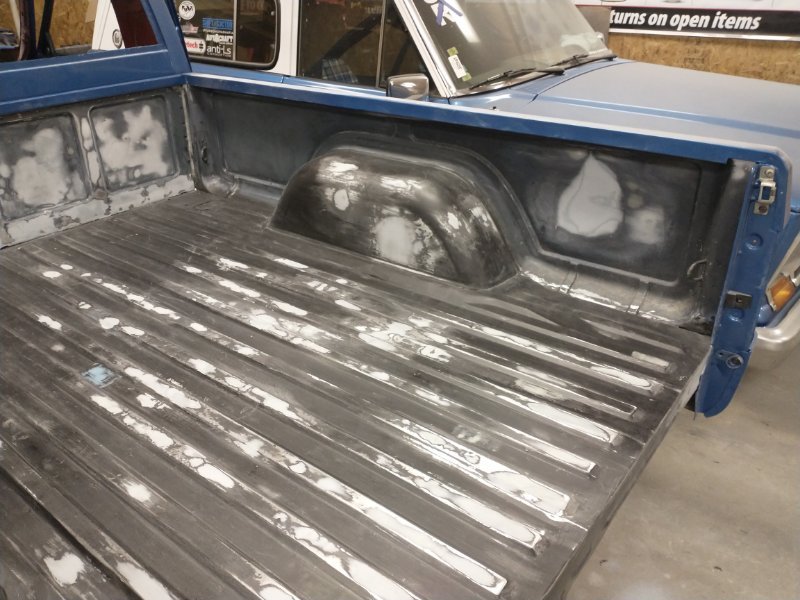
Running the risk of seeming like I'm posting the same photos over and over again, lol. But all the blocking is done finally. Just needs the untouched spots scuffed down and it's ready for the paint guns to come out.
-
After a bunch more filling and sanding. It's getting really close now.
-
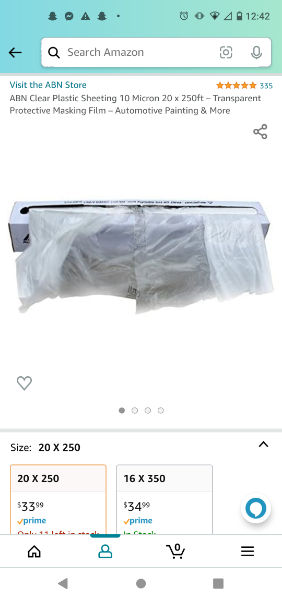
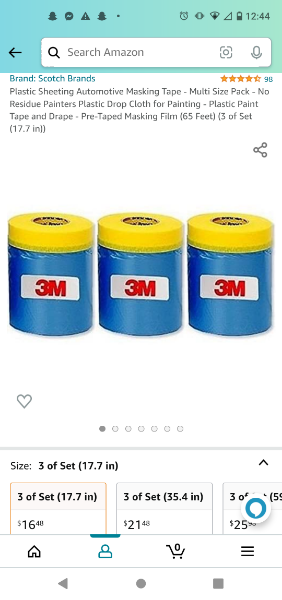
Thank you! Everything stays in the garage except I did move the Cherokee outside when I was doing the final paint. I got a big roll of inexpensive plastic and cover stuff really well. This is the stuff I got. It goes a looooong way. You have to be careful using it as masking plastic though, only one side will let paint stick. If you use the wrong side you make a huge mess of paint flakes. Also. I've been using this a bunch for masking. Super convenient and inexpensive as well. Cuts hours off of masking.