


CO MJ
-
Posts
105 -
Joined
-
Last visited
Content Type
Profiles
Forums
Gallery
Everything posted by CO MJ
-
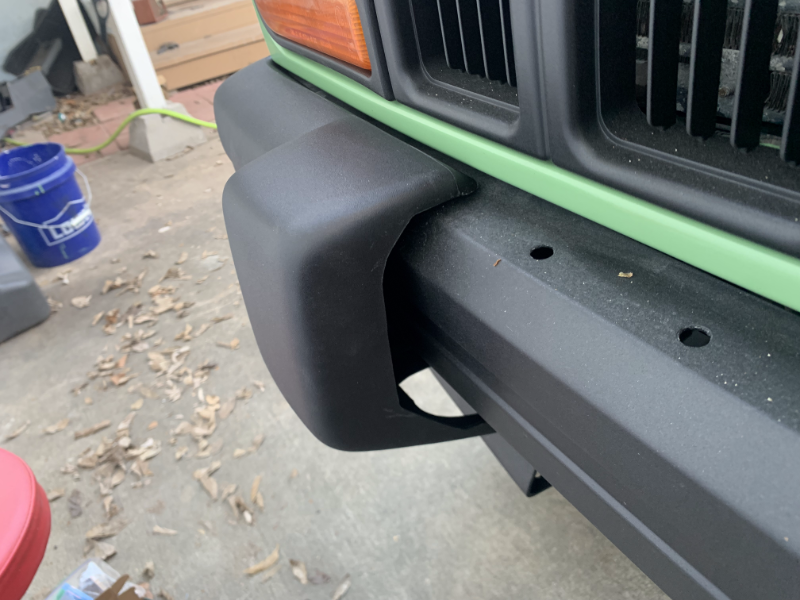
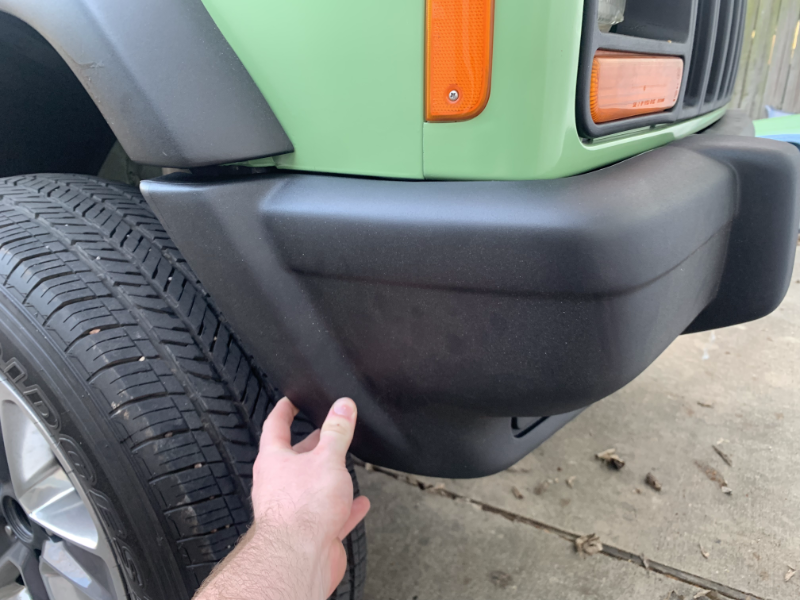
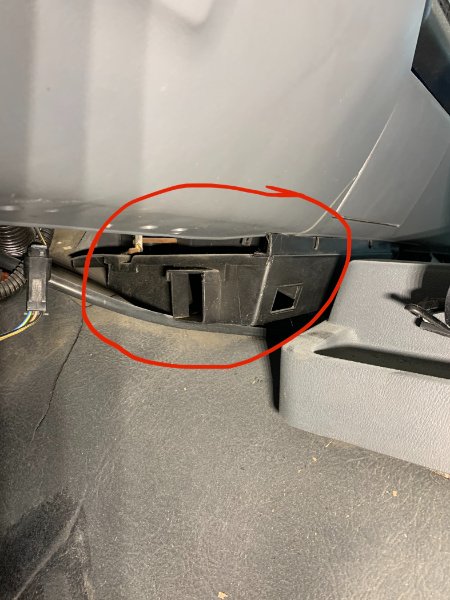
For those of you that have swapped in the front clip from a 97+ and done the factory bumper as well - did you have to swap the front bumper brackets as well? Did you reuse the comanche front bumper or use the cherokee bumper? I have swapped my front clip, quarterpanels and fender flares and I am now trying to fit the bumper end caps from the 97. I thought I would just need to drill holes in my stock bumper to match the holes on the new end caps, but that doesn't seem to be the case. The outside of the caps line up with the mounting holes in the fender flare, and the top edge of the cap seems to line up with the front clip, but the inside edge of the cap sits a fingers width off the bumper itself. It seems like the bumper on the cherokee maybe sits out a hair farther, but I'm not sure if I will need the bumper, or just the brackets to move the bumper forward to fill the space. Photo attached shows my dilemma.
-
Wise words! Fully agree. I plan on pulling the dash sometime this year for upholstery so I will likely do it then when I have easy access. Based on the above photos it does look like the TCU harness is part of the engine harness, so I'll have to figure out what years I can pull from given I have an 89 renix with presumably an ax-4 from the same era. There is a 90 in my local yard that appears to have the same connector, someone has already nabbed the TCU, but might be a good candidate. Thanks for those! The connectors are what I was having an impossible time finding. From the diagrams the cross dash harness appears to have two of those, one for power windows and one for power locks, but oddly mine only has the power window connector. More mystery!
-
Decided to go pull one from the yard along with the breaker, redid the connectors and now I have power windows! Took a loot at the TCU harness as well. I still cannot identify where it comes through the firewall to hook up to the TPS or the transmission, but I also didn't bring a flashlight. I suspect the previous owner either didn't care, or saw that it runs behind the dash in a way that probably requires pulling the dash out, and decided it was easier to keep it under the driver dash. Might go back again and pull the whole dash out as well as a harness if I can find one the same year as my transmission, but I suppose that will require figuring out what year I have since it may or may not be the same as my truck year.
-
Gotta be one of those, right? I pulled the lower dash plastic panel, and there is yet another anomalous black box velcroed to the inside, with a big wide connector coming out of each end, which doesn't look anything like anything I see in the diagram :eyeroll: I will have to take a photo but looks like another mystery to solve
-
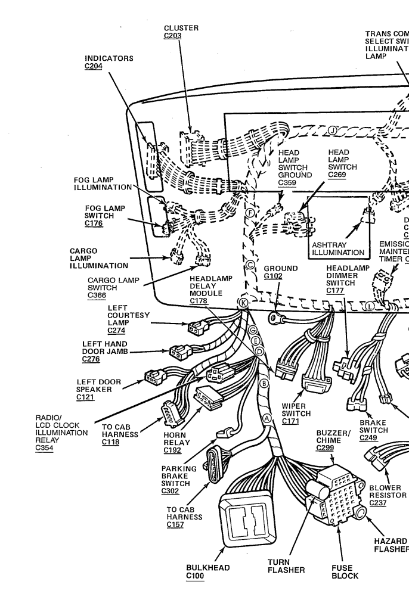
I was wondering the same thing. Correct! I will have to go find the diagrams for the 97+ door harness but assuming it works the same way, I think building my own harness is as simple as power from the fuse box circuit breaker and a ground for each door, and two wires between each door switch box. It's a pity the harness diagrams don't have a little more detail, I'm not sure how that harness physically lays under the dash, and I'm also clueless as to where the TCU connector comes through the firewall. I'm wondering if since this truck was originally manual if maybe they didn't punch the hole for it, and maybe thats the reason PO put it on the driver side.
-
I am swapping in power doors from a 97+ cherokee, my current harness is just speakers in the doors. Okay, that makes sense, I couldn't find a picture or mention of the fuse breaker anywhere so wasn't sure. Next question is the connector, c308, that is supposed to plug into the fuse box, is not labeled in the diagram for the cab harnesses, on the driver door harness or the cross cab harness. I also don't see a connector in any pictures I can find of the door harness that looks like it would go in the fuse box. Since my truck did not have power locks or windows, I'm guessing the connectors I need are likely on the cross body harness since presumably I don't have it. I don't think I'm going to bother with the locks, only the windows, so instead of trying to acquire the cross body harness I think I will just get a breaker, and make my own harness just for the window power.
-
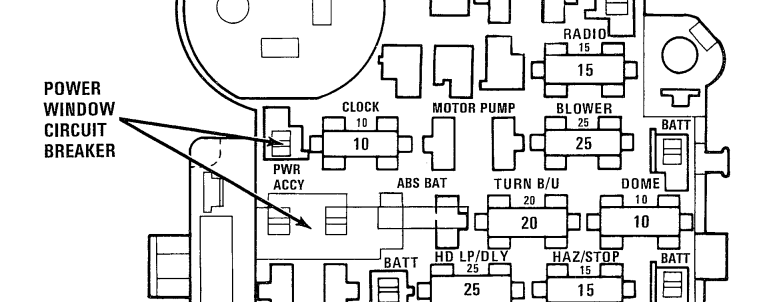
Here's another one; on the fuse box diagram and power distribution diagrams is the "power window circuit breaker". I don't see anything of the sort on my fuse box, is it physically built into the panel? In the schematic there is a single wire, but there are two arrows on the fuse box diagram, pointed at 3 different connectors. Does anyone know where each of the pins actually go? If someone has power windows and wouldn't mind snapping a picture of the connector that would also be very helpful!

-
So it looks like that mess is largely because whoever converted the transmission did not put the TCU where it's supposed to go under the glove box, and instead put it on the driver side. Does anyone know if the connectors for the automatic are present on the engine control harness for a manual? C113, C234. From what I'm searching it looks like they are not, and that's why I have this spaghetti mess and the PO has just run all the connections by hand instead of swapping out the harness. If that's the case, and I have all the connectors, if it's worth moving the box to it's correct location and building my own harness, or if I should go find the right harness, or just clean up those fuse box connections and call it a day as everything seems to work anyways.
-
Thanks! Will check this tomorrow. FWIW the voltage drops when the wires are connected, before I ever push the up/down switch. The radio also will sometimes just cut off while driving so bad connection feels likely
-
And another one: I'm trying to use the acc connection on the fuse box to power my window motors. I get battery voltage when I turn the ignition on but as soon as I connect to my door motors the voltage will drop to 0 or even weirder, like 3-6v. The door power connected to an external power supply works just fine. The fuse doesn't blow. That's weird right? I'm having trouble finding a diagram of where the acc power comes from, but I'd assume a wire from the battery, to the ignition switch, to the fuse box. No other magic involved. Unless maybe the ign turns on an acc relay, but I don't see mention of that anywhere.
-
Update! Black box on the roof is just an antenna. I see that hacked off lever is connected to what I guess is the clutch master cylinder? Whatever, it definitely appears that this truck has been converted from a manual to automatic. Removing those not stock wires from the fuse box results in my transmission being stuck in like third gear, very little power going to wheels. I don't know squat about how transmissions work and their wiring so will be reading up there. Any ideas what those wires might specifically be, and any suggestions on cleaning things up to better match stock automatic wiring?
-
The various relays just hang there though? They aren't normally mounted in a block bolted to the frame anywhere?
-
Is it pretty typical for cars from this era to have numerous electrical components just dangling beneath the dash? That seems crazy to me
-
Thanks for all the help! So it sounds like everything is stock anyways other than those wires coming out of the fuse box and the thing on my roof. I'll try again tomorrow to track down where those wires go.
-
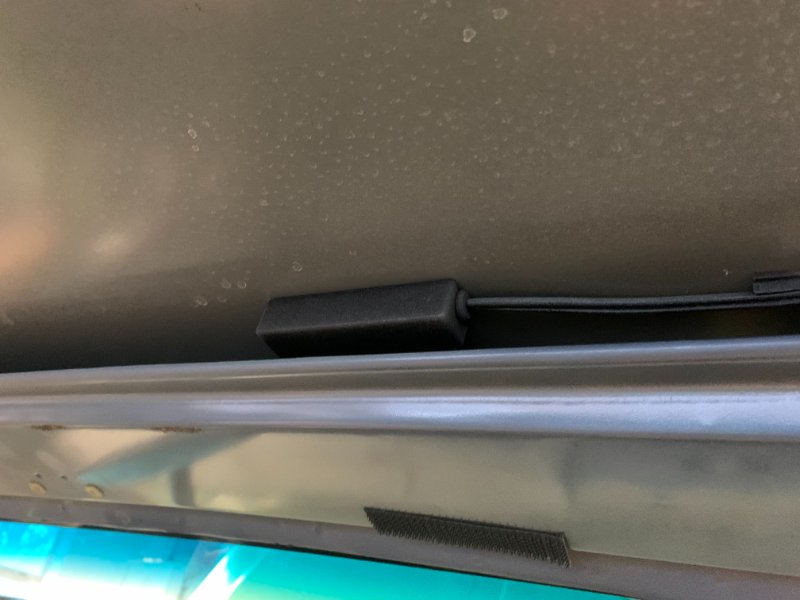
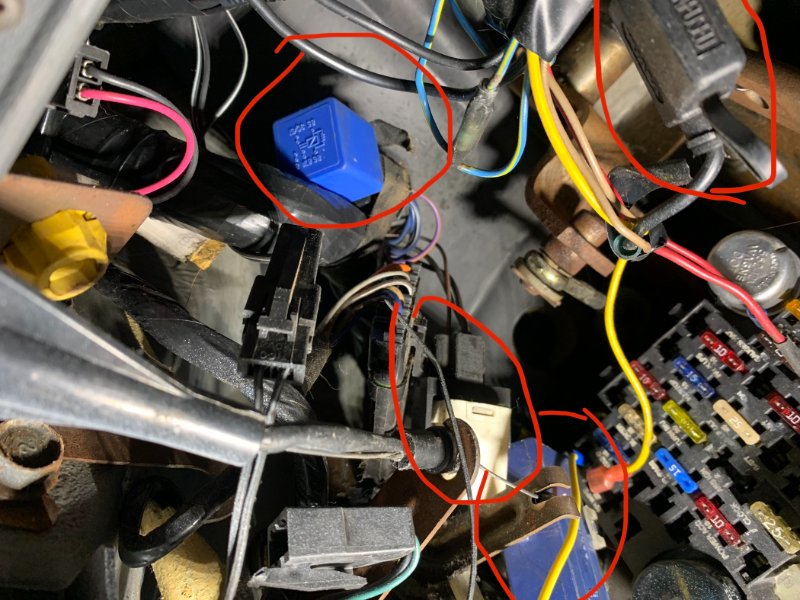
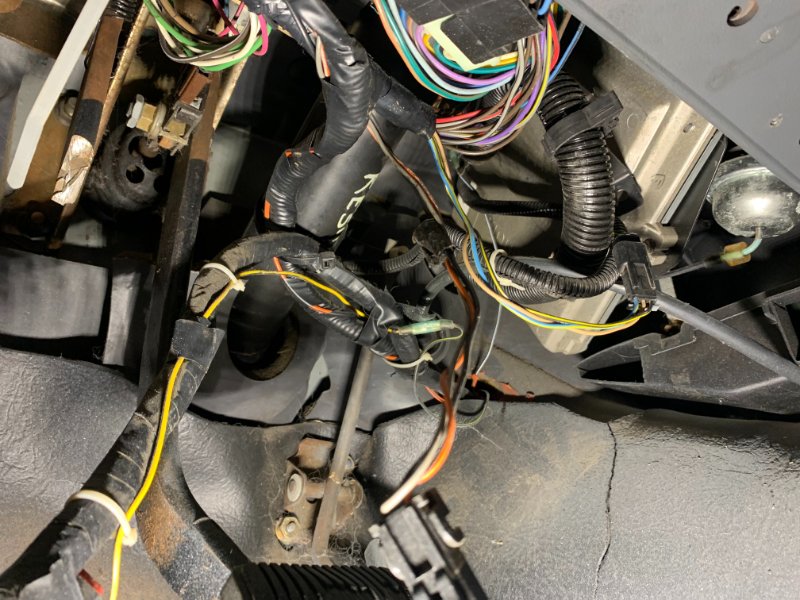
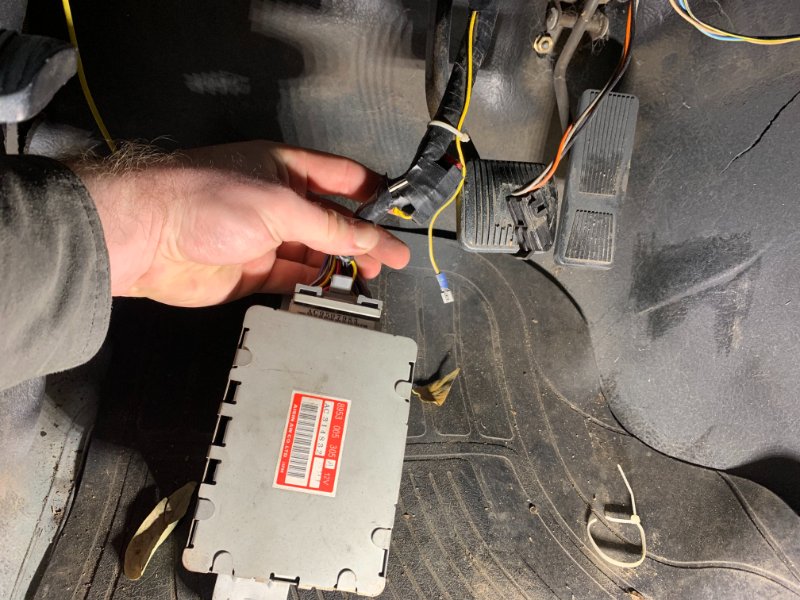
Before I wire in cherokee power windows, I think I need to remedy a few wiring gremlins. I'm not sure if everything under my dash is supposed to be there at all or if it's in the right place. 1. In this photo there are 3 wires (ignore the yellow in foreground) that go into my fuse box in the rr wipe, ign, and gauge fuses. They run out through the grommet in the firewall to the engine bay. They look too new to be factory, any idea what they might be for? 2. I have circled what looks to be a blue cap over the end of a harness connector, what's this? 3. I have also circled a white relay, what's this? 4. In this pic is another view of the blue cap and white relay, as well as another blue relay and an inline fuse. What the heck? This is another view of underneath. Worth a note, either my pedals have been replaced or this truck used to be a manual as someone has hacked off the clutch pedal. 5. What's this box? Any idea why there's this random wire and inline fuse on the harness? 6. Anyone know what this box is above my headliner? Just two black wires that go down behind the glove box, can't figure out where they go to from there. No markings on the box. 7. What's this big plastic box in the middle?

-
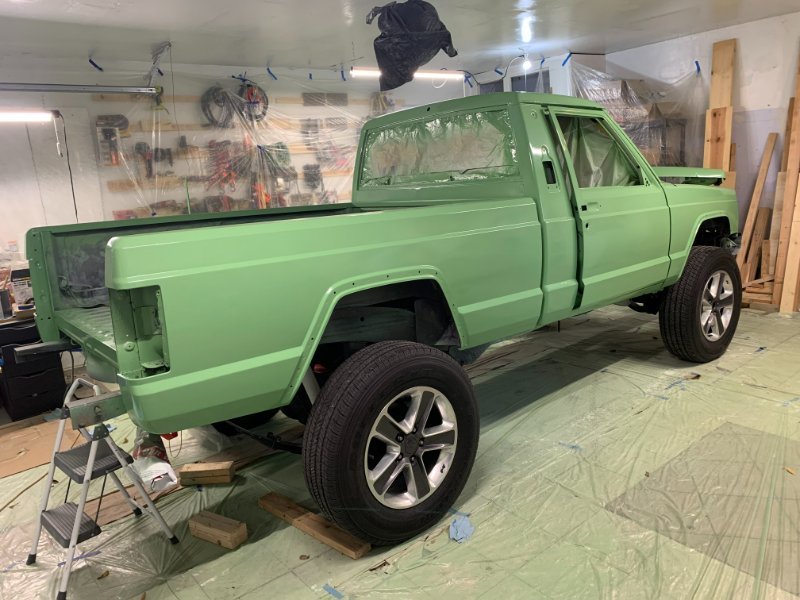
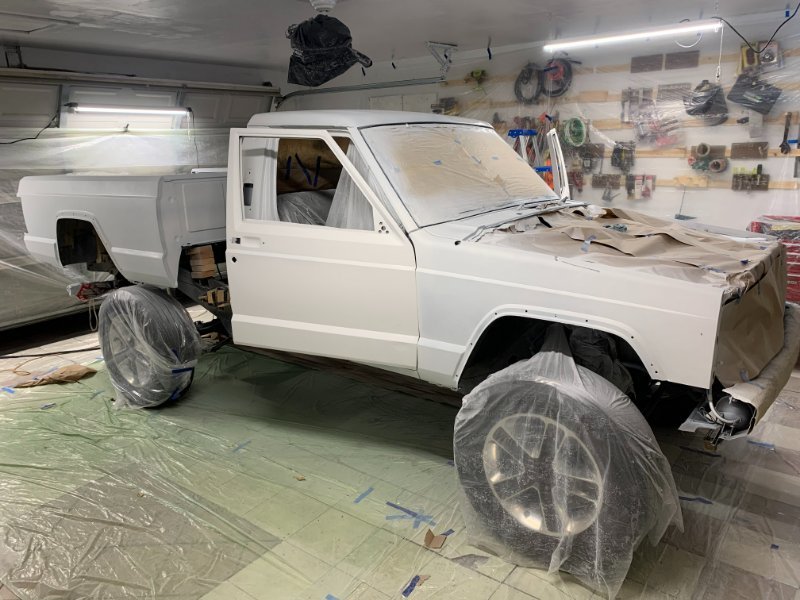
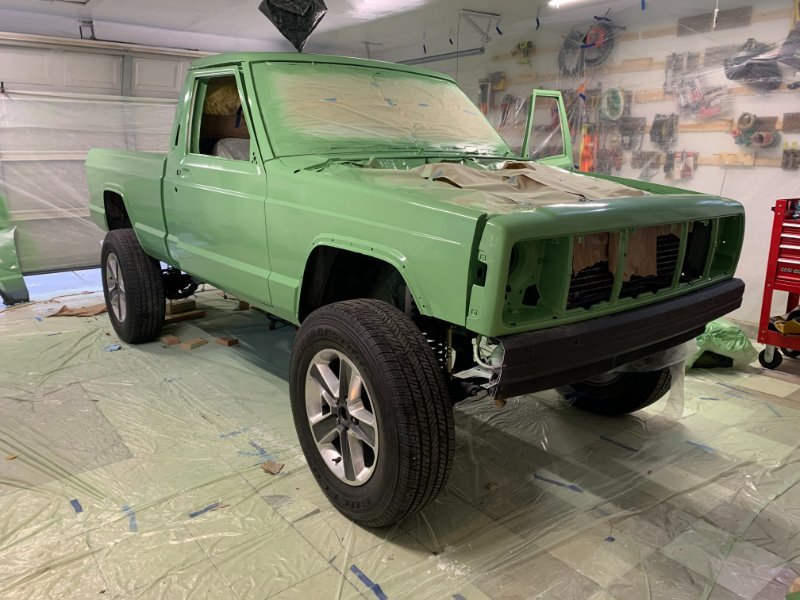
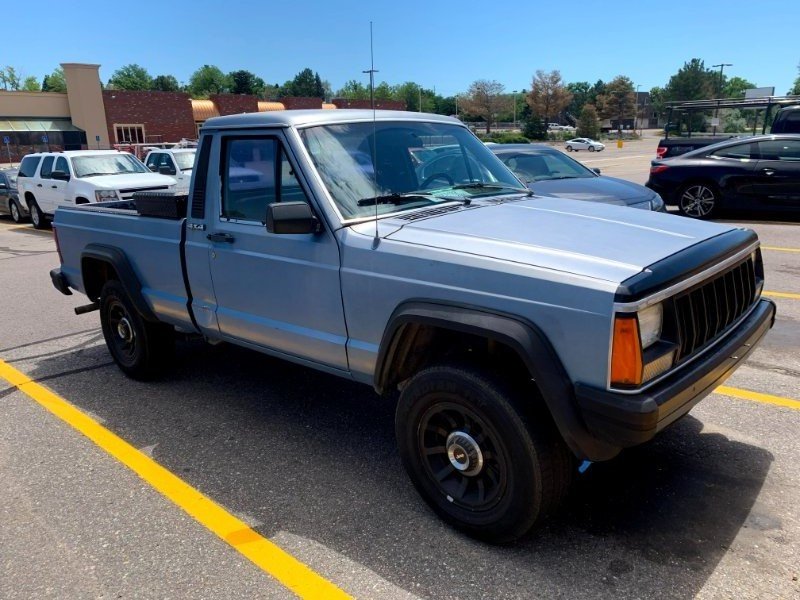
Figured it was about time to start a thread for my old $#!& box to keep me accountable for getting stuff done on her! Painted her over the last week or so, I think she's going to be pretty good looking once I finish all the trim pieces. 89 Renix 4.0 4x4 MJ Done: - Stock i6 block - Rustys 4.5" MJ lift - Doors, quarters, and front clip swap from 96-01 XJ - 32" tires and wheels from I believe a 2000's wrangler with bolt pattern conversion spacers Todo: - Paint all trim - Install all exterior trim - Window tint - Redo headliner - 96-01 roof and floor consoles - Paint and upholster interior trim/dash - Bucket seats - Carpet and sound deadening - Sound system - Bedliner - Headlight wiring Current photo: Starting point: Paint in progress:
-
Whatever adhesive my PO used to adhere the rear window also stuck quite well to the weather stripping and unfortunately removal resulted in complete destruction of the rubber. I'm not super keen on purchasing another 30+ year old piece of rubber from a donor and was wondering if anyone has come up with any other solution that looks pretty good. Molding from another truck that is available new, some generic weather stripping cut to shape, etc.
-
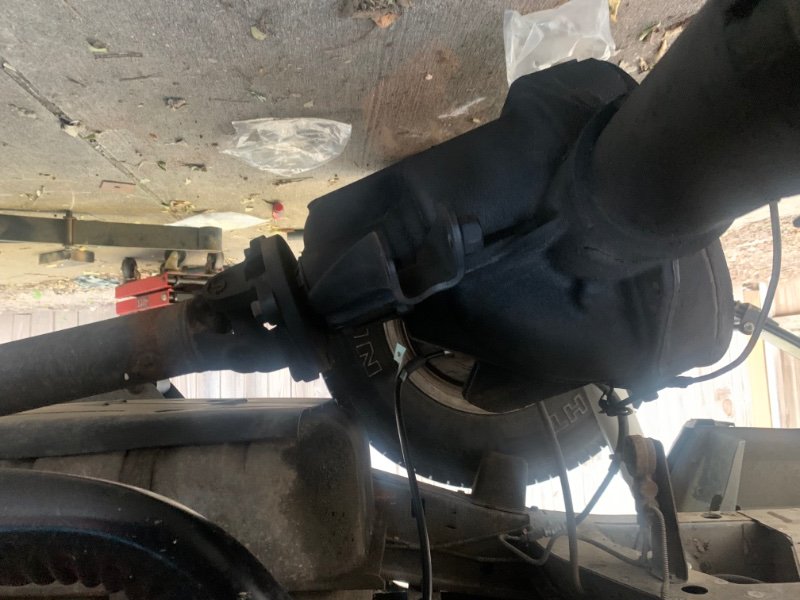
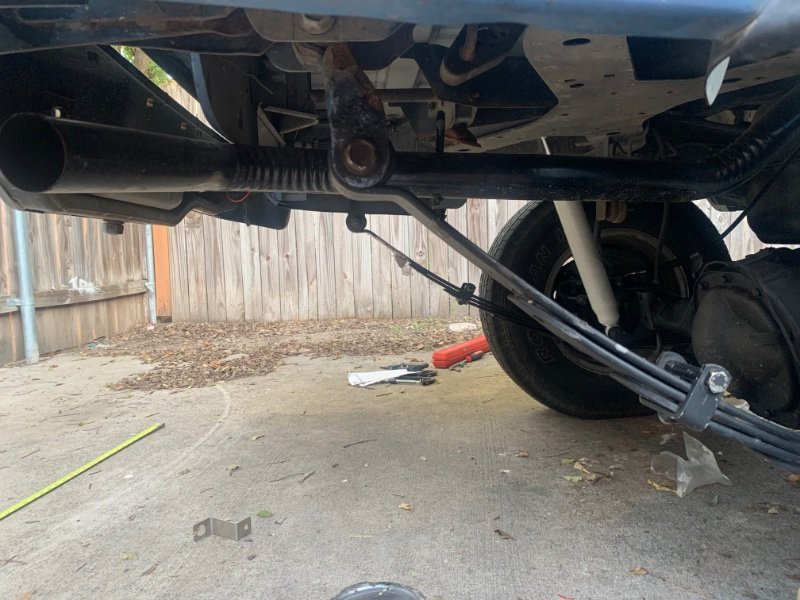
This is the last response I received from Rustys. I'm not an automotive engineer but from everything I've read there's a good reason for the shackle to be perpendicular to the eye to eye line of the springs, which makes their response very suspect. Not sure what TC stands for, but there's no way these springs are ever going to relax so much that I get into correct alignment. There must be 30-40 degrees between where they are and the correct angle. That being said, I just want to make absolutely sure it's not something I've done incorrectly before requesting new parts to do the job again, but I've followed the install instructions to a T, so I very much believe that is not the case. Here's another question. Should I have sprung for the adjustable control arms? After a little bit of driving, I feel like I am being pulled all over the place, steering feels off, etc. I adjusted the track bar and have the body perfectly centered, but I have not checked camber, caster or toe. With stock uppers and the fixed lower control arms, am I able to do anything about the caster angle? Presumably I've lowered the angle by lifting right?
-
Any chance you have a pic? Not a bad idea, wonder how much of this is just not trying hard enough to get them in the correct location during install. Rustys insists these are the correct springs and the numbers do match the screenshot of the video earlier in the thread so maybe if I can force them to the right spot maybe they'll eventually relax and hold.
-
So I have shims installed that came with the kit, it might behoove me to just remove them. I think they are 6 degrees. PO must have put the plates on the axle with some angle, I bet removing the shims will put me spot on
-
Not sure what you mean. Stock config is SUA right? How can you position the axle if it has to sit on the pin fixed to the leaf pack?
-
Ended up doing the same this afternoon. Looks better, still not perfect, and the driveshaft angle hasn't really proved. If springs settle another inch I think I'll be okay though.
-
@howeitsdone you're the man, thanks for those, giving me hope! I think I will pull the shackle bolt and see if I can persuade things into position. I'm not sure what DS is, but I did install with the shocks removed as per the instructions (which to be honest, absolutely terrible). Frame bolt, shackle bolt, axle bolts, shocks, in that order.
-
Just measured the length of the main spring. Old is 56, new is 58. Don't think that's enough for 4.5" of lift while maintaining a safe shackle angle. I've sent this info along to rustys. @75sv1 not a bad idea, but this kit is sold on the premise that I should be fine with stock shackles. @ghetdjc320 Agreed. Even if they settled the shackle is still going to be at an awful angle, and they'll probably smash into my frame ever time I hit a bump. This was a full kit for MJ so plan B better be them sending me the correct springs :)
-
Measurements above, new ones are about an inch and a half shorter but are much more curved. Alignment pin was on top of the springs. Thanks! I have a feeling the answer is smush the springs into the right place lol