
iimafa
-
Posts
106 -
Joined
-
Last visited
Content Type
Profiles
Forums
Gallery
Everything posted by iimafa
-
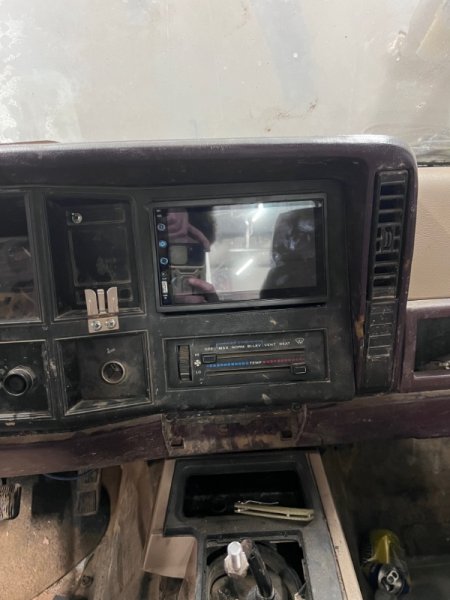
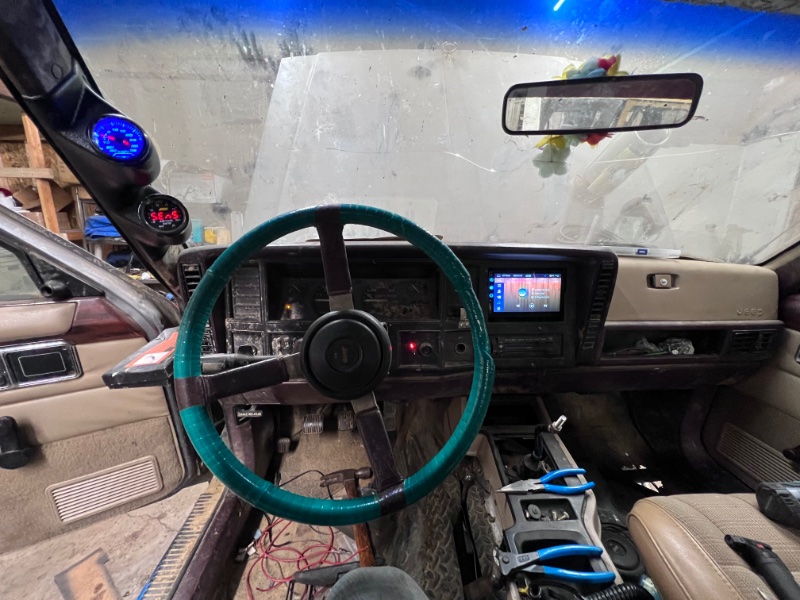
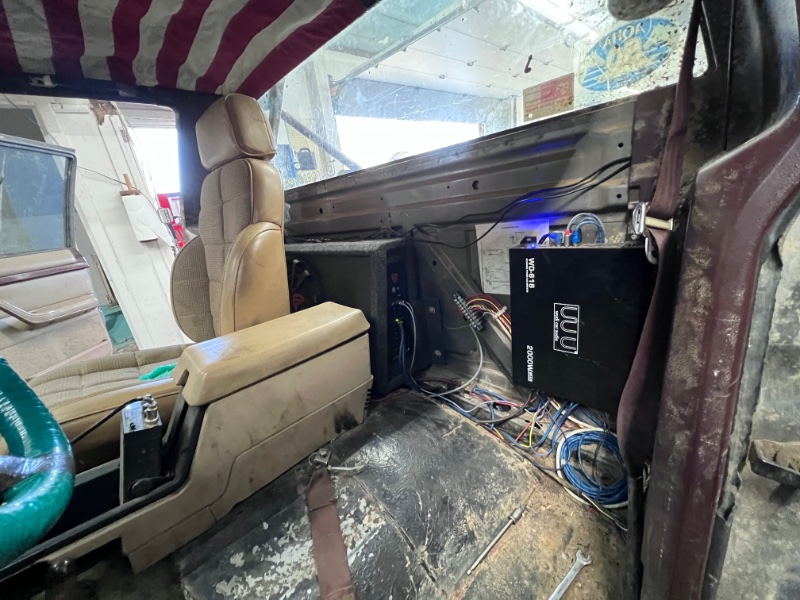
it wasn’t has much work as I expected it to be, the head unit wasn’t very deep which helped a lot. The main reason I wanted the double din was to display my map, hoping to run a USB cord down to the center console to mirror my phone…. We’ll see how well it works. It is electrical tape! The original wheel was falling apart and was a really gummy gross rubber type stuff under the leather. I’ve had the tap on there for a few years now and it’s been alright but haven’t driven it at all. It’s the really hard cheap tape that is almost unusable for taping small wires together. I will most likely change it once it’s moving. I would like to get a stock wheel cover again though, but sadly part of the old gross rubber fell off where my hand normally goes.
-
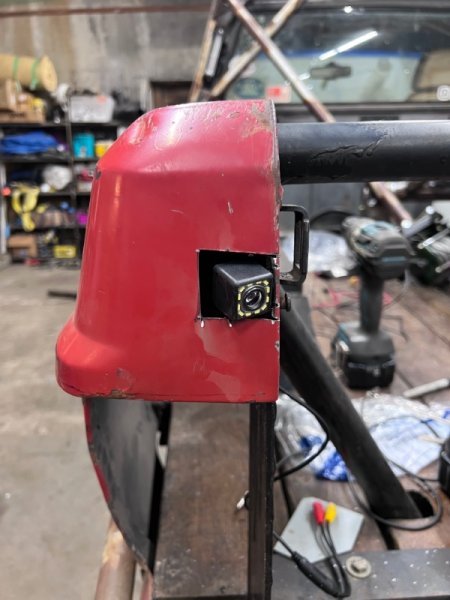
The last bit of work I got done was I replaced the blower motor speed switch because the old one was burned up. I moved the head unit a bit and did some trimming to clean it up some. I also added a piece of steel around the reverse camera in an attempt to make it a little beefier to prevent it from getting smashed. I’m worried about sliding against a tree on the side and the outer skin pushing pin and breaking it so I might add a bracket behind it so I can through bolt it in an attempt to prevent it.

-
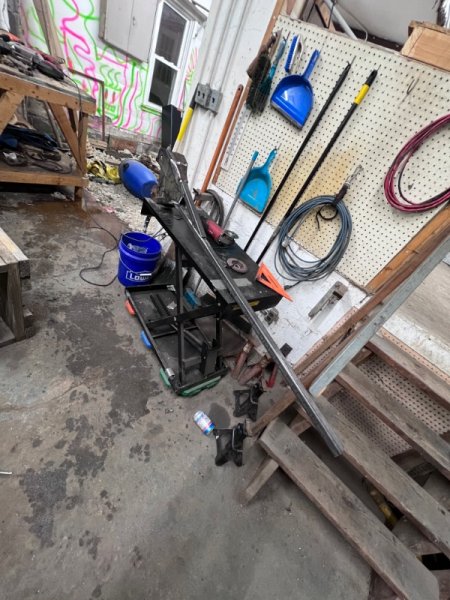
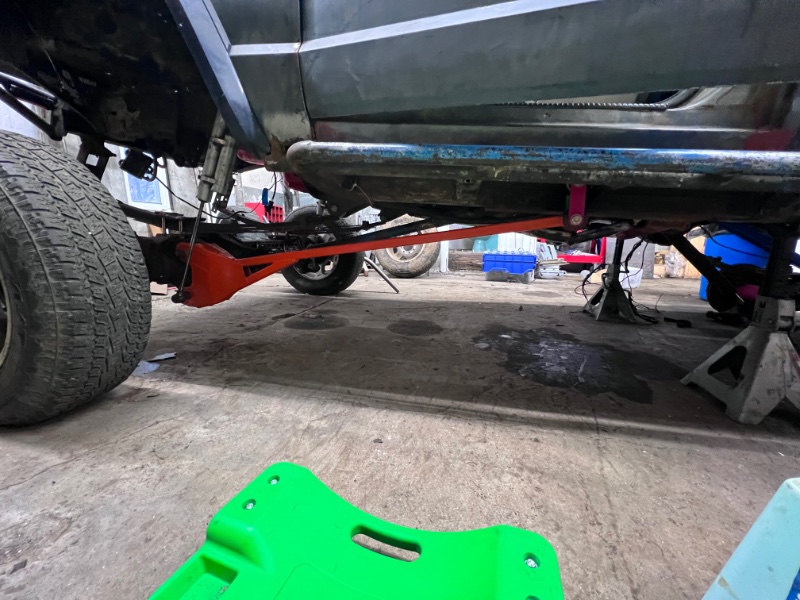
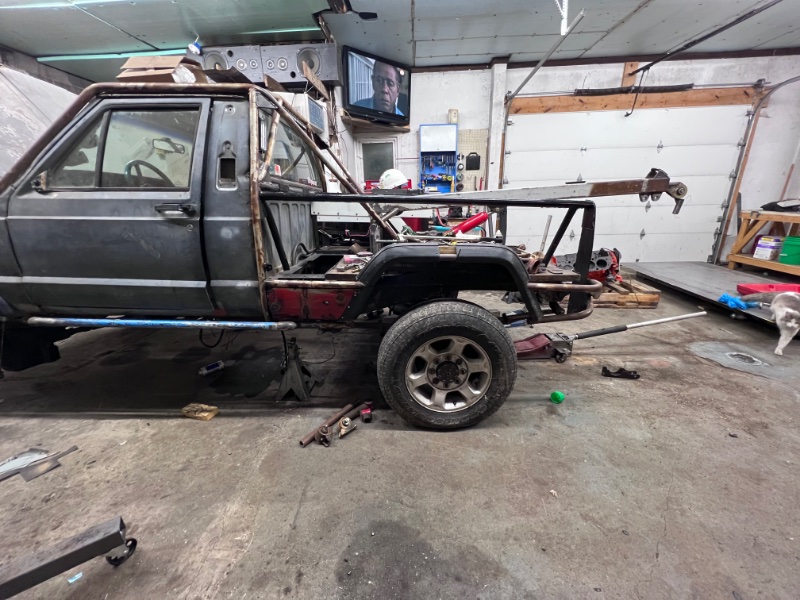
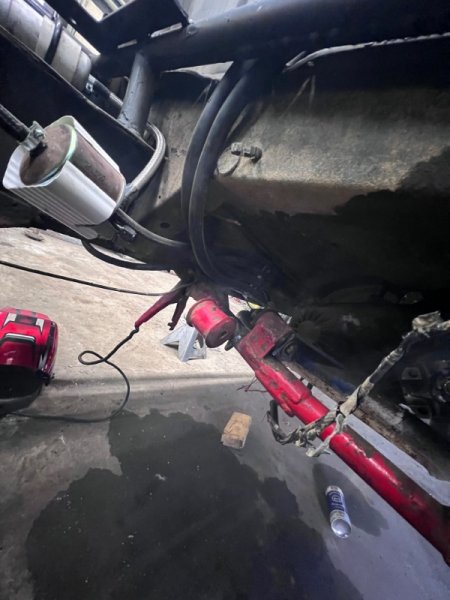
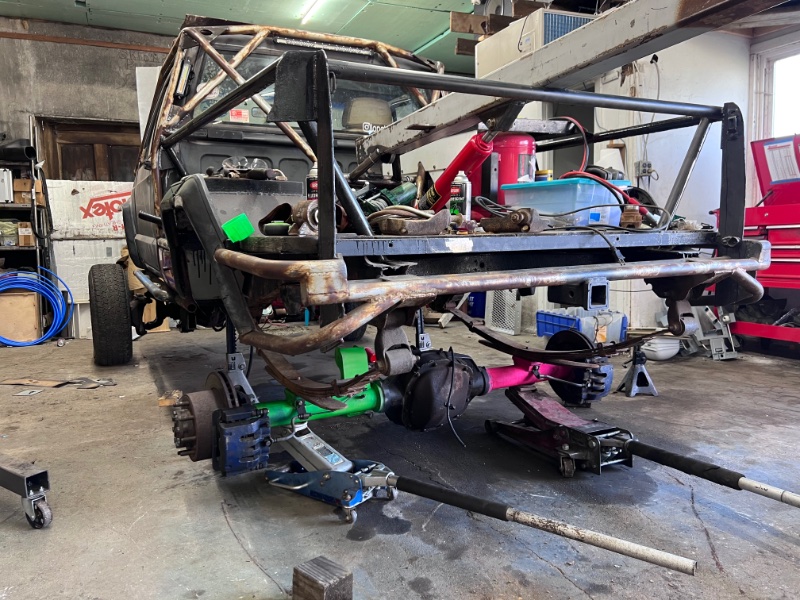
The next thing I got accomplished was the front anti-wrap bar…. I did this one very odd and I’m not sure how I feel about it. It will definitely work well to keep the axle from rotating but it hangs very low, I originally thought it wouldn’t be a big deal if it hung down the same as the driveshaft but it appears I missed that mark by a solid 6 inches. I may cut it and toss some weird looking bends in it. I’m worried I’ll set it down on a rock ledge and just bend it in half. It’s 1-1/2” square 0.25” thick so it’s some beefy steel but I don’t think it stands a chance where it is.
-
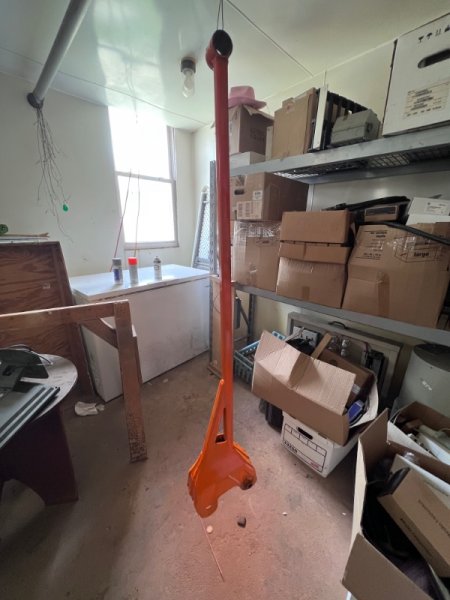
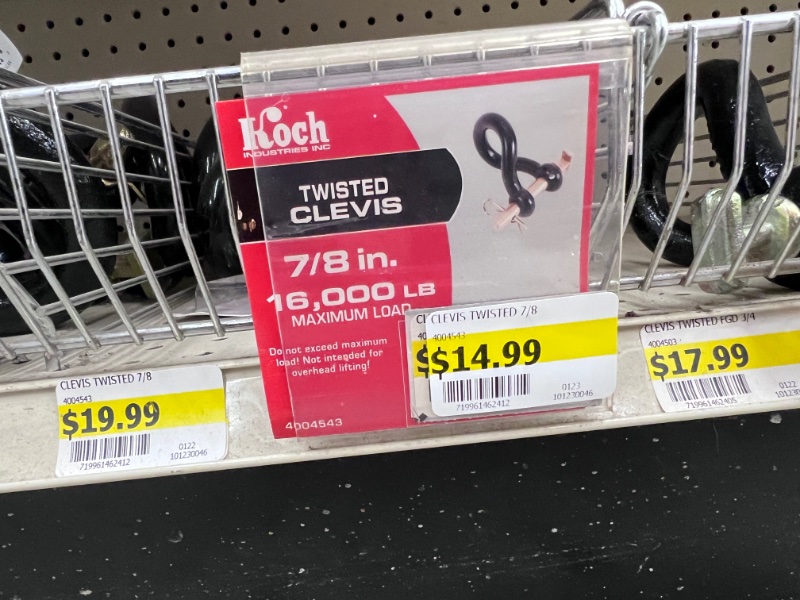
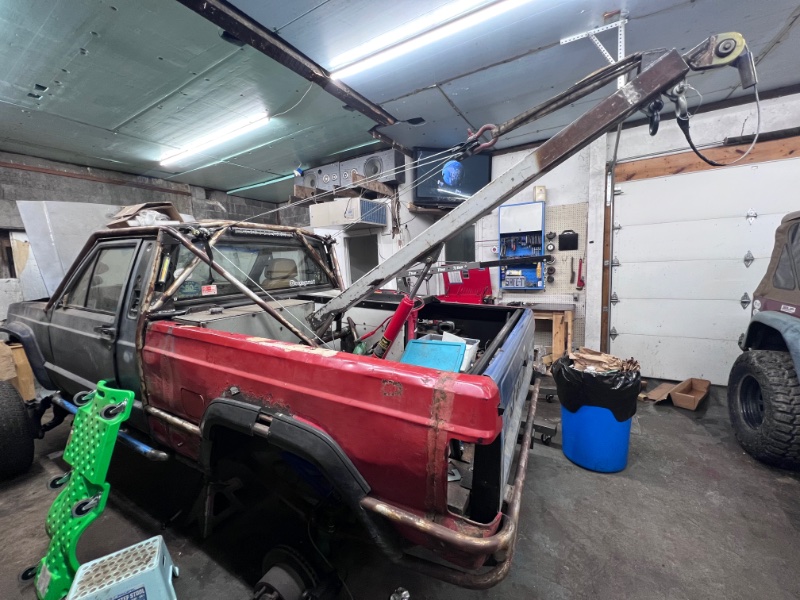
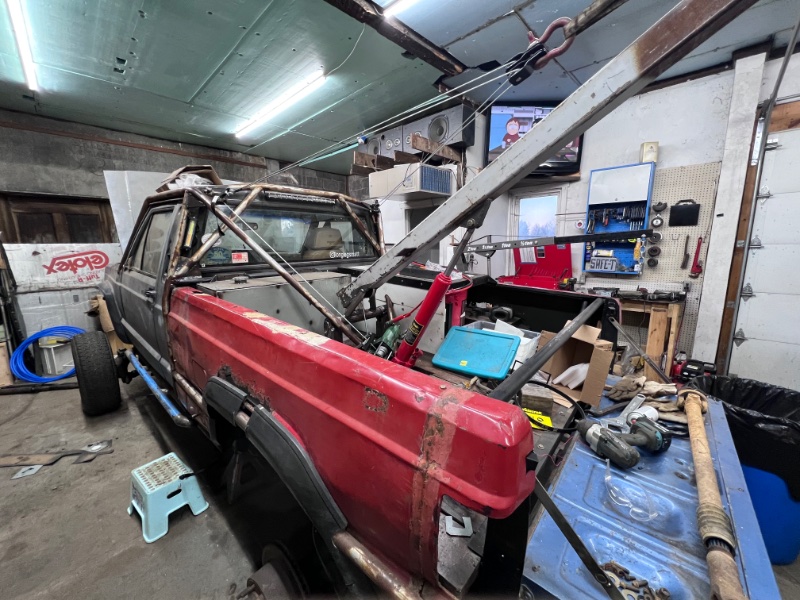
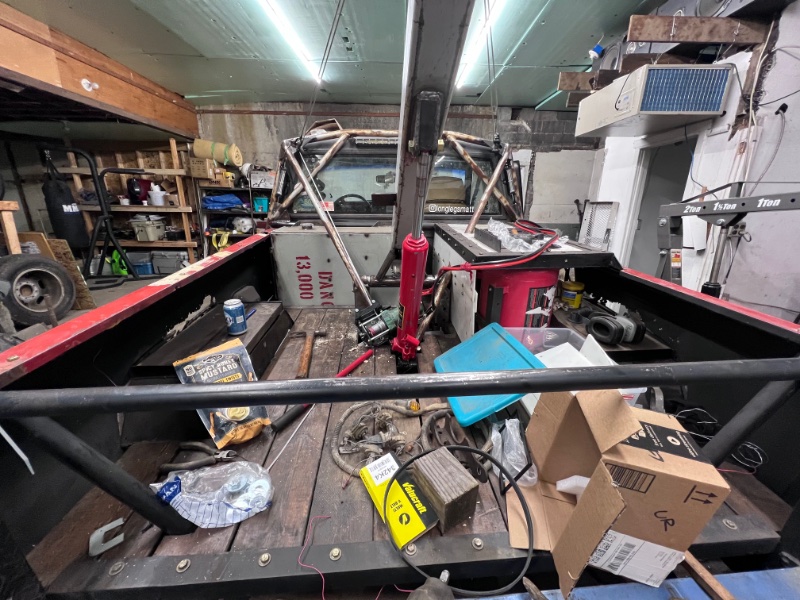
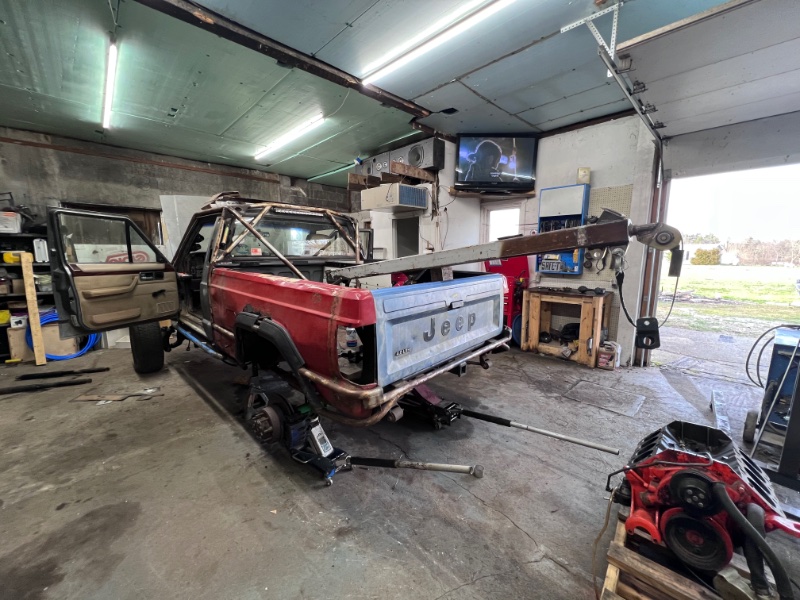
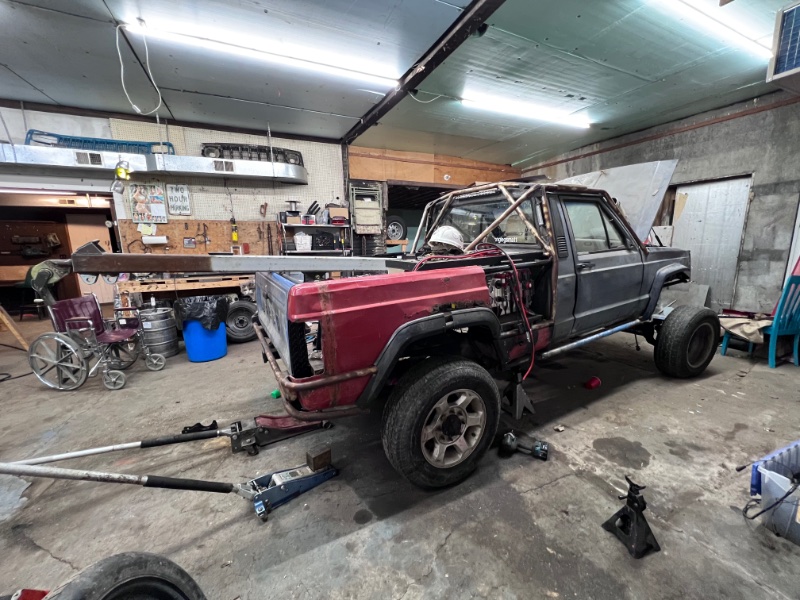
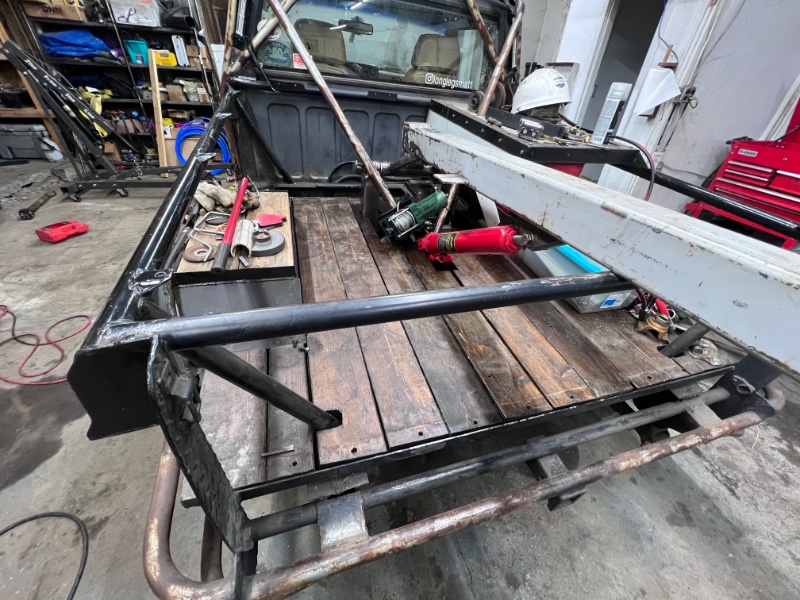
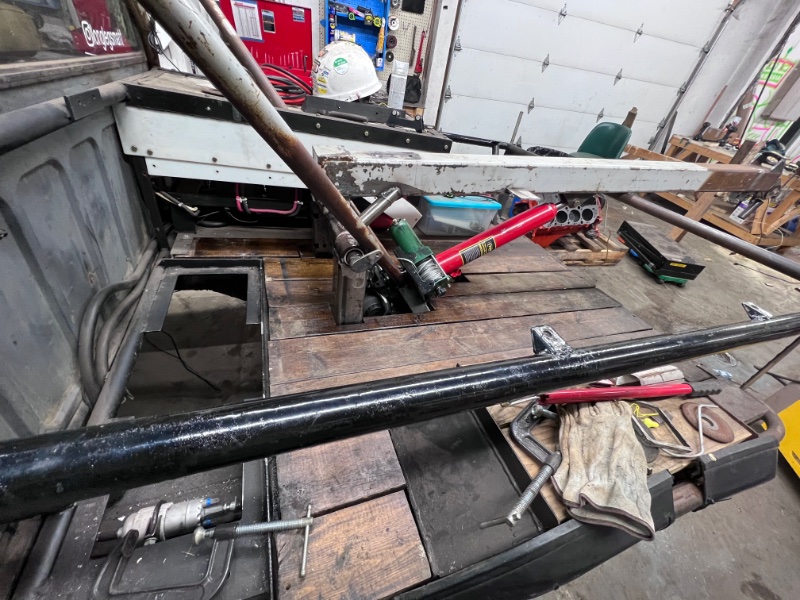
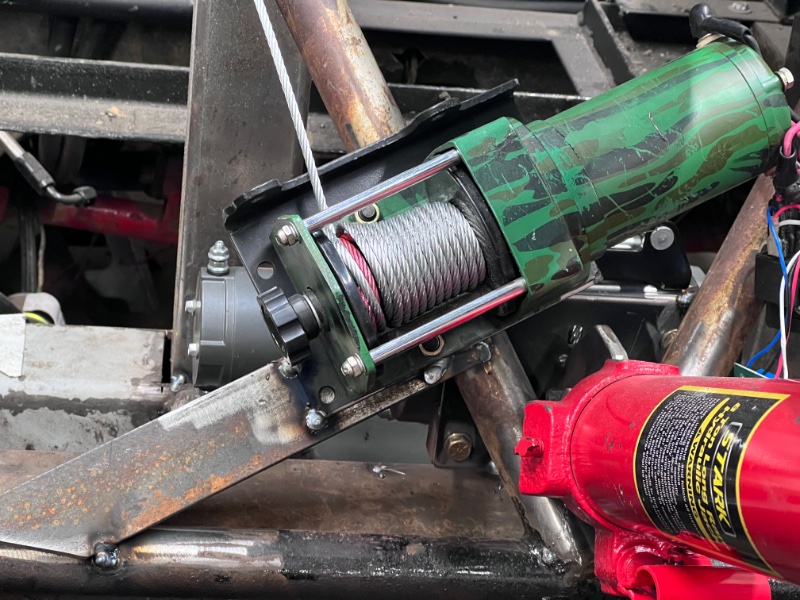
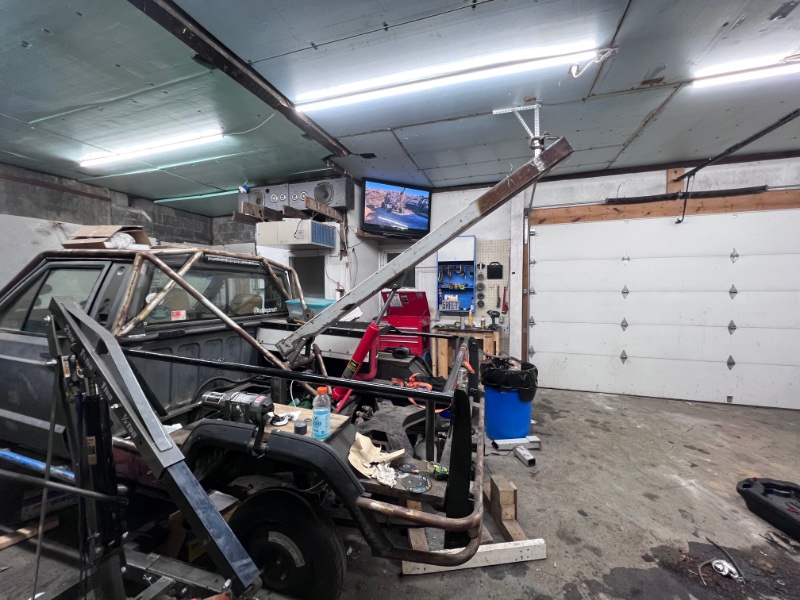
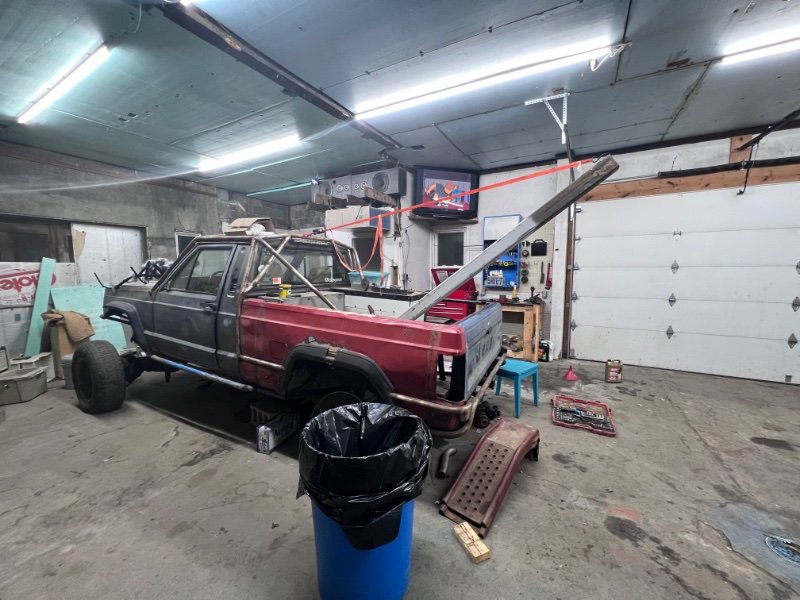
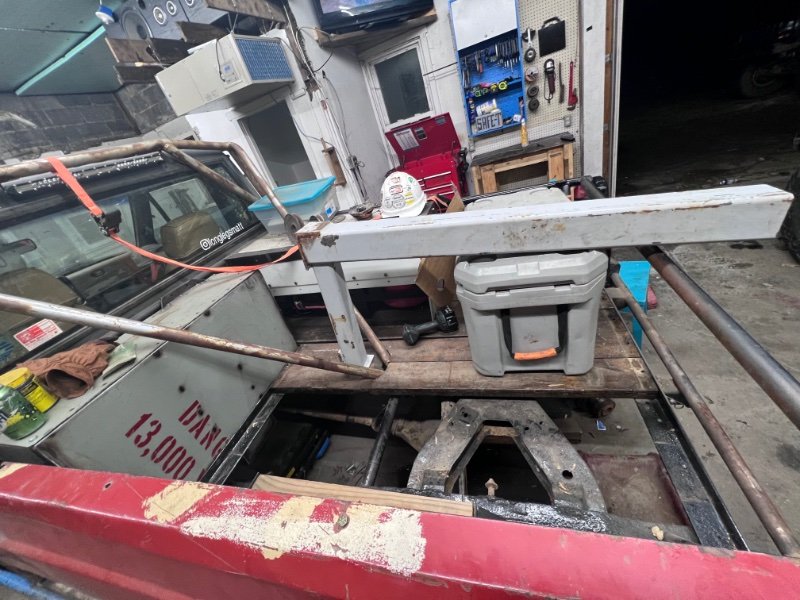
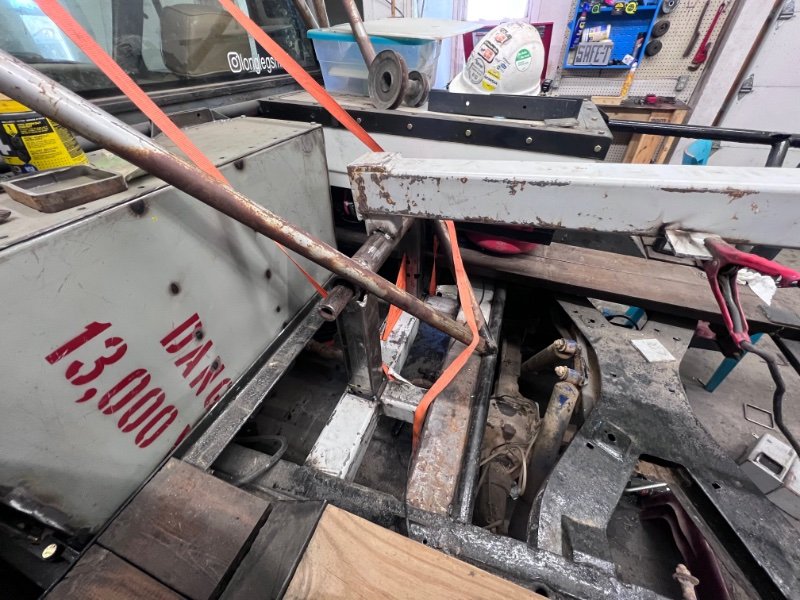
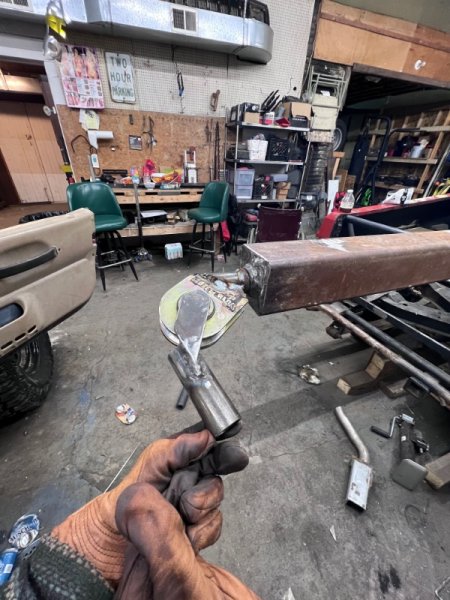
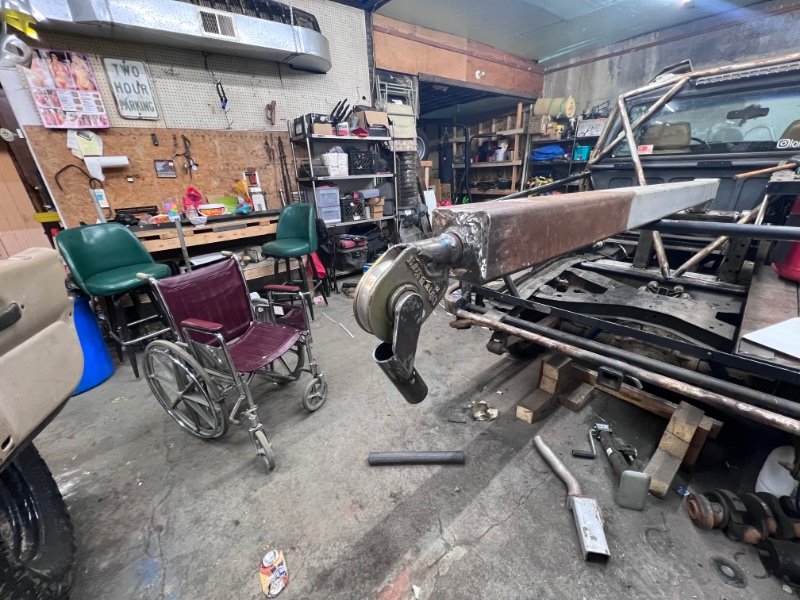
Made a little more progress this weekend, tried getting the bed all the way back together, and didn’t really like how the cables for the boom looked so went looking and found these twist shackles at orschelns. I have two 10k snatch blocks coming this week so I’ll get a picture when it’s all together, but it’s starting to feel like it’s getting close to the end which is exciting.

-
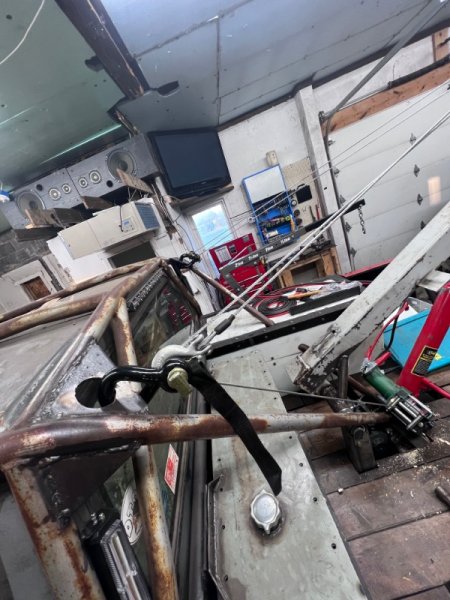
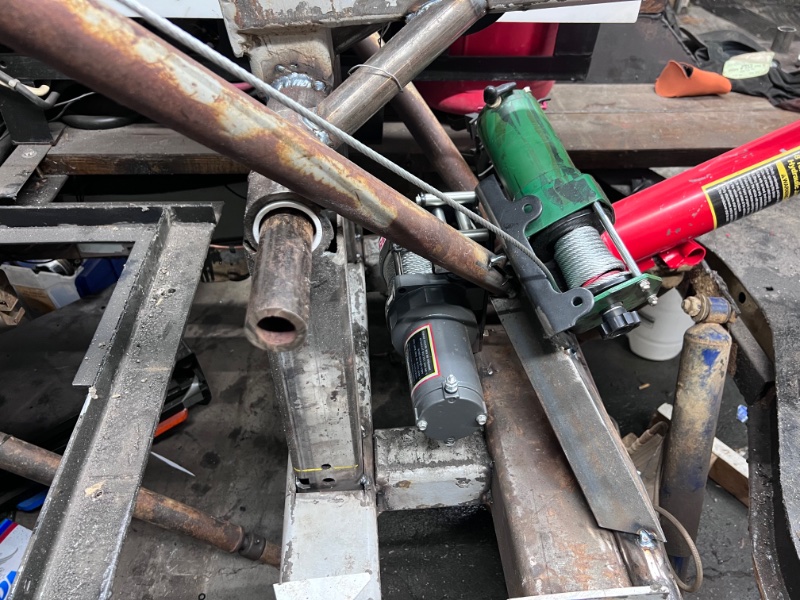
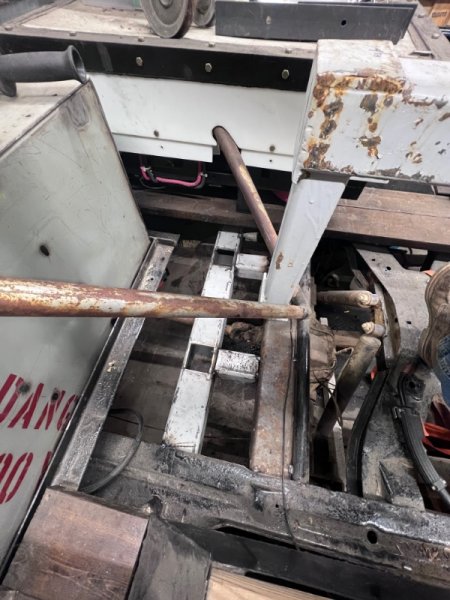
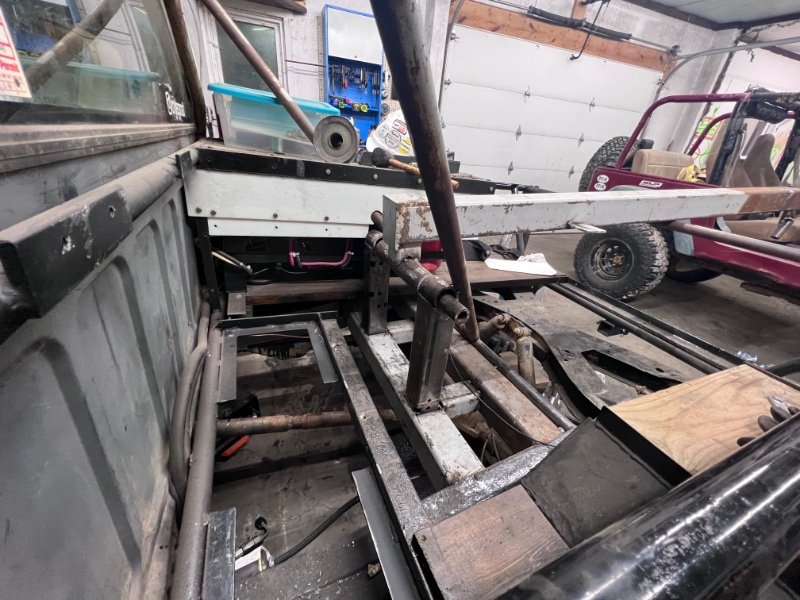
Made some small progress, tossed the reverse camera on a switch so I can kick it on whenever I need it, and tossed the dash back together. After doing so I found that the radio isn’t powering the remote wire for the amps AND the blower switch doesn’t work for the heat, so I have to pull it apart again. Other than that I got the tank back in its place, the bed bolted down, the skins on and the lift cable strung out. It’s to short to reach the end of the boom without the small strap so I need to figure out what I want to do with that, but I need to get 2 snatch blocks to finish that up for now and start working on how I’m going to control the 2 winches for the boom.
-
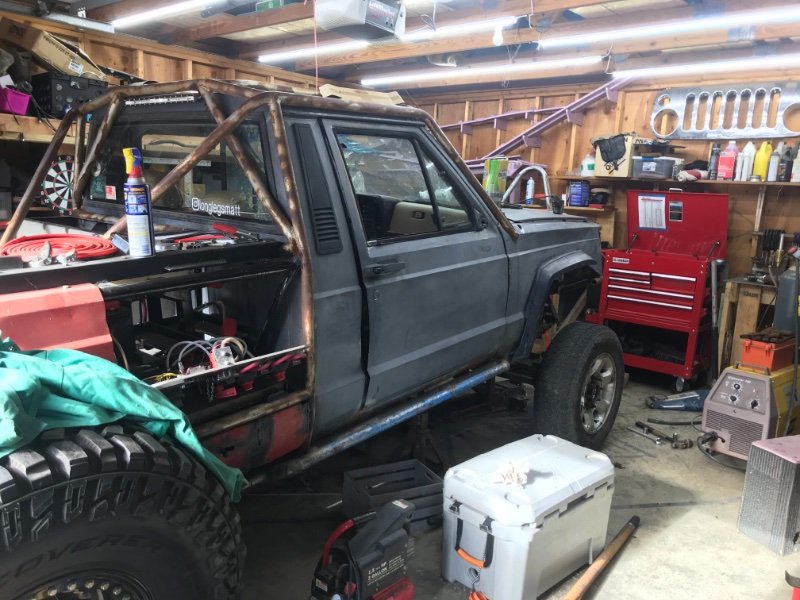
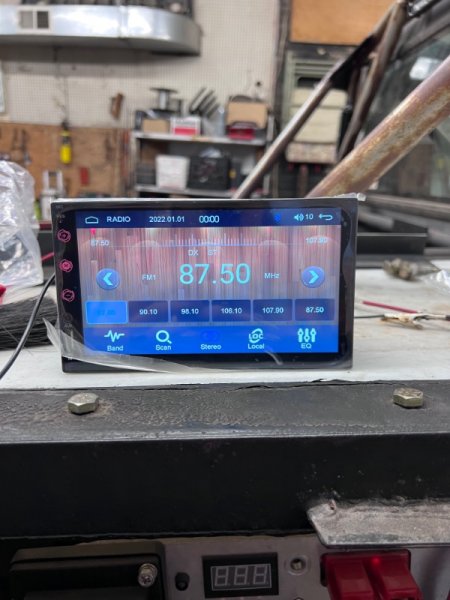
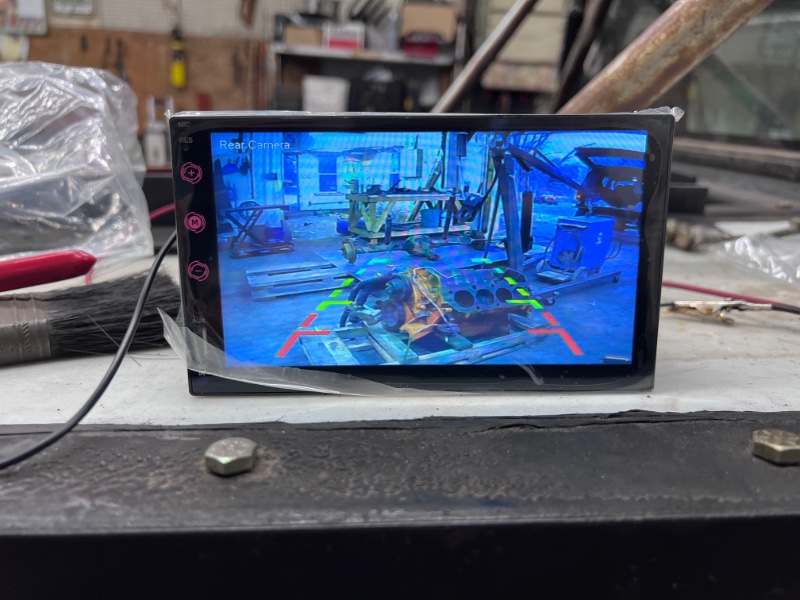
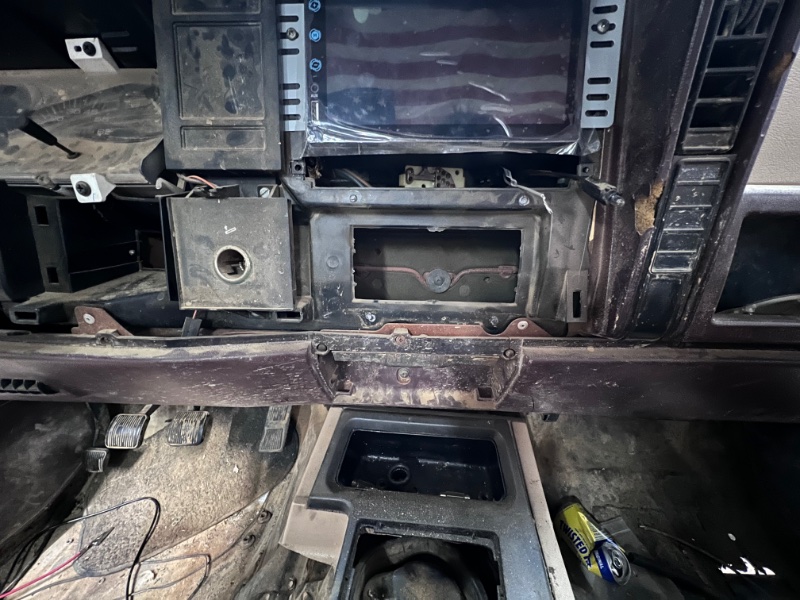
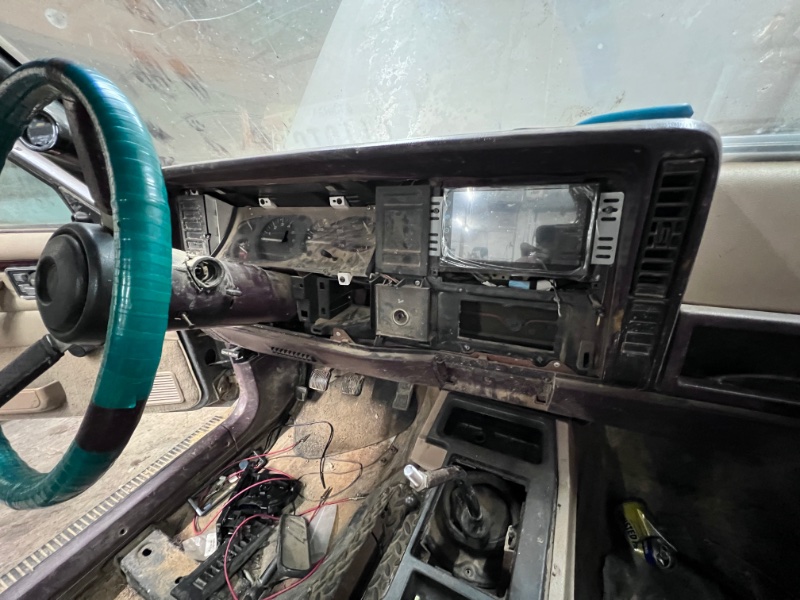
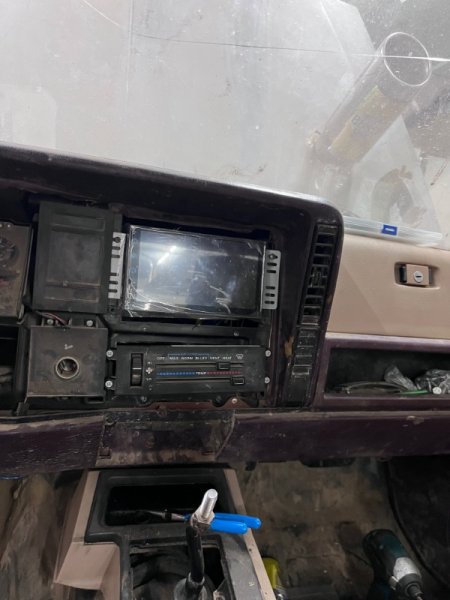
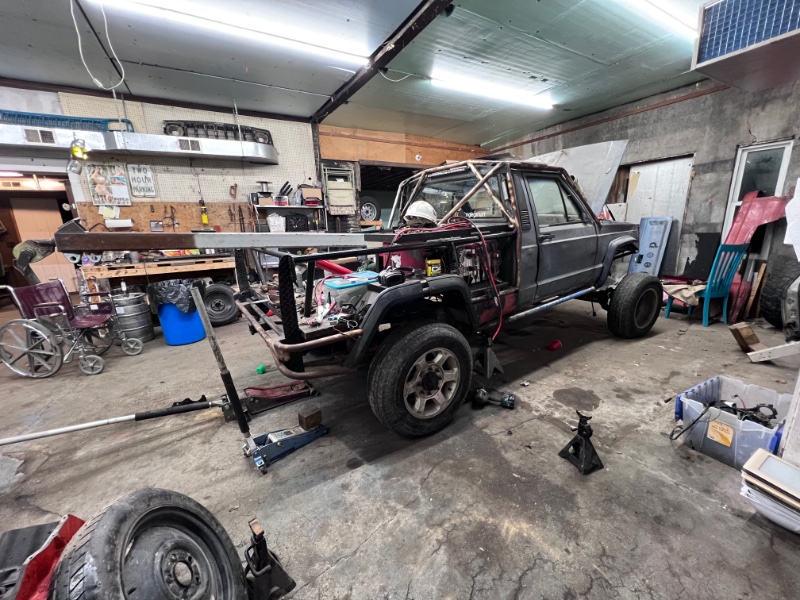
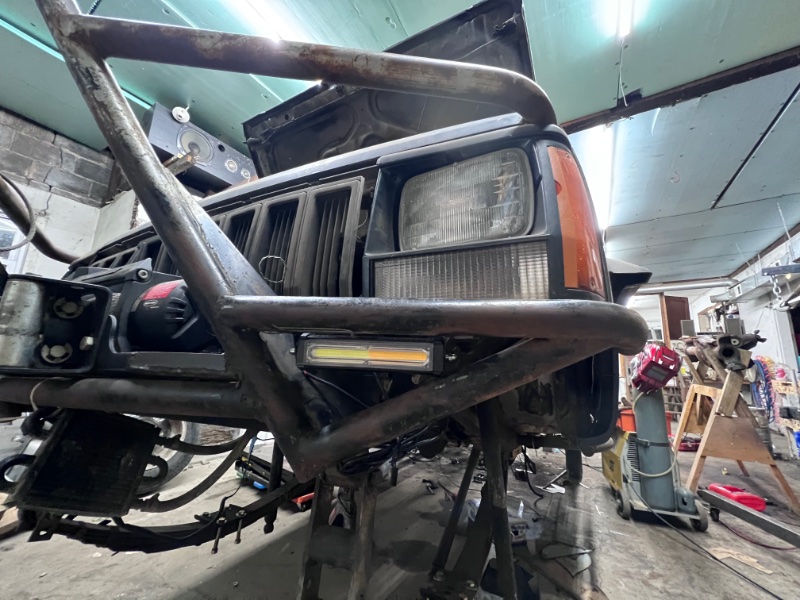
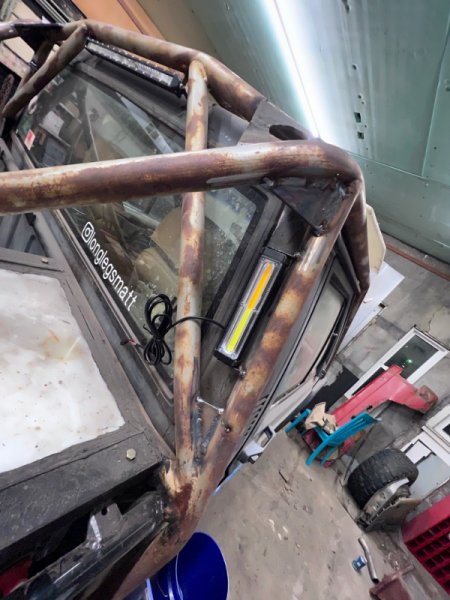
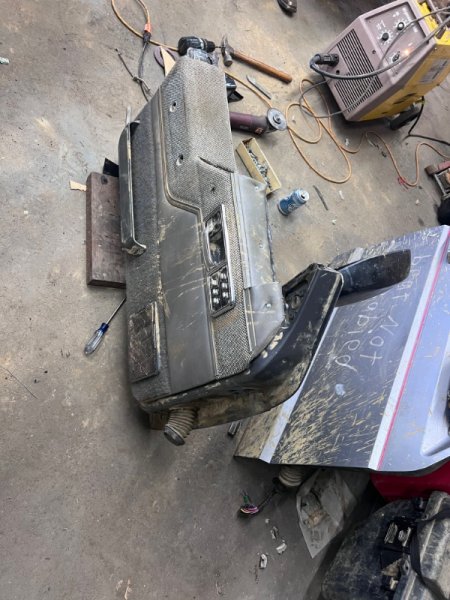
Got a little more work done on it tonight, I added a picture of what was behind the rig and what the camera can see. If you look in the bottom right corner of the screen you’ll see the red handle of the pry bar that I put in the hitch receiver, and on the left it’s pretty much straight back so it should be a pretty useful field of view, especially since I can hang my head out the window and see the entire driverside. I then started working on mounting the head unit, it’s a double din unit and the stock dash doesn’t accept it very easily, I didn’t take a picture of it before, but basically I had to remove the lower vent then slide the heat controls down into its spot. so a little cutting and it kinda fits. While I’m there I found a burned up plug on the fan speed switch though so I’m going to address that so I don’t have to do pull it all apart next winter.

-
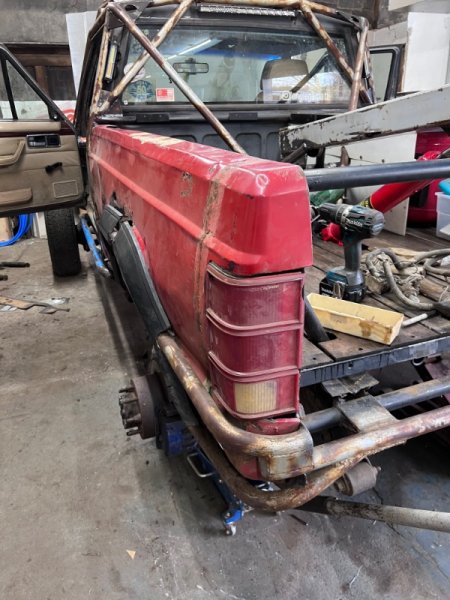
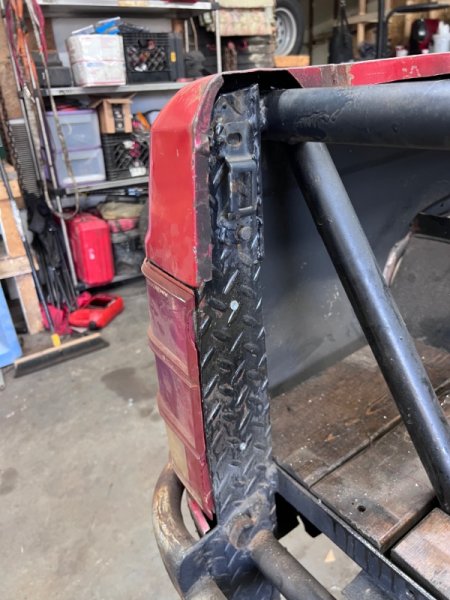
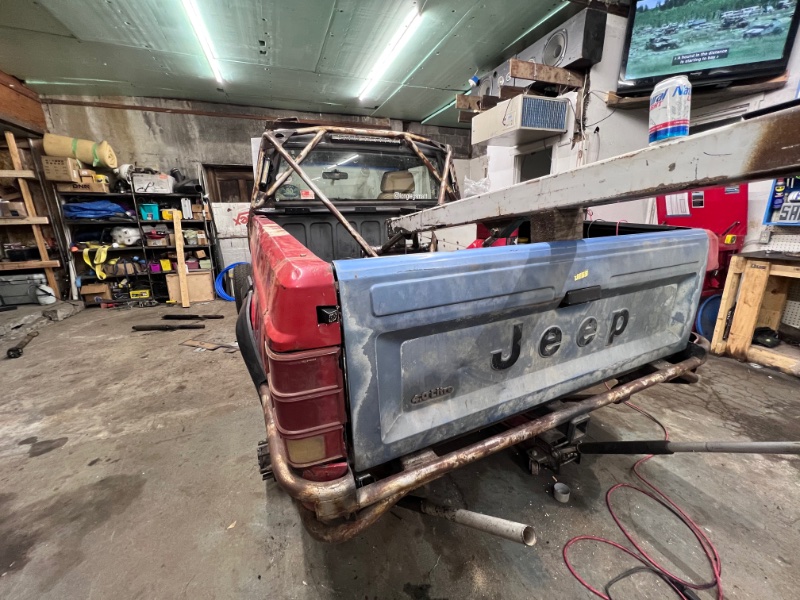
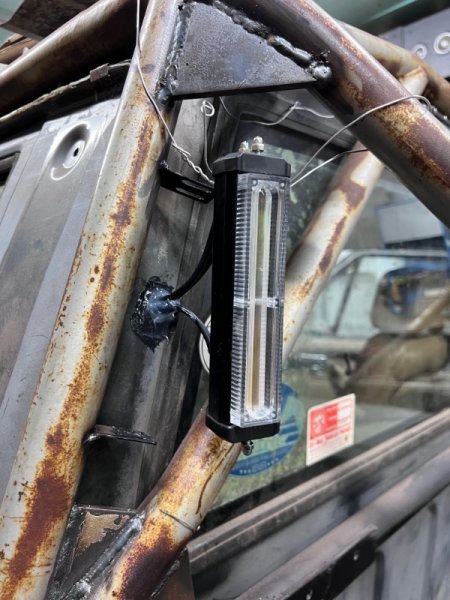
I also was messing around with some of the skins and decided to mount the single tail light that remains, i just drilled through the plates that hood the tailgate and used the stock screws. I then messed a little with the radio, added a properly sized RCA cable for the sub and started trying to plan out the double din head unit I bought. I didn’t make it very far with mounting the head unit but I tested out the backup camera and decided to find a spot to mount it and settled on right above the driverside tail light, I didn’t want it in the tailgate, so I figured it was a pretty good spot. I'm going to add a thick piece of metal to shield it a little and cover the big gap from my poor cutting skills. I was planning to have it wired to a toggle switch so I can kick it on and off whenever I want, not just when it’s in reverse. That will be coming soon.
-
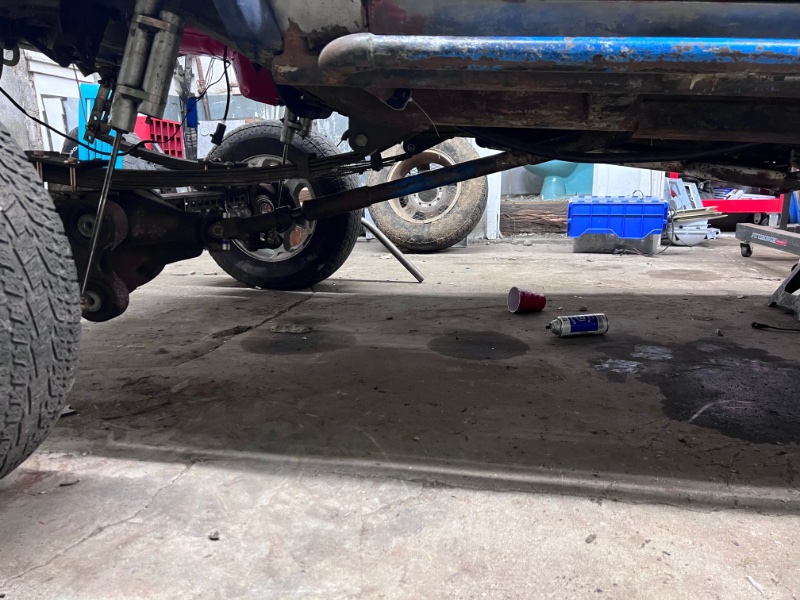
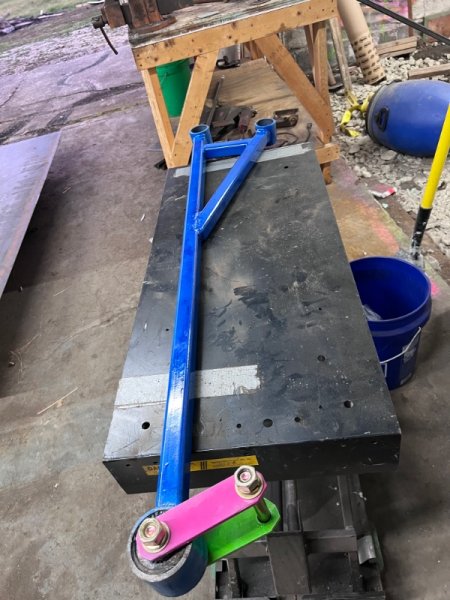
Made some more progress this weekend, got the brake lines run on the rear axle and tossed the tires in it to see how she looks…. Getting closer everyday it seems. next I started building the anti-wrap bar for the rear, I used 1.25x1.25x0.25 square tubing for the body, a 2.5” uniball and three 2.5” poly bushings I had sitting around. In my head I imagined it with 2” square but that 1.25” square was way heavier than I thought and the 2” stuff was super heavy, also it was expensive at around $10 a foot! I never would have thought it would be that much. I think it should hold though. I added some tie downs to the rear axle for strapping down on a trailer, I forgot to get a picture of them but will add it later.

-
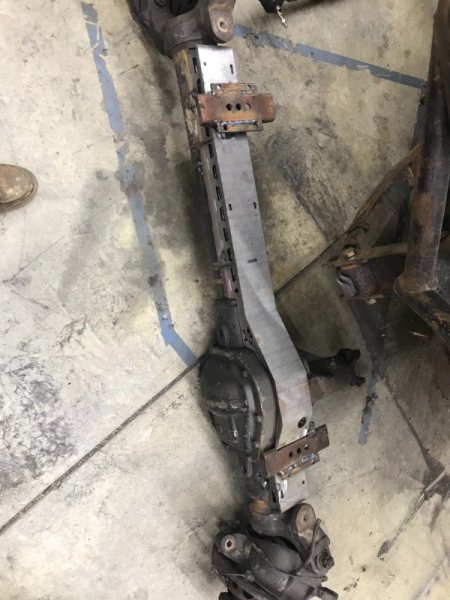
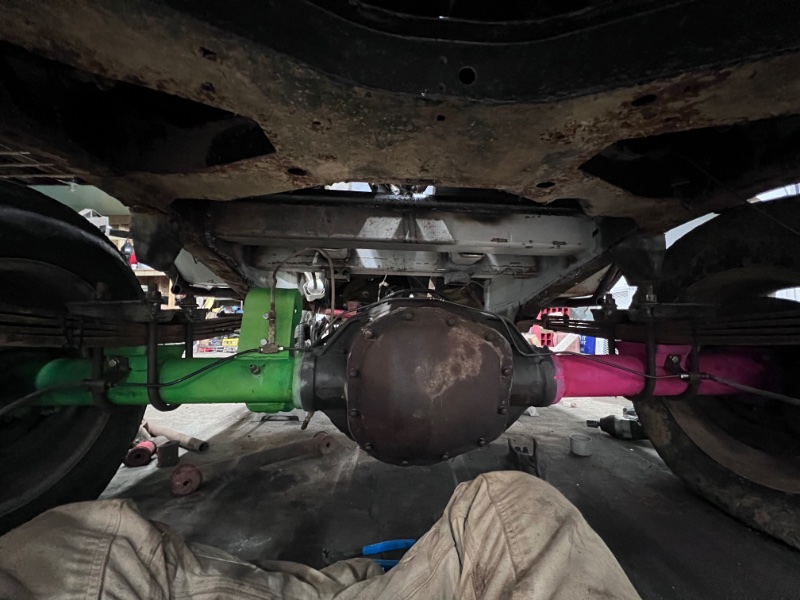
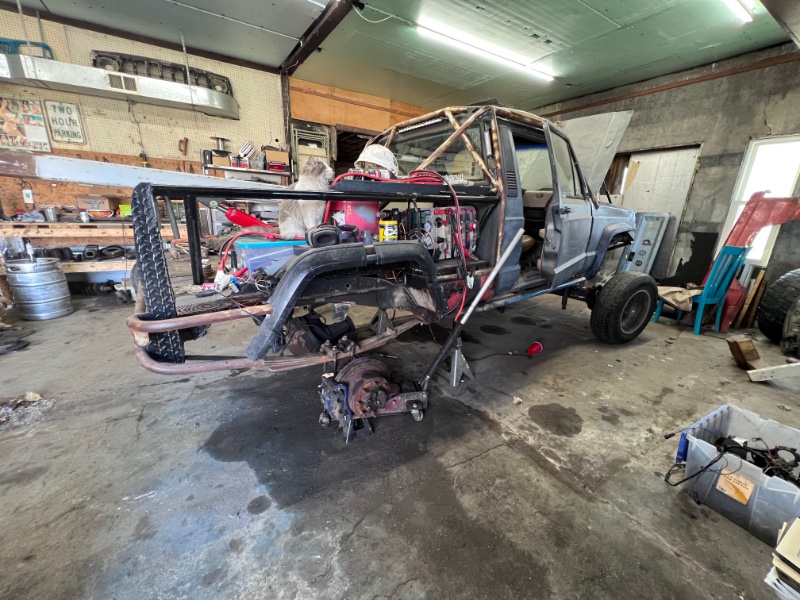
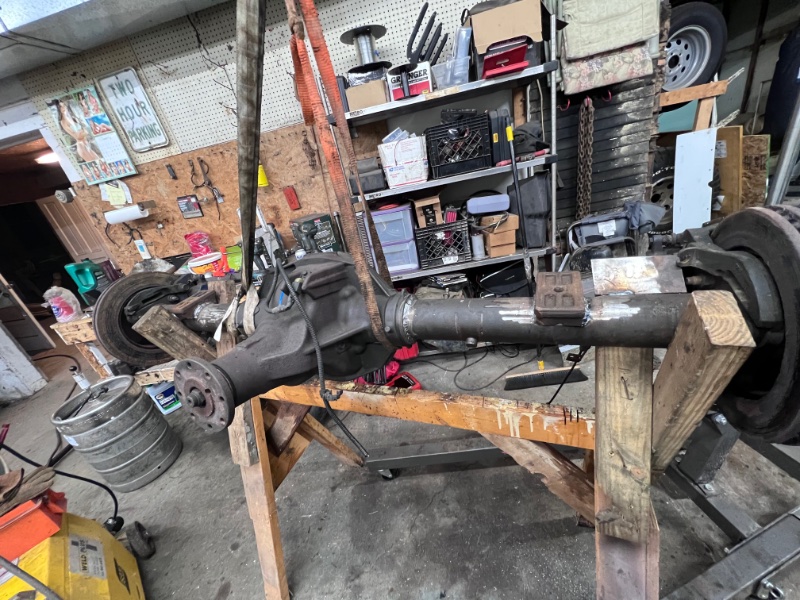
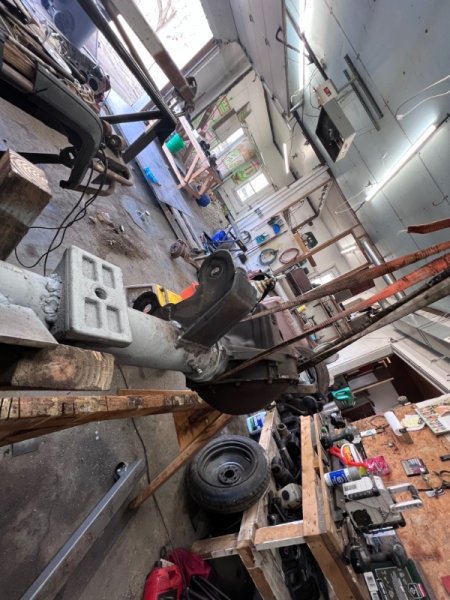
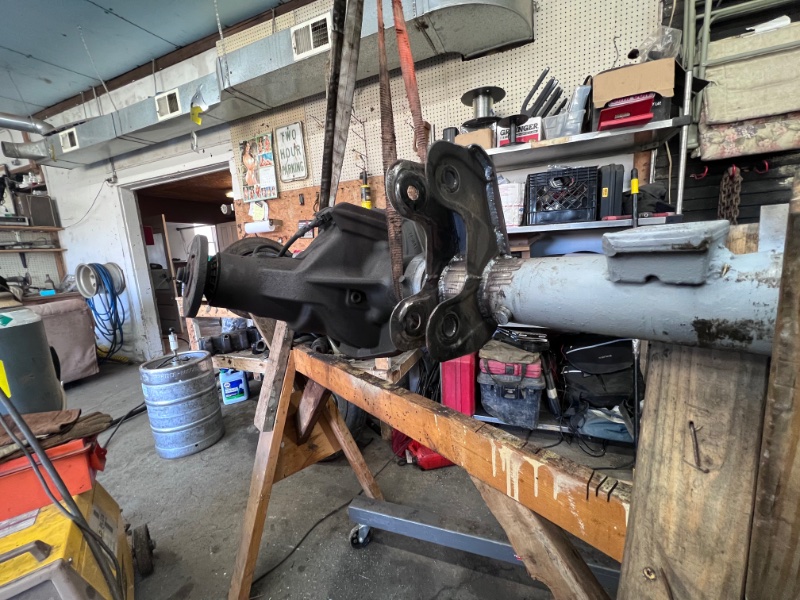
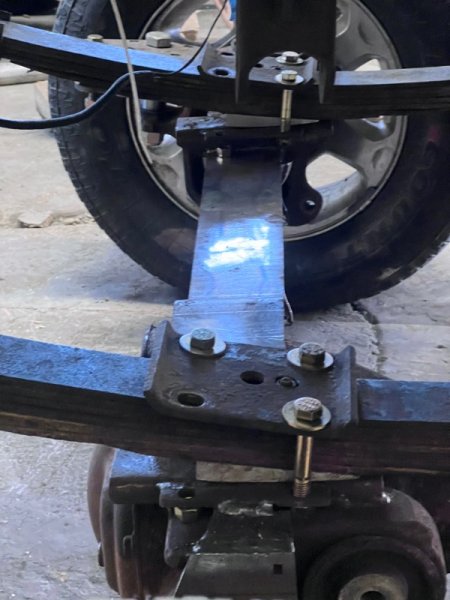
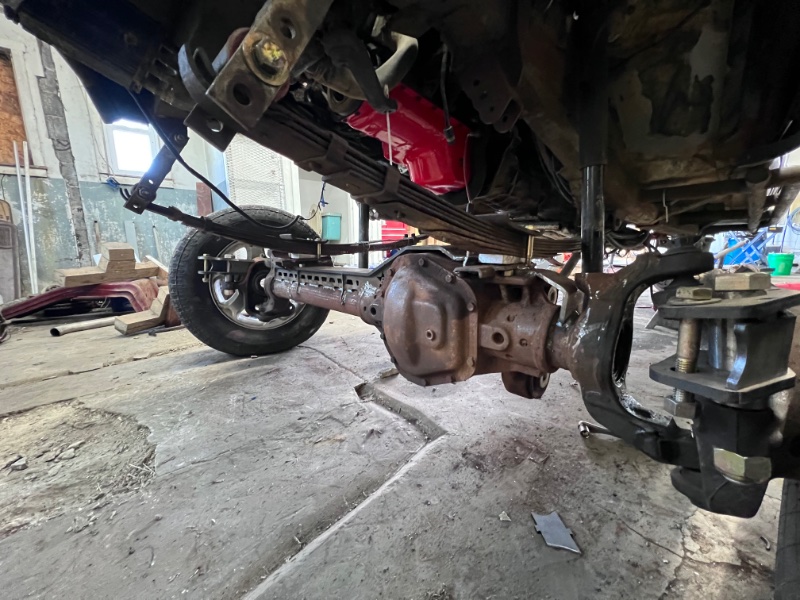
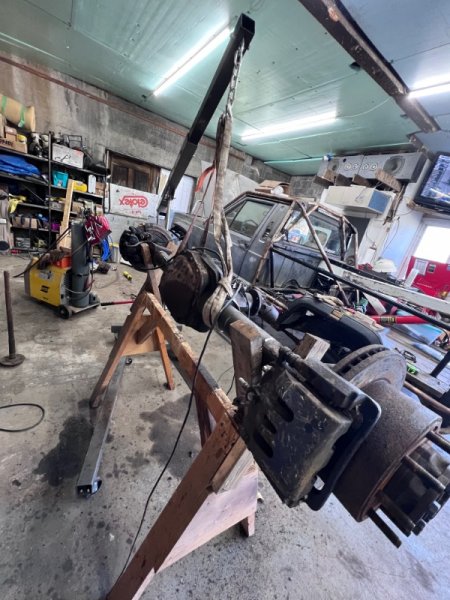
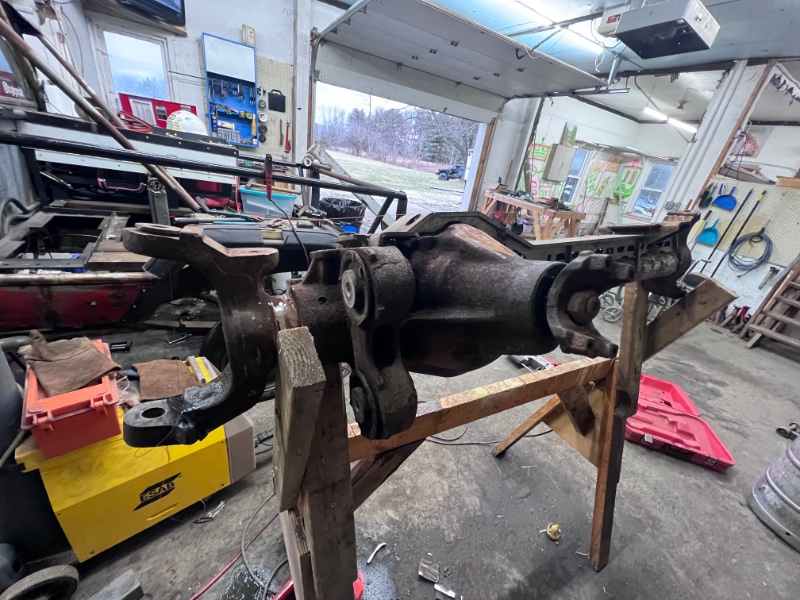
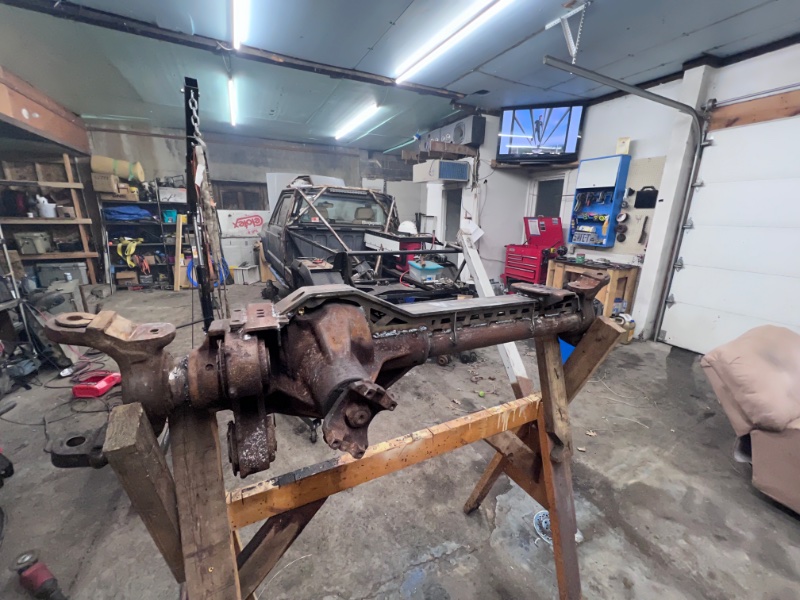
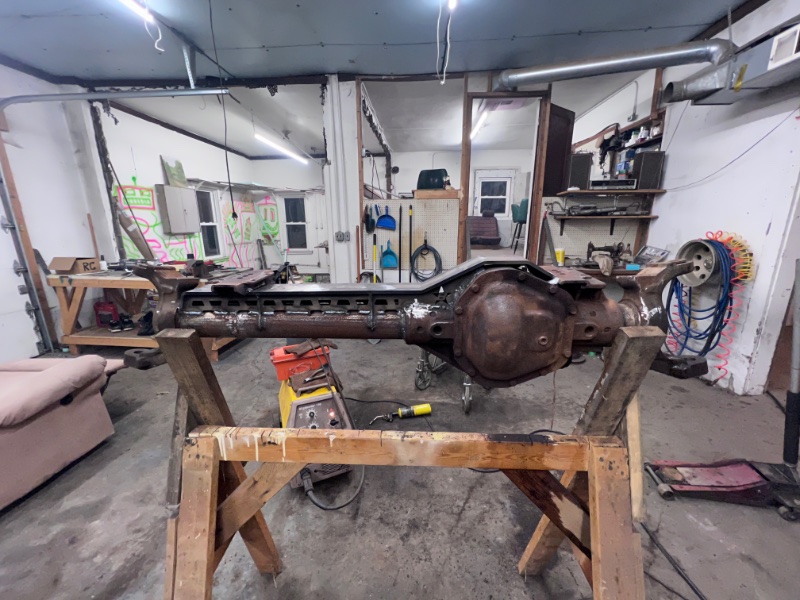
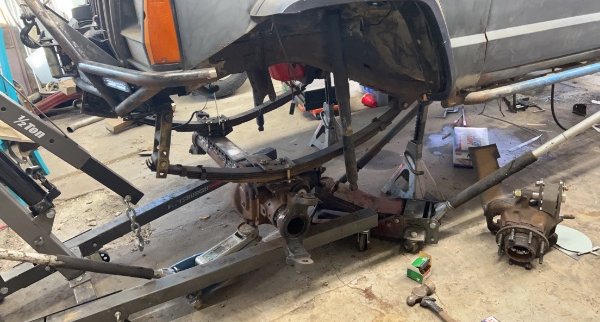
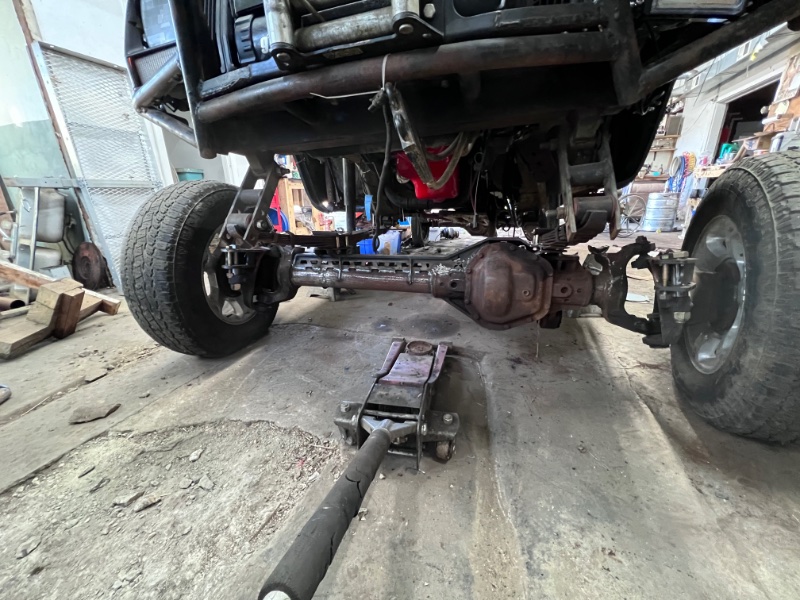
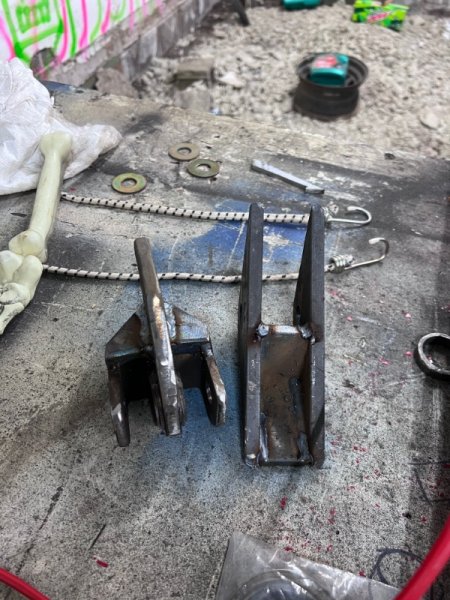
The last thing I got done was I got the rear end most of the way together. I started by pulling all of the dust shields and E-brake stuff off. I reused the stock perches because that’s what I had and I wanted to get it under the unit. I then made an anti wrap mount from a stock ford front control arm and a piece of scrap. I still need to run the brake lines and add shock mounts, but I need it under the vehicle to measure the shock, I have the old ones that were on it that I will most likely reuse. U-Bolts are expensive so I went ahead and chopped the old ones, the threads weren’t deep enough so I made some 1-1/4” spacers to make them work. The spacers are 0.125” walled tubing pushed into a 0.065” wall outer tube with 1/2” washers reamed out to 5/8” I think they should hold up fine, I had all of it laying around the shop so I made it work. I went ahead and painted it also…. Gotta watch out, Cosmo and Wanda are always hiding in plain sight…. (Cosmo and Wanda were from a Nickelodeon cartoon called “The Fairly OddParents”) also, the rear axle is a sterling 10.5 out of a 2006 f250, it has 3.73 gears and an LSD, I currently have zero plans to change any of that, I want to get it going then I will handle gear and lockers, I will most likely just weld it for the time being


-
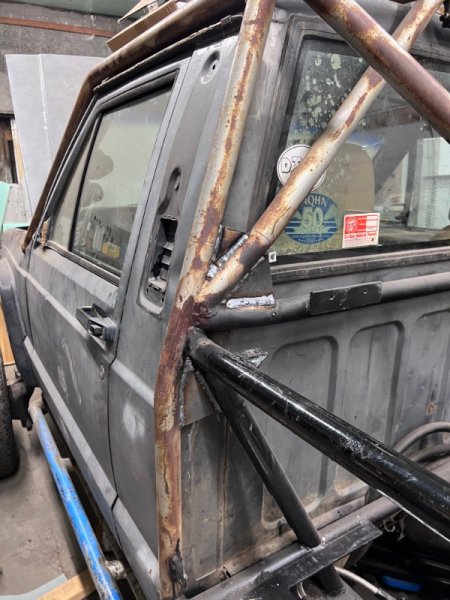
Next thing I got done was that I got the strobes mounted, it’s basically a real tow truck now. The control module has a switch to turn them on then the button just cycles through the different strobe patterns, i but it on B pillar because it was easy to route all of the cables and can easily be reached from outside the vehicle if I need to turn them on from outside of it.
-
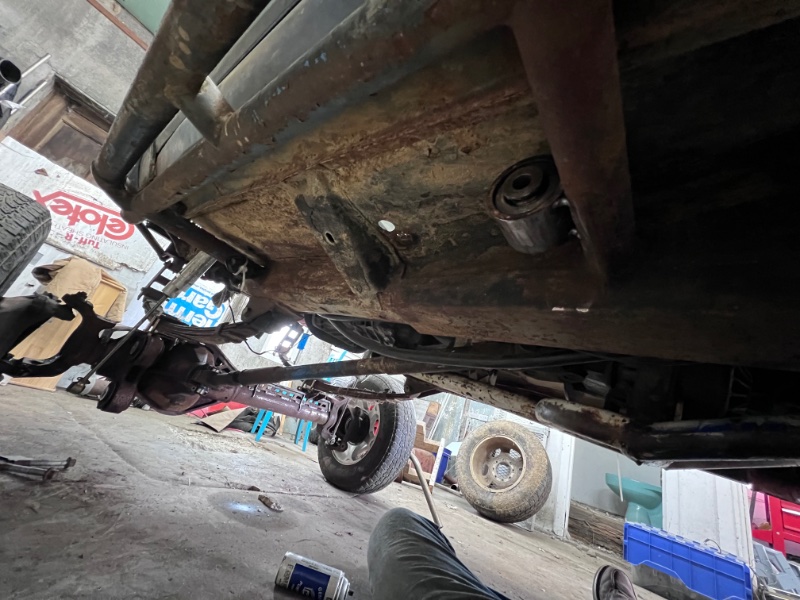
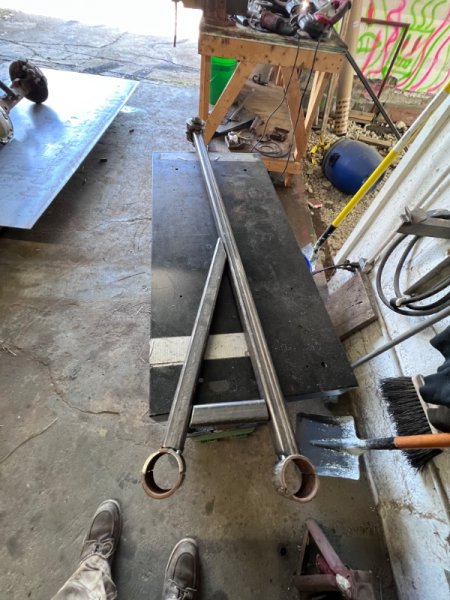
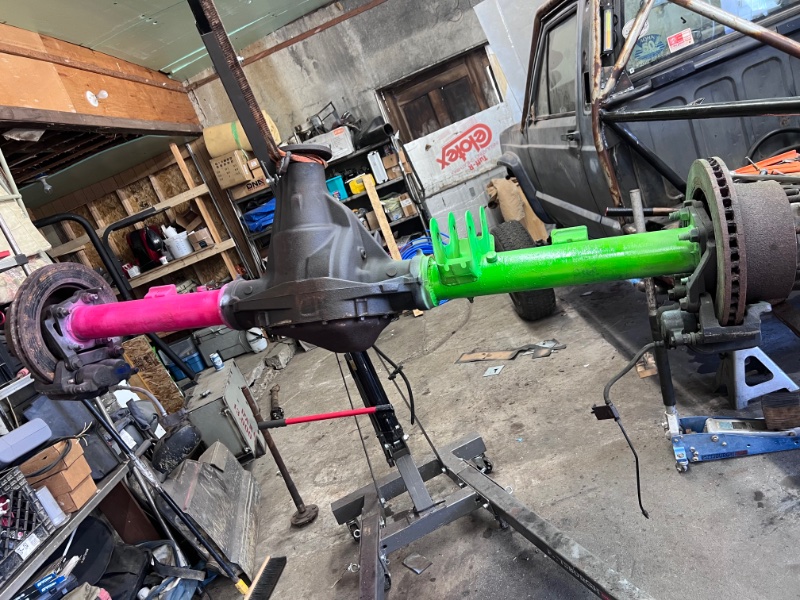
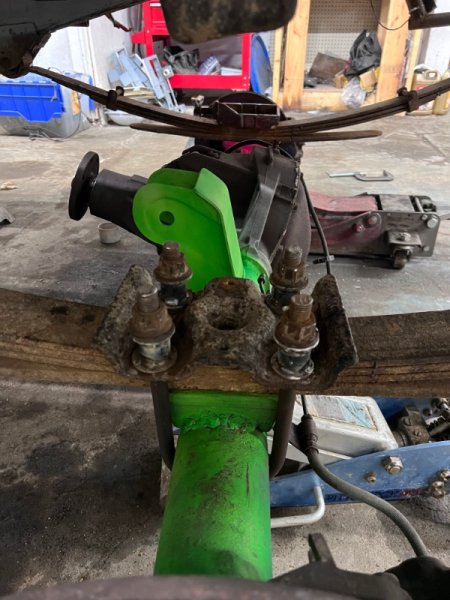
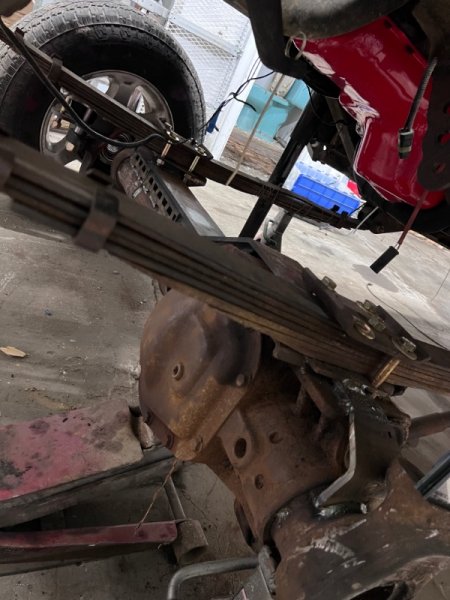
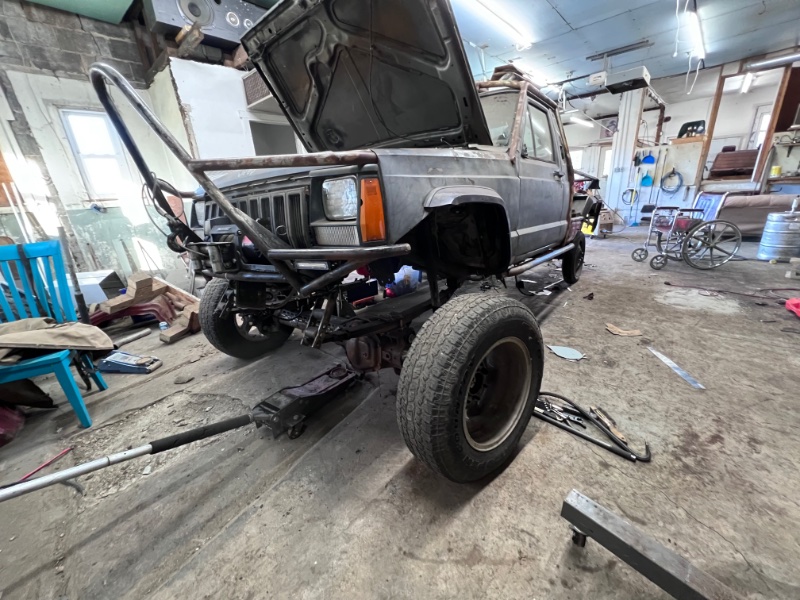
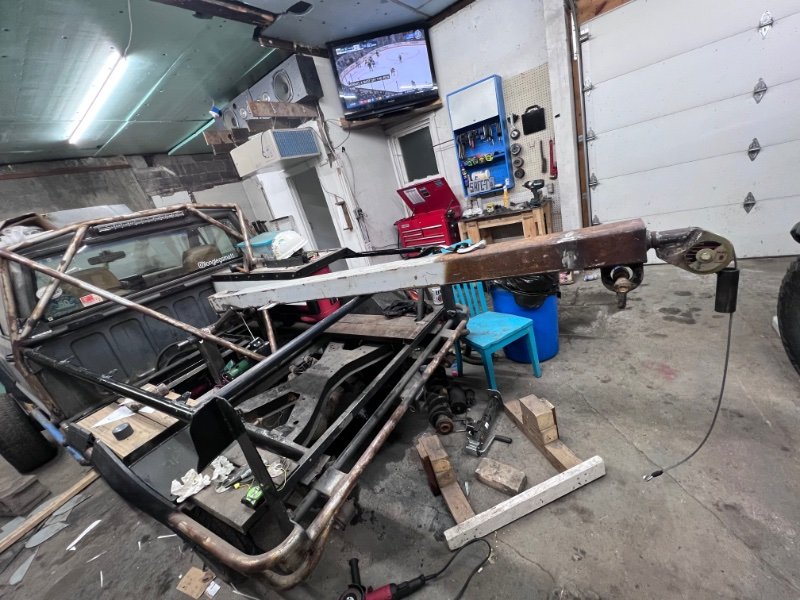
Got a lot done on the rig this weekend! I started by getting my leaf spring shims in for the front, they’re 6 degree shims. This set my caster angle around 9-10 degrees. One thing I wasn’t expecting though was that they were curved on one side, I’m assuming this was for spring under applications…. I just ground the curve down on both of them and tossed them on. I’m not sure exactly how I feel about the whole front setup at this moment, but I think it will work for the time until I get the cash to 3 link it. I’m going to use the front section of the stock ford control arm to make an anti wrap bar, it will also help protect the driveshaft from anything and hopefully save the springs because the center of the axle is not centered with the leaf. Should be alright though.

-
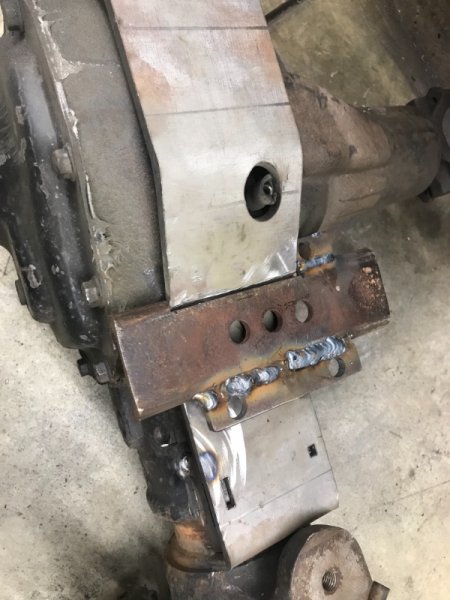
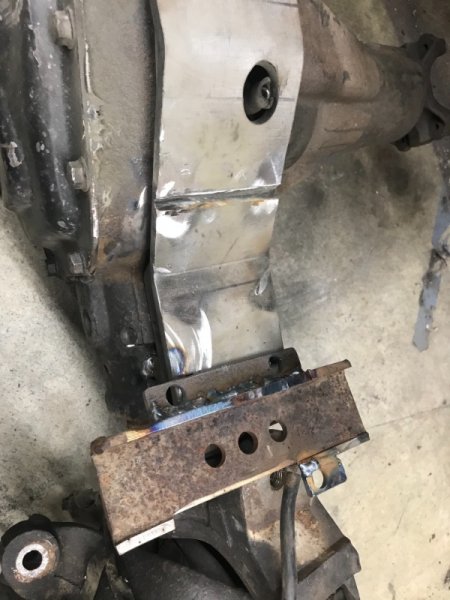
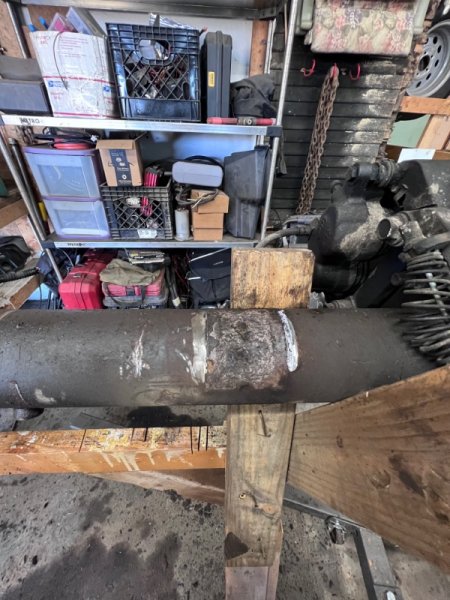
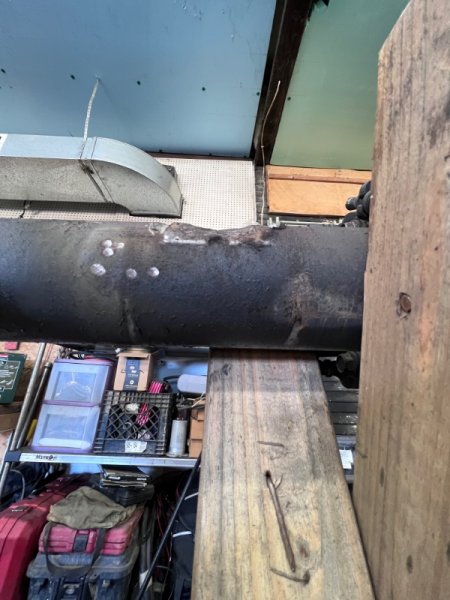
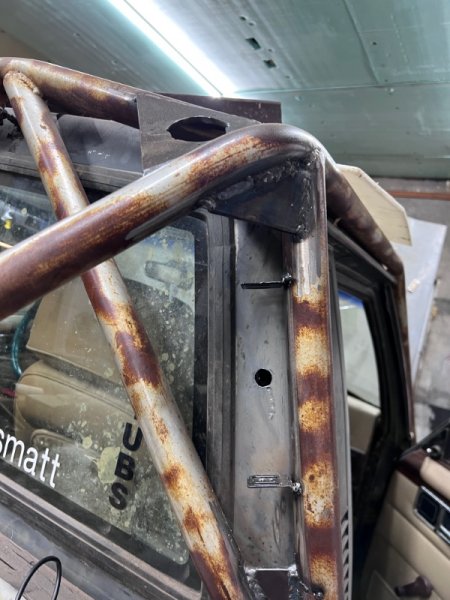
Made a little more progress on the rig, added a small section on the driverside of the truss to connect the perch to the short side axle tube. I did this because I was worried it might crack off the cast section easily and figured it would have a better chance of holding if it was taken down to the mild steel tube…. hopefully it works. Next I got the wood for the bed cut and stained. It starting to look more like forward progress now which is a good feeling. I snagged a 2006 sterling 10.5 from the junkyard for $160 with good brakes, which I thought was a pretty dang good deal so chopped the mounts off and started cleaning it up to go in and GEEZ the rust spots under the perches are crazy deep, it’s pretty alarming at how bad they are. Other than that I also started routing the wires for the work lights, drilled some holes in the cab to fish the wires through, then some silicone to seal the gap. I’m thinking this should be good enough to keep out most of the water over time. I’m not exactly sure where I’m going to mount the small controlled for the lights, but I’ll figure it out this weekend, I’m thinking I want it in a spot that I can easily reach when I’m outside the seat but we’ll see how it goes.
-
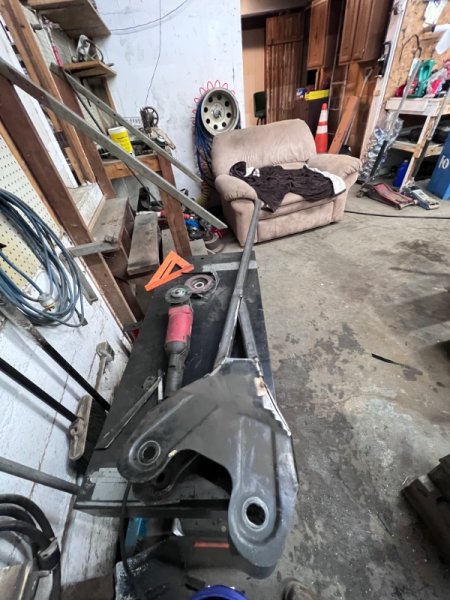
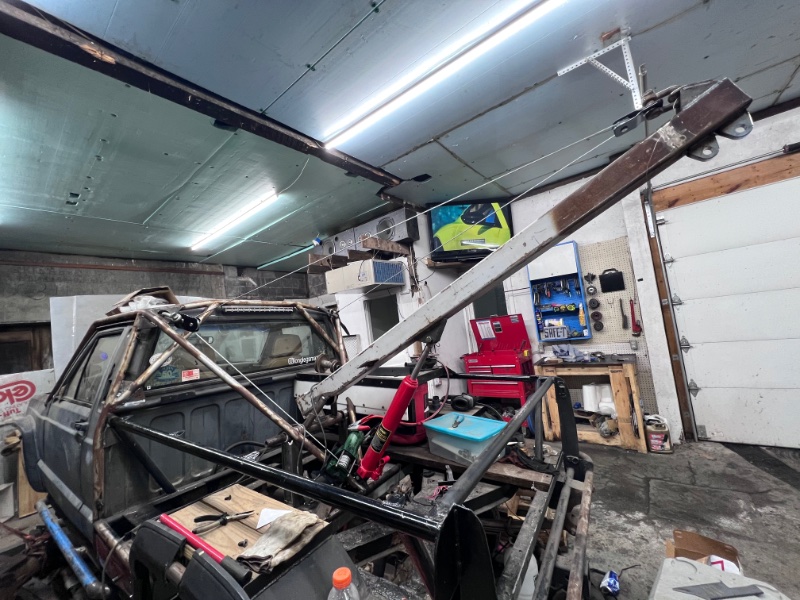
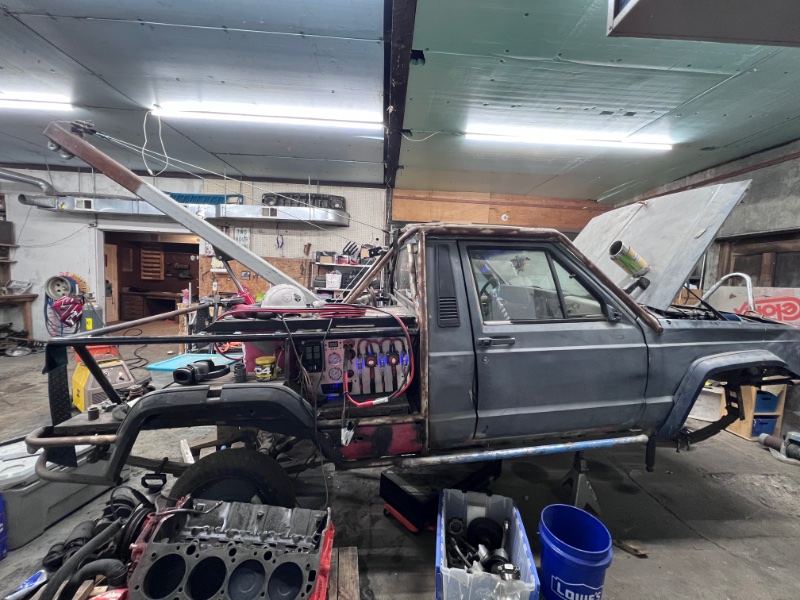
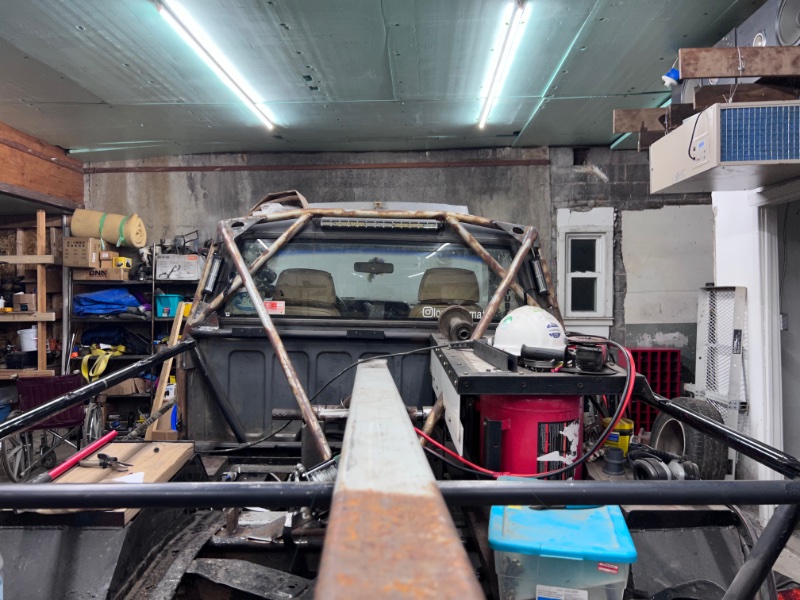
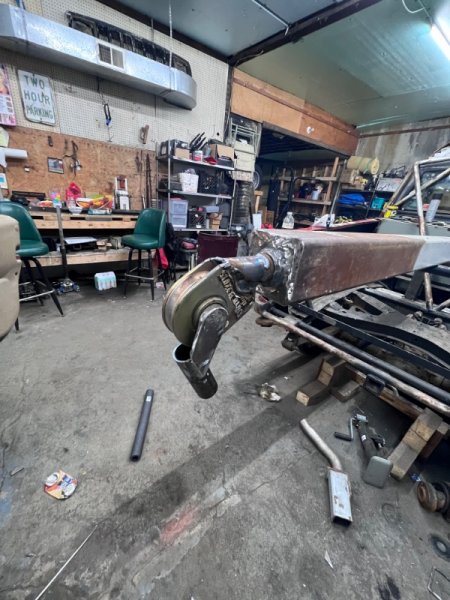
Made some good progress on the UNIT, got most of the boom welded and Frame plated in the rear (forgot to take pictures) but I started working on the front end a little…. In an earlier post it had a front end under it, BUT I traded my buddy for his Dana 60 with the cast section because I’m planning to use the bushing mounts for an anti wrap bar, got the truss fitted and welded on, thinking I’m going to add a little more to it because I currently have the driver-side perch welded directly to the cast and I’m worried about that being a weak spot, so I’m thinking I’ll continue it over to the axle tube. I added the strobes to the front bumper and then tossed the axle under the rig to see how she fit. The pinion angle is way off, but was planning to fix that with some angled shims. One step at a time, she’ll get done.

-
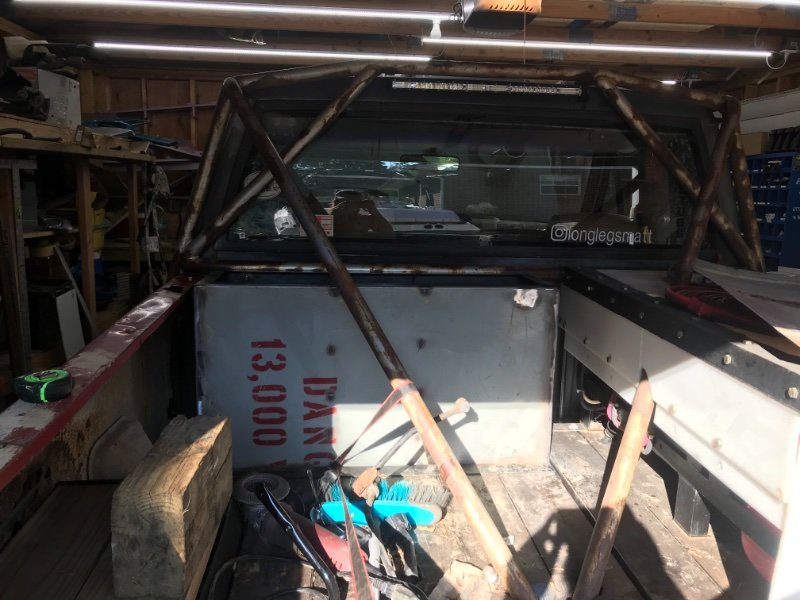
Little work on the rig, added some work lights on the back, some gussets on the cage, and a second winch mounted in the back. Slow progress, but it’s getting there I need to start on the front axle again soon.
-
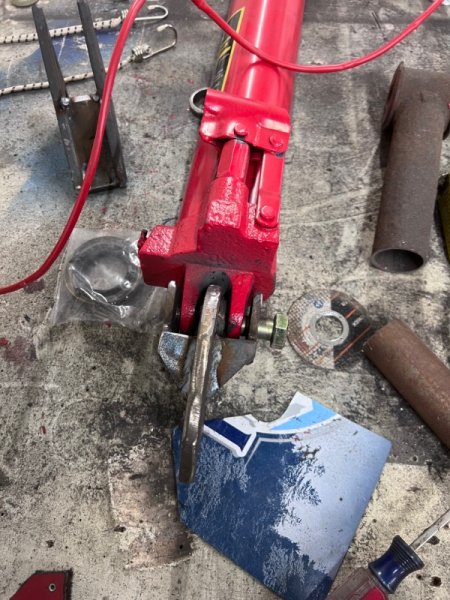
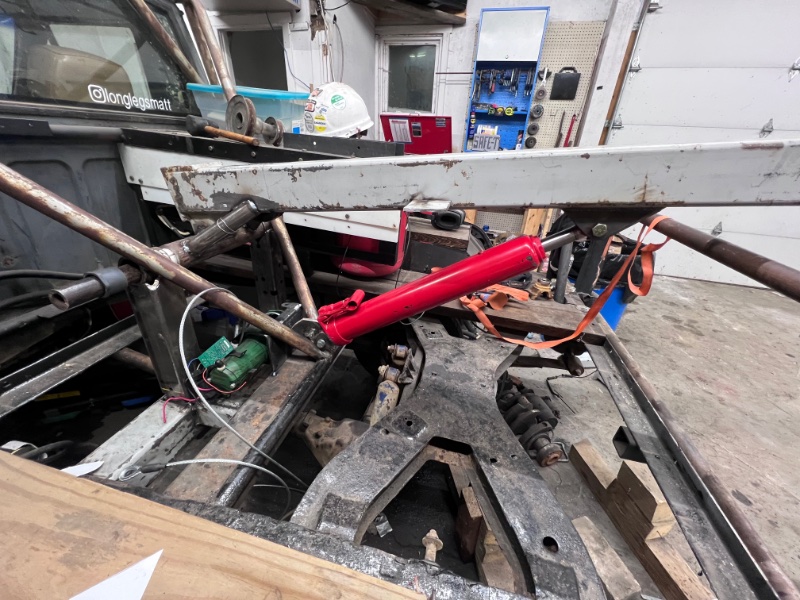
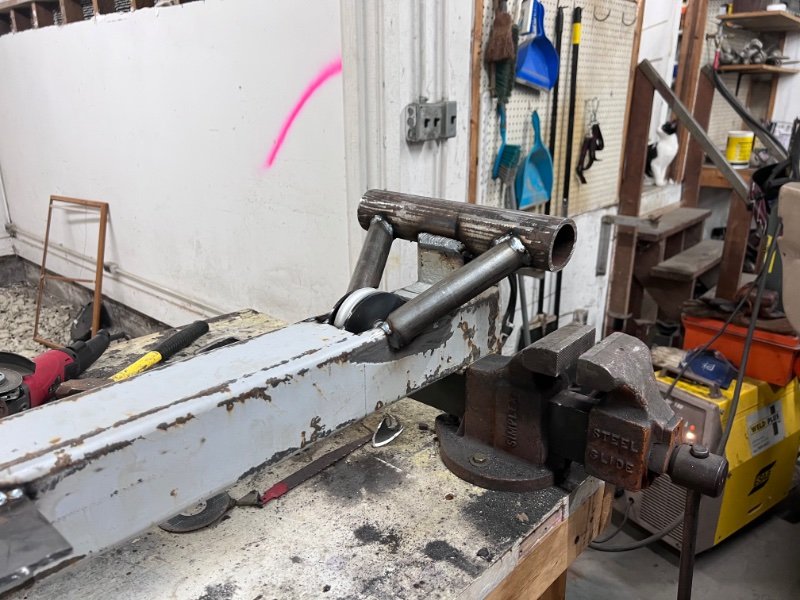
Made a little bit more progress on the TOMANCHE, got the mounts started for the hydraulic ram. Added a mount on top of the boom so I can chain it to the cage. I’m still worried if it’ll hold the weight of a jeep, I think It’ll mainly be a RZR and RAIL BUGGY recovery truck, should handle smaller units just fine. Hope to get some more work done over this upcoming weekend so more updates should follow.
-
You’re not wrong! I’ve been trying to just keep the ball rolling with it.
-
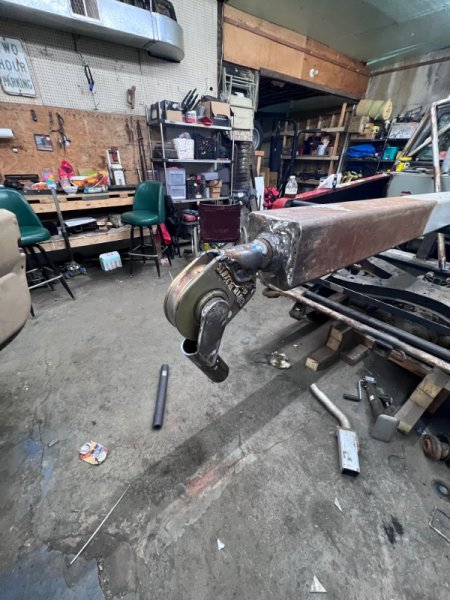
Made a little more progress on the boom this weekend, it’s slowly getting there, feel like it might be done at some point
-
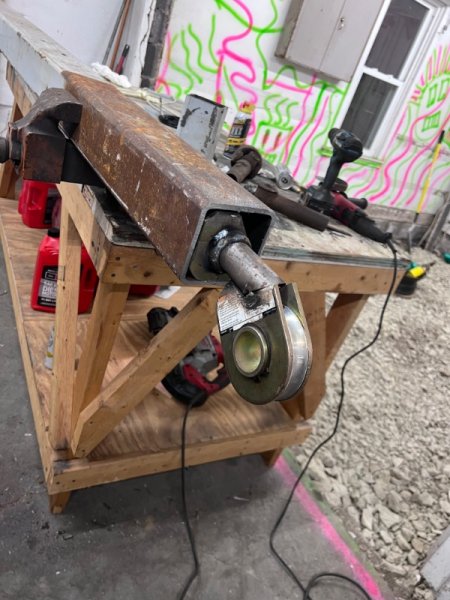
So after a bunch of web wheeling and some spare metal laying around I started on some extra stuff that wasn’t exactly needed, but I think it’ll be pretty cool.so I started on making a boom for the back to make it a small tow truck, prolly end up making a tow bar for the back at some point, but the main reason for it was that I had all of the steel sitting around and I was going to add a cross member in the back anyways so I just decided to make it a little larger, the plan is to have a hydraulic jack for the lift portion and a 3k winch for cable portion, prolly have some chains from the tip to the cage corners also for a little extra support, but honestly I’m mainly winging it. Feels good to be working back in the shop thought, so anything’s better than nothing at this point.

-
So it’s been awhile since the last update, but I’ve gotten back on it the last two weekends with some new found motivation from a weekend of wheeling with my brother down in Tennessee.

-
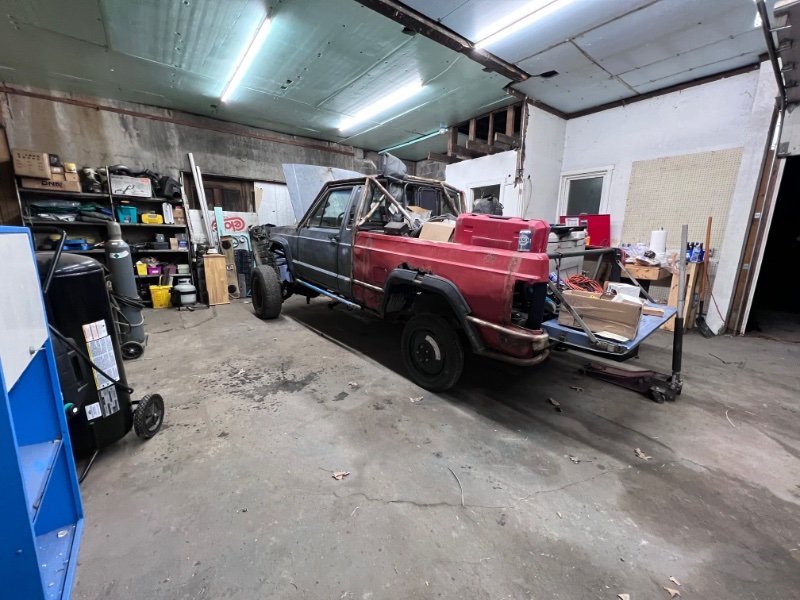
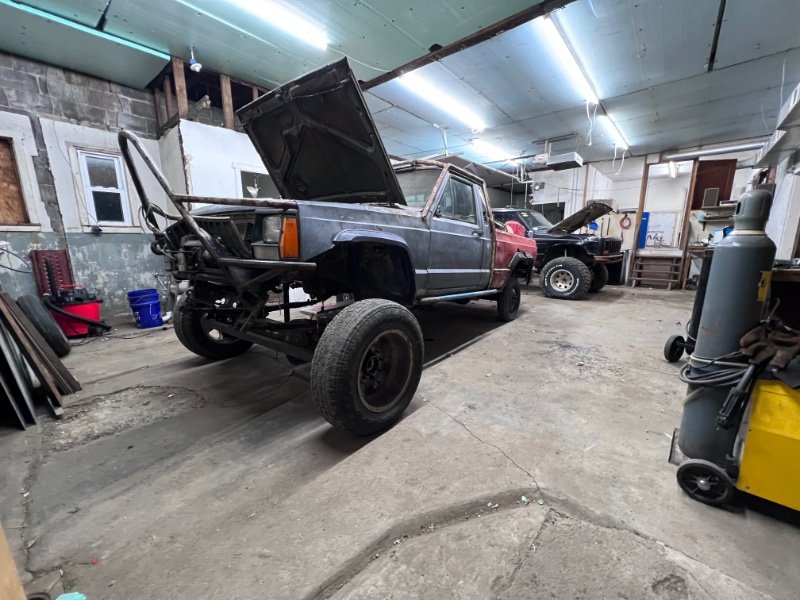
It’s been awhile since I last posted anything, but don’t worry, the rig is still around. It’s in its final home (I hope) and will hopefully get loved on after boating season has past. I did snag some doors for it and went ahead and chopped one for it, charged the battery the other day and listened to the radio while drinking a Busch light…… one day she’ll be ready I just hope I’m ready for that day.
-
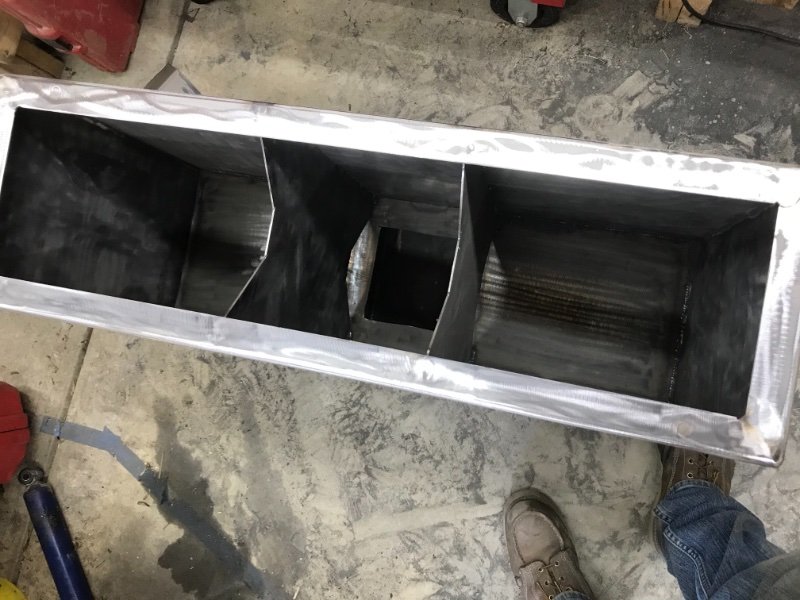
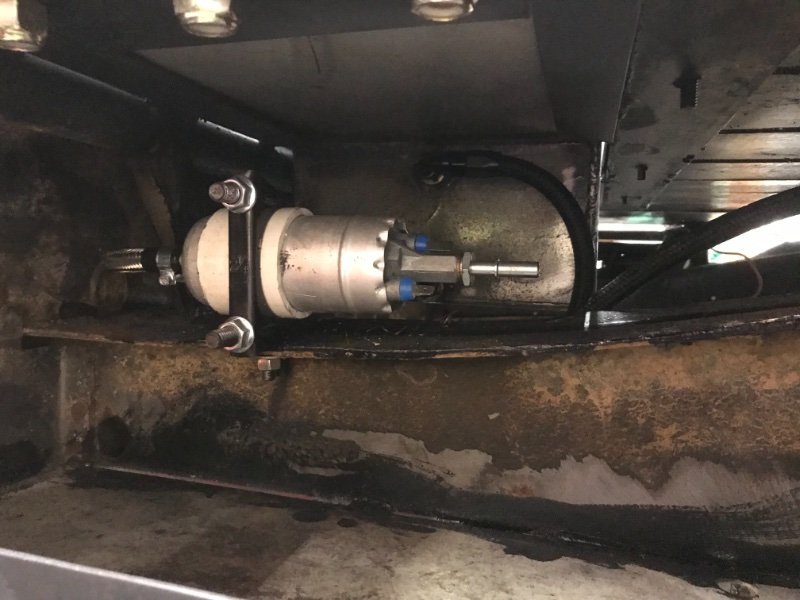
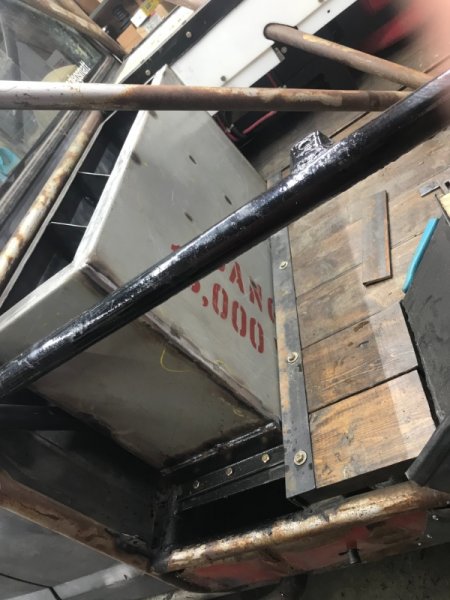
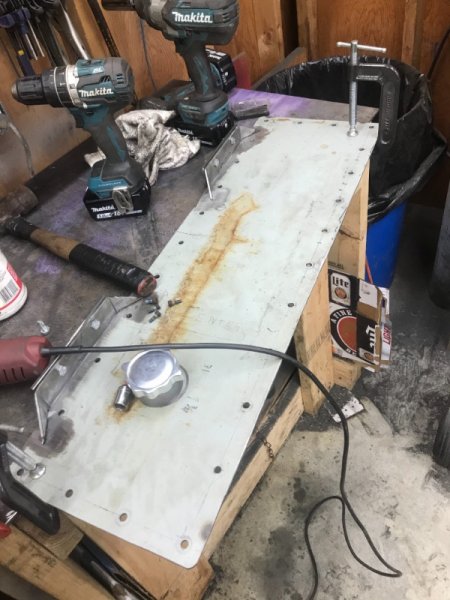
Got some small finishing things done, 1/4npt bungs with some brass 90s threaded into them for my “fuel gauge” there will be some clear 1/4” tubing connecting them for a sight glass, also got a fuel pump mount made out of an exhaust clamp and some of the lines connected to the tank, still need to clean out the tank and final inspection to make sure there’s no holes but the project is moving right along!


-
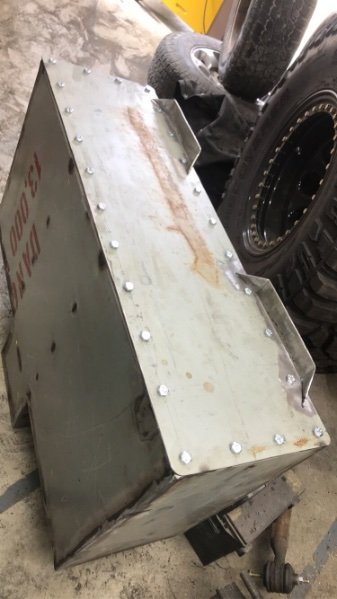
It should be about 33 gallons if my maths are somewhat close so should weigh about 250lbs full!! And that’s without the weight of the tank! And thanks for looking out, I haven’t looked for any sealant yet but I figured there had to be something out there for the job.... I just have to find it now!
-
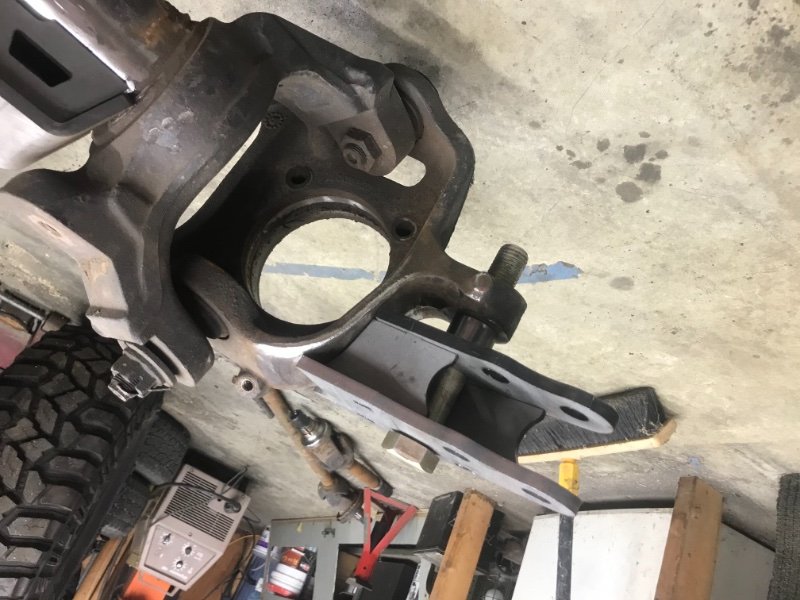
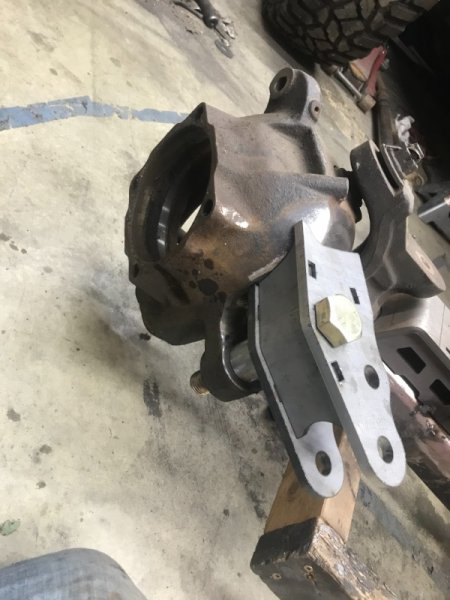
Also I made a little progress on the front axle, got the knuckles taken apart and drilled for the Barnes4WD high steer arms, the spring perches are still under review currently as I’m not fully sold on their mounting, in an attempt to not move the currently spring on it this is about where they have to go, I’m going to look at it a little closer when the fuel tank is finished up. But progress.


-
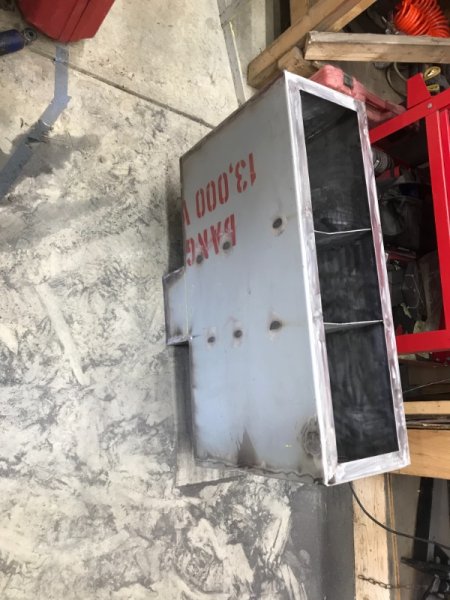
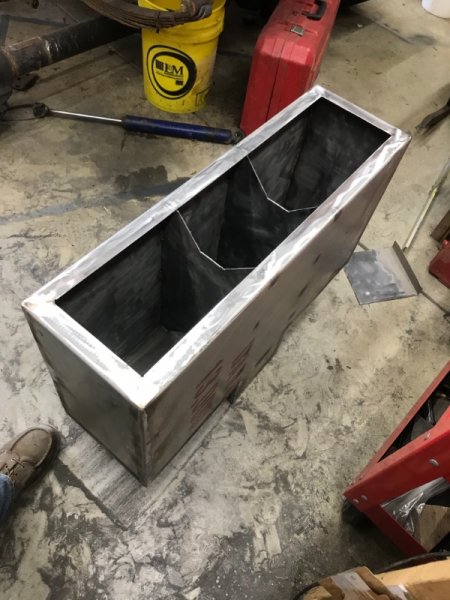
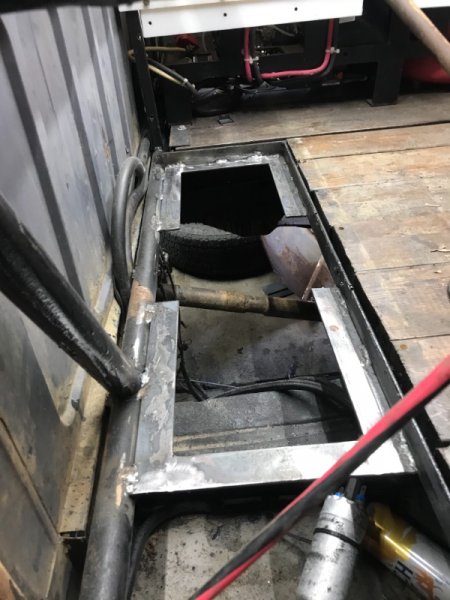
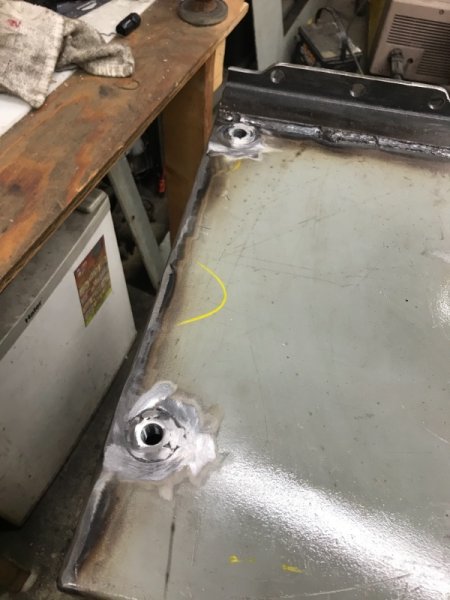
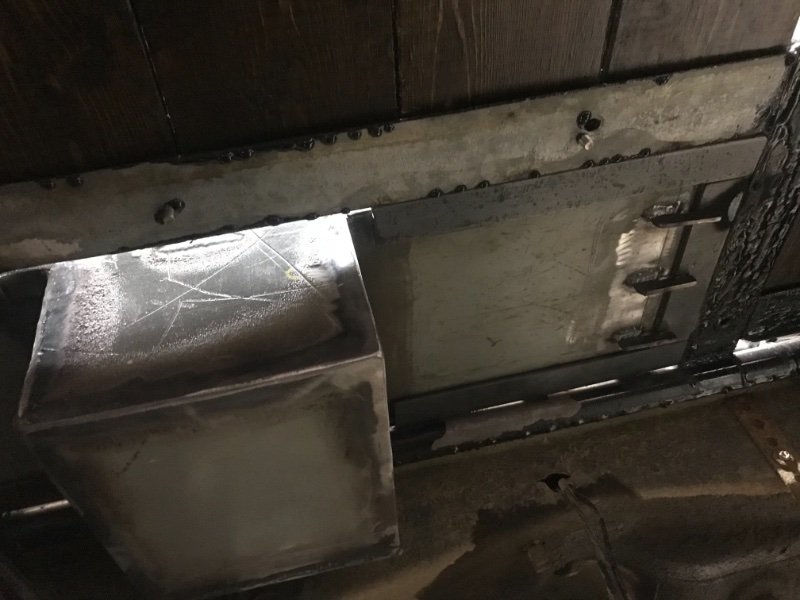
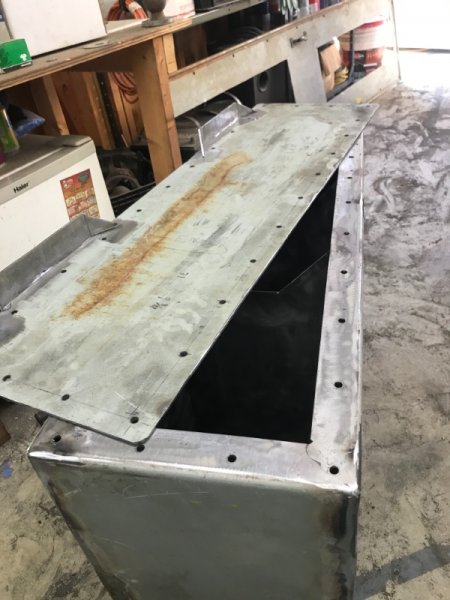
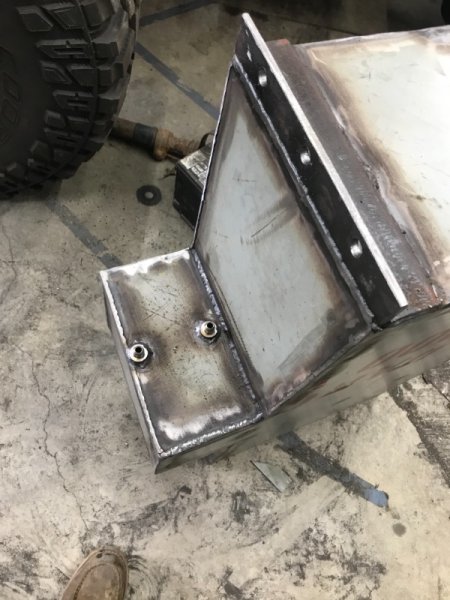
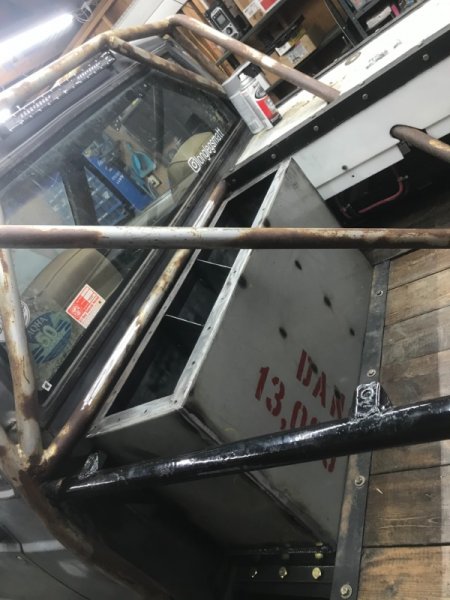
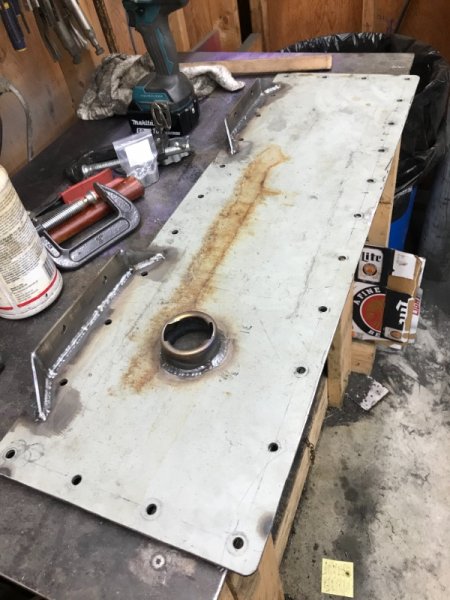
The fuel cell is just about finished up, in the first picture you can see how it’s being held in, the idea was to make it somewhat easily removable if I ever need to.... I most likely won’t ever take it out because it’s about 60 pounds without the top plate! But I have the option. The plan is to use a lot of RTV to seal the top in place and I’m thinking I might add some 1/8” npt bungs to make a level gauge out of some clear tube, not sure if I want to take it back out though. I clear coated the whole tank and painted the mounts so gotta clean it out and glue it up, then it’s onto finding a forever home for the filter and pump!

-
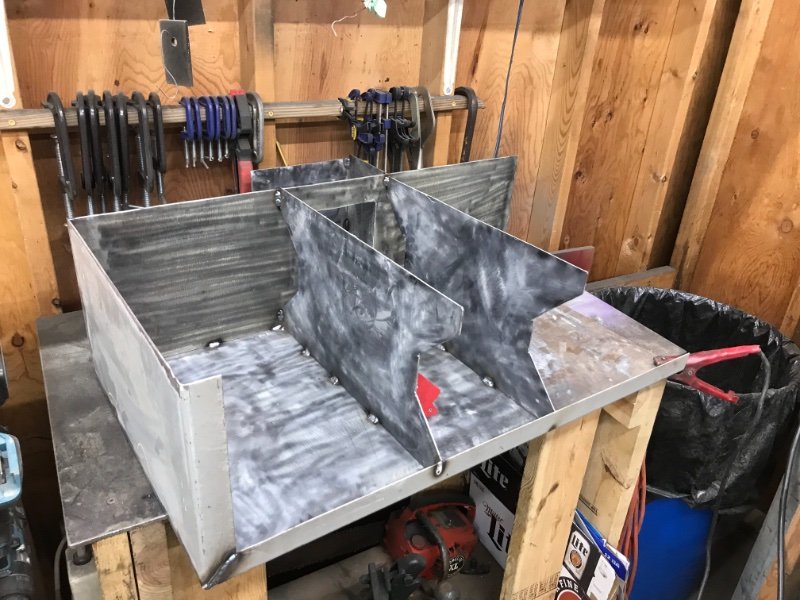
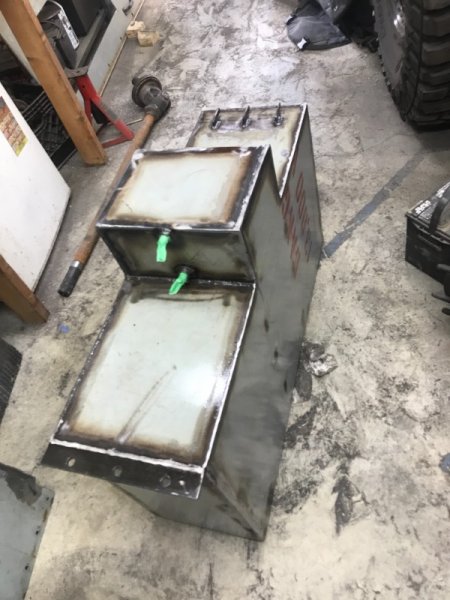
Finally had some time to work on the beater, started with getting the axle cleaned a little better to tack the truss on. next step was to mount the leaf spring perches, still need to finalize it and figure out how to add a forth bolt on the drives side, but before I did that I moved onto the fuel cell, it’s right about 32 gallons if my calculations are correct and I know it’s steel but that’s all I had so that’s what I get. The plan is to make a top plate that will bolt on and I will try to seal it with some type of RTV, I got a good start on the mounting platform for it. I’m trying to make it as stout as I can considering it’ll be almost 300 pounds when it’s filled so i don’t want it going anywhere. I’m hoping to finish up the fuel cell this weekend and work on mounting the fuel pump and filter. Feels good to be making progress!