

JACKED88
-
Posts
529 -
Joined
-
Last visited
Content Type
Profiles
Forums
Gallery
Everything posted by JACKED88
-
TerraWombat, it's been a while so I was wondering what the latest is on those brackets? Any progress on getting your shop/machines set up to run a limited production of um?
-
So it that because the female is too big or the male is too small? This is actually a good thing as it makes it much easier to buy the tubing stock. Just get 2.5"OD square tube with 1/4" wall thickness for the cross piece and the female receiver tube and call it done. The female is too big meaning the male is right .... for once. LOL!!! Yes, the same pc of material can be used for both. 1/4 inch material for the cross pc would definitely be heavy duty. Most hitches/cross pcs are made out of thinner 3/16 inch material. With the use of 1/4" thick brackets, additional mounting holes and 1/4" wall tubing for the cross pc, if welded properly these hitches should exceed the rated capacity of a DrawTite or any other hitch that was manufactured for our trucks. If anything was to fail it'll likely be the "buyers" welding. Hence it being perfectly understandable expressing your disclaimer of liability for damages caused by using these brackets to build a trailer hitch.
-
Your right. The cross pc is 2.5 inch O/D tubing. The "female" part of the receiver is also 2.5 O/D tubing with 1/4 inch wall thickness. The "male" part of the receiver (part with the ball) is 2 inch O/D tubing. Interesting information. I'll have to check my hitch out, but I was very confident that the female portion of the receiver was 2"OD. I was also measuring an XJ Class II hitch last week so I may have my dimensions mixed up. To be certain I just went outside and measured one of the store bought receivers I have. (the male pc with the ball) Is is definitely 2 inch O/D material with 3/16 wall thickness. I also remeasured 2 of the three hitches on my other vehicles and both "female" receivers are 2.5 inch material with 1/4 inch wall thickness. The wall thickness and or I/D of square tubing is never exact. The walls are usually a little thinner than 1/4" making the I/D a little larger. That's why a 2" O/D ps of material will easily fit into a 2 1/2 inch O/D pc having 1/4 inch wall thicknesses. The over all difference is usually about .040 and often a little more pending the manufacturer. Hence the reason all "male" receivers fit loosely into the "females" (yes, we're still talking about trailer hitches) LOL!!!
-
Your right. The cross pc is 2.5 inch O/D tubing. The "female" part of the receiver is also 2.5 O/D tubing with 1/4 inch wall thickness. The "male" part of the receiver (part with the ball) is 2 inch O/D tubing. You guys are lucky to have places you can buy material by the foot. I've been buying material for years and have yet to find a place that'll do it. Every now and then they'll have cut pcs but seldom are they what I'm looking for.
-
I wouldn't have expected it any other way. The "buyer" should be able to find square tubing at just about any steel supplier. Problem is most suppliers only sell it in 20 foot sections. I don't know any that sell it by the foot. Most of um will cut it for you for a minimal cost but your still gonna have to purchase the whole 20 foot pc. Best thing is to find a couple of other people who want to build a hitch and split the cost of the tubing. That or find a manufacturer or welding shop that uses/has 2" tubing and buy a 4 1/2 foot pc from them. (4 feet for the cross pc and 6 inches for the receiver) Plus, a 10 inch long pc of 2"x3" angle iron. Keep in mind that not just ant square tubing will do. It will have to have the correct wall thickness so your receiver fits properly. I'm pretty sure it needs to have 1/8" wall thickness. Take your receiver with you for proper fit. Sorry but I was mistaken in what I said about the safety chain holes being in the pc of angle iron that welds to and or between the cross pc and the receiver. The angle iron pc has holes in it so you can bolt the hitch to the bottom side of your bumper. The safety chain restraints/holes are separate from that and could be simply made out of two heavy chain links/u-bolts/I-bolts or whatever welded to the bottom side of the receiver section. As before, I'd suggest people go to their local welding shops to pick up small sections/pcs of iron. You'll need 1- 4 foot pc of 2 inch square tubing, 1- 6 inch pc of 2 inch square tubing and one 10 inch pc of 2x3 inch angle iron. Plus some kind of rings for your safety chains to hook to.
-
I haven't been keeping up with this lately but it looks as though TerraWombat has everything under control. Looks like we might as well get our brackets from him. With that said, consider me taking a back seat to the production of these brackets. Thanks TW for stepping in and making these brackets a reality. Good to hear your getting your machines set up to run um. I don't know how many people want a set but I do know those that do have wanted um for a long time. Including me. Consider this your first official order for a set made out of 1/4" plate. I'm confident you'll price these reasonably and find the cheapest shipping rates possible. Post or P/M me the details on how much they are and where to send the $. Oh, as suggested in the design, are you cutting the square hole in um for the cross pc/tubing? Also, are you going to offer the pc of angle iron needed for structural integrity to be welded to the cross pc and the receiver itself with the safety chain holes pre-cut in it? Other than the brackets themselves and cutting those safety chain holes, the rest of building a hitch with these brackets is just straight cut 2" tubing. Even a caveman with a hacksaw could do it.
-
I've never seen or heard of anybody being ticketed for having a home made hitch. The way I see it, what they don't know won't hurt um. Just stay clear of state troopers. The rest of the cops either don't know or could care less what kind of hitch you have. If anything was to be said about it, play dumb :dunce: and tell um it was on the truck when I bought it and you assumed it was a factory hitch. :dunno:
-
I agree ....... assuming you plan on towing a mobile home. A Comanche towing capacity with the Class I hitch was 2,000 pounds; 3,500 pounds with the Class II. Running the 4.0L/auto trans combo increases it to 5,000 pounds with the Class III. Class I —up to 2,000 pounds (910 kg) — light loads Class II —up to 3,500 pounds (1,600 kg) — light loads Class III —up to 5,000 pounds (2,300 kg) — larger loads (campers, boats, etc.) Class IV —up to 10,000 pounds (4,500 kg) — larger loads (campers, boats, etc.) I agree with what your saying about spreading out the footprint but I don't think a fifth bolt is necessary. The way I see it, if 3 bolts is all that's required for a 5000lb hitch, then 4 bolts would increase that part of a hitches capacity by at least 25 percent (6250lbs) in which is more than what our trucks are rated to tow. How much more do you need?
-
Can't turn off my truck!!!
JACKED88 replied to JACKED88's topic in MJ Tech: Modification and Repairs
Nice write-up. Thank you. :wrench: Done. Took me about 20 minutes to replace the tumbler. Nothing else appeared to be broken. Works great. Thanks again for the help. -
Can't turn off my truck!!!
JACKED88 replied to JACKED88's topic in MJ Tech: Modification and Repairs
Thanks everybody. :thumbsup: I'll tear into it tomorrow and let yall know if I find anything other than the tumbler being broken. -
I'm pretty sure my ignition tumbler is broken. The switch is stuck in the on position. I had to pull the coil wire to kill the engine and then disconnected the battery to kill the power. I can turn the key to start but I can't turn it to the off or locked position. Assuming the problem is the tumbler, I'm gonna need to remove and replace it. Does it need to be in the lock position to be removed? If it does .... I'm screwed!!! I've tried everything short of beating it with a hammer to get it to turn to the off/locked position. Not happenin. Again assuming the tumbler is the problem, I've already bought a new one and borrowed a puller kit from the parts store. Now all I need is a refresher course on how to do it. :dunce: Anybody??? Thanks in advance. Robert
-
I was given a measurement of .600" from the bottom. Also .600 from the front edge and .900 from the rear edge. (front being the leading edge / rear being the trailing edge)
-
No hurry Tim. I've got a full plate of other priorities I need to concentrate on right now anyway. It'll be at least a week or two before I can get back on these brackets. We've got plenty of it so take your time. I need to Thank You again for doing this for me/us. More later. Robert
-
OK, if everybody agrees ..... 1/4" it is. Naaa, I don't feel threatened. I just didn't want to sound ungrateful or for you to think what you've so generously offered wasn't good enough. I felt much better after reading your reply saying you'd "happily" do the modification for us. With that said, you probably shouldn't have shown quite as much enthusiasm in saying you'd "happily" do the modification. Why? Because we have may need a second bracket with an additional modification. That second bracket/modification being what a couple of us were talking about by designing a bracket that would have both the hitch and rear bumper mount in one bracket. A combo so to speak. I said we may need a second bracket because I don't think everybody that just wants hitch brackets will want to have to remove their stock bumper brackets. To be honest I'm not sure I understand why a person would remove their perfectly good bumper brackets and only have one bracket for both their hitch and bumper. Lets suppose for some reason you want to remove your hitch from your truck. Guess what? You can't remove just the hitch if your brackets support both the hitch and bumper. I think a combo bracket might be better suited for those who intend to build their own rear bumpers. Then again, if your gonna build your own bumper wouldn't you incorporate a hitch into it making the hitch part of a combo brackets useless? What? Now we need three different brackets? A hitch only for those who just want a hitch, a bumper only for those who wanna build their own bumpers and a combo for those who feel the need to remove their perfectly good stock bumper brackets. The more I think about it the more I think we aughta make one bracket (the combo) and you can cut off whatever part you don't want. I think we need a little more input before we start making additional modifications or brackets. Nether can I. This is probably as good a time as any to put this out there. We will try our best to make these brackets fit as closely as possible. However if for some reason they don't fit your rig, get out your drill, grinder, file or whatever you have and do what ya gotta do to make um fit. There will be no guarantees nor will there be any returns. If you feel as though this is going to be a problem ..... simply don't order any. Hows that for covering our a-sses??? LOL!!!
-
What it would take for me? I would bolt my already made bracket to the frame and would carefully measure where the shackle bolt hole is and revise my drawing to include it. I would then cut another piece out to test fit and adjust accordingly. What would it take for you? You'd need a CAD program to open the DXF file and edit it. The eDrawings program I mentioned earlier is just a viewer and doesn't allow you to do editing, but maybe the paid "professional" version does? I'm not sure. On another note - looks like I just came across quite a bit of 3/16" and 1/4" steel In other words I can't do it. In consideration of what your already doing for us, you've gotta know I'm cringing at the though of asking you to make the modification for us. I can't bring myself to type the words. The brackets will work fine without the shackle bolt. Naturally they'd be better/stronger with it but fine without. I'm leaving it up to you.
-
Awww, come on Pete. 1/4"??? You know we always over kill everything we do to out trucks. Why should these brackets be any different? I've decided to compromise between a 1/4" and 1/2" and have my personal set cut out of 3/8". Whatever thickness yall want needs to be agreed on by everybody. In other words, one thickness fits all. Where are you proposing those gussets be welded? Are you talkng about to the bracket and the hitch cross pc? Other???
-
I'm not even gonna try to pick apart yalls replies with some of my own. I'll just say Thank You for them and leave it at that. I do however have a question about the drawing and dxf file. What would it take to modify um to include the use of the upper shackle bolt? Would it require tracing another cardboard template, cutting it out, measuring once, twice, three, four times, and drawing it in your CAD program like before?
-
Wow!!! An actual blueprint? I'm impressed. I haven't seen one of those since I quit doing machine work. (I was a machinist for about 15 years ..... 18 years ago) And I called a "brake" a press. :shake: What can I say? I never worked in a sheet metal shop. The template and pic I received from Mike (fiatslug87) has some measurements but nothing we can compare to your print. Being an x-machinist I've got a pretty good idea of what it takes to make a print like that. (or at least before everything went high tech) As for the dxf file, that's a little out of my league and have no idea what it takes to make one but something tells me it isn't just a few strokes on a keyboard. Your having the right tools and sharing your knowledge with us will make a big difference in getting this project off the ground. I'd like to be the first to Thank You for what your doing for us. I didn't realize you were actively doing this type of work for a living and understand what your saying about freebies. With that said, we all need to thank you and convey how much we appreciate you sharing your work with us. So again, Thank You for your generosity and as you put it ..... contributing this to the community. I'll PM you my email address. Thanks again. Robert
-
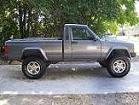
Here's an update on this truck. First ..... I didn't have any problems getting the tittle and registration transferred into my name. Good thing since I've already spent over $1000 bucks on parts for it. Instead of having the trans rebuilt, I found a low mileage (45K) trans out of a newer truck for it. Also got the radiator, water pump, power steering pump, rear bumper, climate control switch and the headlight switch for it. I'm supposed to get the front bumper assembly, power steering pump/alternator bracket this weekend. I'm still looking for a red tailgate. You'd think with as many red trucks you see one would be easy to find. That's just the thing. All the ones you see aren't in a junkyard. Oh and I'm replacing the driver seat. It's not torn or anything I just don't think its gonna clean up very well and it doesn't seem have much support. That and I want an electric one. We're gonna tow it to the shop where my son works and get it up on a lift to do the trans swap. Although I could do the rest in the driveway, we'll go ahead and install whatever else we have time for before they run us out of the shop. (about 10pm) Hopefully I'll be able to drive it home to finish it up. After some test driving its back to the shop and over to their detail dept. They've got some guys and a gal over there that do great detail jobs for under $100 bucks. I'm talking bumper to bumper including under the hood and buffing out the whole truck. It'll be money well spent for the initial cleaning it needs. I'll post some more pix when its finished.
-
Thanks!!! I'll be looking for um and let you know when they arrive. Thanks again. Robert
-
I measured all three of mine and they're all within measurement error of the template/measurements I sent you. Your template/tracing looks great and the measurements will be a huge help. Thanks again. I'm pretty sure I have another one coming so between the two we'll surely be in business. I'll make several copies of both and start playing around with some of the requested modifications.
-
Do you have any pix of your brackets? Making the modification for the shackle bolt shouldn't be hard to do but I'd still like to see how you did yours.
-
Awesome. I'll find out what kind of machine he has and try to get a ballpark idea on the cost per bracket. I'm sure the cost is going to depend on how many we want/need. If I/we only want 2-3 sets he'll likely do um for free. If we're talking 2-3 dozen, I'm gonna have to buy a sheet of material and I doubt he can do that many without charging me something. This is why I was trying to get an idea on how many we need. So far there's only about a dozen people subscribed to this thread. Out of that dozen not everybody says their interested in getting any. I have no doubt the number will determine the cost. In most cases the more you buy the cheaper they are. In this case it may be just the opposite. Not having the good ole in-law break, how much do you think the jetting should cost? Not including materials, only the jetting. So how would we/he get that file? Via computer or copying it to a disc and mailing it?
-
The file I have now is in .dxf format, which is what most CNC operators would need to generate the code needed for their particular machine. I could very easily run these in large batches and sell them if I were setup to do so. There are a few things preventing me from doing that: 1) A machine that would produce consistent parts. As I said before, there are some manufacturing issues with it right now that allows the Z-axis to move around during the cuts leaving me with beveled edges and dimensions that aren't quite the precision I would like them to be. 2) A local supply of metal. I live in Yuppieville, NJ (otherwise known as Princeton). The thought of anyone doing something that requires arduous tasks such as designing bracketry, modeling them in CAD, and cutting them on a CNC is unheard of, thus, the number of metal suppliers in this area is equivalent to the number ZERO. The one place that is within 35 minutes of my shop does not have reasonable pricing on their metal and cuts it with a torch so that when I get it, it's warped to all hell. 3) My compressed air supply is too small to run large batches of parts. I have a Home Depot compressor that puts out maybe 8CFM@75psi on a good day. My plasma cutter requires a minimum of 8.5CFM@60psi so you can see I'm pushing the limits. It's fine for doing one part and then stopping to let the compressor recharge, but is not sufficient for mass producing items. I will be producing certain items in the future for purchase, but they will be done in small batches and will be of limited availability. I've just got too much other stuff I need to get done first. No problem. I'll keep at um from my end. Now about that dxf file you have. If your still willing to help, you said most CNC's would need it to create the codes they need. Really??? :brows: Considering your not set up to run these brackets on a larger scale, what ya gonna do with it and do you think my jet guy could benefit from it?
-