

Spydie
-
Posts
16 -
Joined
-
Last visited
1 Follower
Spydie's Achievements
Jeeper (1/11)
-

Comanche runs, dies, won't run, repeats process. Help
Spydie replied to Spydie's topic in MJ Tech: Modification and Repairs
Little update, we found that the Starter Relay might be the culprit. When you shake it a little, the starter will crank once and then everything turns off, then when you shake it again it will crank once more and turn off again. Getting a new one in the morning to replace and see if it actually is -
Comanche runs, dies, won't run, repeats process. Help
Spydie replied to Spydie's topic in MJ Tech: Modification and Repairs
Its starting to smoke so i'll go with yes to that. both new and old resistors get hot. It currently won't start up at all. It was starting up after sitting for 5-10 minutes but now nothing -
Alright guys, my comanche was working fine yesterday when i took it on a 60 mile round trip. Went to start it up today, drove 2 minutes and it started running rough then turned off and wouldn't start back up. Thought it was the ballast resistor so i went and got a new one but before putting it in i tried the truck again and it turned on ran for another 2 minutes to get it home and died again. The ballast resistor was hot enough it was smoking and you could smell it burning up. Any ideas what could be causing this? The truck cranks over but will only do that, it won't start up. Any help is appreciated!
-
Thank you!
-
Alright, so took the MJ out for the first time today thinking the 4x4 was working (stupid me for assuming :doh: ) Well, got underneath and realized the dude before me took off every vacuum line he could find and now I'm left trying to play find where it goes. I've tried looking up some diagrams but none have really helped, i know the two for the actuator side, but i not sure which of these three (or why there's three?) to connect the hose to. Any help is appreciated
-
Thank you! I'm with you on the trim pieces, just have to find the right parts I'm looking for. I was hoping to be jamming out last night but had some family emergency come up so the tunes will have to wait. And I was thinking more along the lines of some Led Zeppelin or something like that :laughin: I'm wondering if somewhere online I can find some snap on trim to cover up the edges. I've never seen anything like that but who knows?
-
Alright so first thing first, I read somewhere else where a forum user said "It's not worth it unless you got one for free and it's really nice" well, I got this radio for free and being a kenwood..was too nice not to. So the adventure started. Warning, this requires an extensive amount of trimming so if it's going to kill you, might as well not try it, I for one could care less how it looks behind the dash since no one will see that anyways and if I really messed up on the dash, could always replace that easily. I'l be pairing this radio with a set of Polk audio DB series 6.5" component speakers with 1" tweeters in the doors and a set of Polk DB series 4x6" component speakers with a 4" round and 1" tweeter in the rear. Should be a nice sounding manche! So what i started out with was seeing how far down I would have to move the vent to know if i would have to trim farther down or not. What i found is if you cut the plastic to follow the metal bracket, you can move it far enough that you don't have to trim the bottom area of the dash like so Here's how i have the vent itself shaped to sit that far down Here it is in the dash, on the bottom you have to trim off two tabs but if you leave the excess that goes the full length on, then you can set it on the metal bracket and have it at the right height. Here is how close it sits, you still have the ability to point the vent up and down without the dash trim getting in the way Now for the fun part of what to trim, basically everything inside, Yes you need to cut into your air ducts. My plan is to fix "patch" the ducts and make new skinnier ones that allow the air to flow to its proper location but still lets me have my bigger radio. For now I'm just going to do a ductape and aluminum air duct tape job but eventually i hope to use some bondo fiberglass sheets to mold some actual solid ducts but that's not a priority right now. I just realized while writing this up that I don't have a picture of how i cut the duct that is below the temp controls, you have to cut and trim that area as well to properly move the temp control unit down farther. I'll post pictures of that once I get home. For the temp control unit what i found is that moving it down far enough to where you use the bottom mounting screw holes on the top of the unit will let you fit the double din radio with ease. I moved mine up a quarter inch so that you can't see a seam between the two with the dash mount kit on the radio. Here is it mounted in the actual screw holes, notice the small gap, with the temp unit moved up slightly that is gone. Then to test the dash trim on with everything in place to see how it all looks together. One thing that's going to drive me nuts is the gap/seam between the temp unit and the vent itself since there's no trim piece to go over it. However I did save one of the cross pieces that I cut off and just might be able to make something work. For some reason I'm recalling from previous experience that i might be able to use some JB weld and be able to get a texture pattern like the dash already has with the JB weld. Might also buy another dash trim piece and play with making an even cleaner looking one. I'll continue updating this to as i make adjustments and do a bit more and finish it off. I hope this helps some guys out and if you have any tips or suggestions please let me know as this is my first write up. Thanks!
-
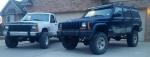
So reading around and can't find a straight answer, I want to use my 84+ style grille and header panel (its newer from a 94) and I would like to replace my fenders while I'm at it so, can i use the the newer style 97-01 with the already trimmed front portion of the fender or will it not match up right and should i just use the 84-96 year fenders? Thanks
-
4.0 Backfiring, stuttering, and misfiring
Spydie replied to Spydie's topic in MJ Tech: Modification and Repairs
I've been reading through them and will be, my goal was to just go over the general stuff that was easily checked this week. I'm really happy it's running better. -
Just throwing this out there, I went to a 6.5" lift on my XJ with no sye and it pulled out the slipjoint in the out put yoke so far that it was only hanging by about an inch. It started to rotate in an oval pattern and caused this awful grinding noise and high speed noises. Put the sye in and all the noises went away. I thought my rear carrier was ready to grenade until we figured it needed the sye.
-
4.0 Backfiring, stuttering, and misfiring
Spydie replied to Spydie's topic in MJ Tech: Modification and Repairs
Alright guys, going through everything here's what I found. Here's what it was doing, 1.) Backfiring like crazy. Couldn't get on the gas without it popping. 2.) Stuttering. When I'd get on the throttle at any speed it would stutter or shutter kind of hard to explain. It wouldn't even go up my driveway without doing it. 3.) Had the miss at 1700rpmish. Here's what I have found and fixed, 1.) The spark plugs were not replaced when the engine was done and man were they bad. 4 of them were fouled. 2.) TPS Sensor had one wire not reading. The pigtail on the wire harness was absolutely destroyed and the C output wasn't reading anything. Once i got it replaced and connected right, i was getting .03v when it needed .83, so that was an issue as well. 3.) The biggest, and honestly most mind boggling problem was the vacuum lines were all sorts of messed up, despite him having the hose diagram on the hood! He had the Map sensor running to a vacuum port on the fuel rail so both the map sensor and this port were sucking while nothing was blowing The fuel rail vacuum was needing air so bad that if you covered it with your finger it would shut off the truck. So i connected the Map sensor to the throttle body and ran a new hose for the fuel rail vacuum to the air box and got that squared away. Then I was looking some more and found that the line for the vacuum canister wasn't even hooked up so I reconnected that. So, now the MJ is running "smoothly" Idle is 100x better, I can now drive it up my driveway with no shuttering what so ever. Haven't had it backfire on me yet. Going to get it plated today so I can see how it handles on the road. It used to bog down around 45mph and not want to continue without backfiring. I'm hoping most of that will be solved with this. We're all honestly surprised it made it made the 80 mile journey home. -
4.0 Backfiring, stuttering, and misfiring
Spydie posted a topic in MJ Tech: Modification and Repairs
Alright, so I'm restarting this as I bought the truck and actually drove it a long distance to feel out everything. I have a few ideas of what's up but need more input before I start replacing sensors. While driving at low speed and low throttle input the Jeep backfires left and right and stutters. Even just pulling it into my garage a few feet its "jumpy" Getting on the expressway it builds up to about 45mph and then feels like it needs to pop so i let off, it will backfire and then continue to raise in speed. Every once in awhile i could get it to continue up without "popping." The engine was recently rebuilt by a shop with a new stage 2 head, stage 1 cam, stroked out .020" over. It also had the crank reground. I've been going though trying to find any vacuum seals but have not been able to find anything. I believe I am missing the egr solenoid but have to check when i get home to be sure. Any ideas are welcome, I just got the truck on Friday so I haven't done much but will be going through all of cruiser54's tips. -
Thank you! I plan on it. He's at about $3k right now but it needs new tires, windshield, motor work, and all the body work. I'd be happy getting it for $2800. It's a diamond in the rough. I'm not opposed to doing all the things you listed as this is going to be a "restore" project for me and I'd like to make everything nice again, I just don't want to get it and have it blow up on me
-
It's a 1990 4.0 auto
-
I believe its the stock cables. Not sure if the plugs are new or not.