

RustInMyEye
-
Posts
108 -
Joined
-
Last visited
Content Type
Profiles
Forums
Gallery
Everything posted by RustInMyEye
-
 I'm looking for either a template or measurements of where exactly to cut the firewall for the 97+ steering shaft. I know its up and to the right(as seen from in the engine bay). Also, that its the same diameter hole. Has anyone ever made like a paper template that can be printed or anything? The best trick i have seen is to cut a section out of a 97+ cherokee, bolt it up matching the brake booster and spray paint an outline where it needs to be cut. I don't have that luxury, my xj met the crusher 2 years ago now. But like lets say someone could go out and draw a square around it and measure its upward and sideways movement. Oh look i ms painted this to help. Basically I'm looking for the green line and blue line measurements. Measured as if there was a square held as the red lines touching the original holes other sides. Thanks for any help. I might make a template myself after I'm done. and put it in here to be printed. So long as the individual knows how to print files true to size...
 -
My 88 Comanche Restoration and Modification
RustInMyEye replied to RustInMyEye's topic in Member Projects: Your Comanches
Today I did those track bar things I was talking about. Minus making the actual track bar, But that's the easy part. I need to remove the stock knuckle and put on the WJ knuckle so that I can figure out where exactly i need to drill my frame side mounting hole. I installed a clayton over the axle bracket and then my own frame side. The pitnam arm I have in there should be staying the same, i was going to put in a durango box though, right now its just the old one that was in there. -
My 88 Comanche Restoration and Modification
RustInMyEye replied to RustInMyEye's topic in Member Projects: Your Comanches
Empty Post -
My 88 Comanche Restoration and Modification
RustInMyEye replied to RustInMyEye's topic in Member Projects: Your Comanches
Todays work. Got the first lower arm in. The frame mounts needed to be massaged a tad bit wider, about 1/16th. I was using a dremel and broke 2 mini grinding wheels about 10 seconds of grinding before the other would have gone in. That will be in wednesday. That is If i can get the bushing pressed in, see below a picture of my struggle. Also, I will most likely be replacing the axles lower control arm mounts. The holes look a little wallowed, and i won't be having something like that cause me problems when this whole thing is done. I also spent some time shaping the radius arm mounts that will sit on the lower arms. No pic of this, but it looks like all those nice tabs you can buy except a lot worse and made with a grinder. My really twisted and bent harbor freight 20 ton press. The bushing no go in, the press pretend to be pretzel. -
My 88 Comanche Restoration and Modification
RustInMyEye replied to RustInMyEye's topic in Member Projects: Your Comanches
Tires and wheels are here and I'm getting pretty excited to get her back on her feet. These are the perfect tires for this rig. standing at 32.5" x 10 jk take offs are just a little smaller then i wanted. I don't really know how far out they are going to stick, I kinda just through it under the wheel well. classic styling. -
Dually fifth wheel comanche???
RustInMyEye replied to 88_primergray_mj's topic in Member Projects: Your Comanches
Get a diesel dually and pull the cab/bed. Get Comanche, pull everything from underneath. Bolt entire Comanche onto diesel dually frame. Bingo!, tow anything your heart desires at a fraction of the comfort. But, you'll look cool as hell. Maybe shorten the dually frame so its about Comanche length. -
My 88 Comanche Restoration and Modification
RustInMyEye replied to RustInMyEye's topic in Member Projects: Your Comanches
Plenty of threads on this stuff. There's like 10 ways to make it work. But, 5 on 5 wheel bearings are made for the cv style shafts. They are a taller bearing. Meaning if I use my u-joint shafts it won't align with the ball joints, causing a lot of binding and eventually kaboom. Rims are here. I like them a lot. Tires tomorrow. Also the entire truck will be brushed in POR15 products. Frame, axles and under carriage in the the original rust preventative coating. Then the rest of the truck until the gallon is used up. Anything that will see sunlight is going to be coated in the two part urethane topcoat in safety Blue. Which should arrive tomorrow. The bed will probably get their bed liner but i haven't ordered it yet. It will all be brushed and since I live by the coast and won't get a day with low humidity until like November. I'm going to set up a car garage tent, line the inside with plastic sheeting, ducttape the seems and run an air conditioner and dehumidifier. I think it will work well and allow the POR to run out well to a nice smooth finish. -
My 88 Comanche Restoration and Modification
RustInMyEye replied to RustInMyEye's topic in Member Projects: Your Comanches
Ordered: Treadwright Warden 285 75 r16 (32.8 x 11.2") For a mostly locally driven rig I thought these would be perfect. Probably going to bead balance them to forgo any possible balancing issues Qradratec Baja Extreme wheels in satin black. 16x8 5x4.5 4.5" back spacing. Again the perfect thing for this rig. $89 a pop and free shipping. Basically I couldn't justify getting a set of JK takeoffs and wheel adapters when I could get all new rims and the tire size I really want for almost the same price. -
My 88 Comanche Restoration and Modification
RustInMyEye replied to RustInMyEye's topic in Member Projects: Your Comanches
Today I Welded the divers side front stiffener in almost 100%. while i was working on the track bar mount. In doing so, I put the front axle on jack stands, bolted the old steering box back in, bolted the stock steering on the axle to that box, and put an under the axle clayton track bar in to help line up the axle, its needs an over the axle mount. The lower links are also ready to go, except for the upper/radius arms. Those will be quick though. I also threw the bed on the frame, mostly to stop killing the grass. underneath it. The first line of welds looked great. Then I covered it up with these big old fat welds. I told my neighbor it would be done in a few weeks today. ha..haha....hahaha The bed is currently up on 2x4's. I have an alignment tube in the way of the bed sitting flat so I preferred it to sit level and up rather then all crooked. It will sit matching normal body lines when i do the bed mounts. OKAY, SO here's THE BIG QUESTION. WHERE SHOULD I PUT THE CAGE. RED WAS HOW I ORIGINALLY PLANNED. HYBRID IN AND OUT THE ARROW POINTS AT WHAT WOULD BE A HARNESS BAR. THE GREEN IS A CAGE THAT WOULD GO BETWEEN THE CAB AND BED. MEANING THE BED WOULD BE PUSHed BACK AN INCH OR SO. NO BIG DEAL. WHICH ONE SHOULD I DO?? YES, I'M YELLING THIS, IN REAL LIFE, AS I TYPE. Red or green, girls. Pick. -
My 88 Comanche Restoration and Modification
RustInMyEye replied to RustInMyEye's topic in Member Projects: Your Comanches
Empty Post -
My 88 Comanche Restoration and Modification
RustInMyEye replied to RustInMyEye's topic in Member Projects: Your Comanches
So today I did this. Which was less then I wanted do to helping my uncle Install a Huge picture window. Sometimes I use the right tools and do something nice. Fixed side of the Long arms done. Waiting to get the axle positioned to cut to length and put in the other side. and I'm 90% of the way to having these frame side track bar plates cut out. I ran out of cutting wheels. I used to run a clayton mount and I snap the thing in half. While I don't plan to wheel this truck as hard, Its getting build as if it could. As much plate will be left where it can be to clear the spring. -
My 88 Comanche Restoration and Modification
RustInMyEye replied to RustInMyEye's topic in Member Projects: Your Comanches
SO I'm all ready to make these long arms and crossover steerings Using these wj knuckles. On this d30, with a little bracing Got the rear frame section as square as I could get it. stitch welded in. Fish plates will go over any joints. And theres the 8.8 for the rear. -
My 88 Comanche Restoration and Modification
RustInMyEye replied to RustInMyEye's topic in Member Projects: Your Comanches
Empty Post -
My 88 Comanche Restoration and Modification
RustInMyEye replied to RustInMyEye's topic in Member Projects: Your Comanches
Replace frame: Check Stitch welded in enough to be a roller. Next is to get the rock sliders in on the drivers side and tie it into the new frame on the passenger side. Then they will get skinned. and wallah new floors and mini boat sides. Really need front suspension links so I can get the axle back in, but I haven't order joints or anything. I want to be able to roll this thing between my driveways for finish welding. Pics: -
My 88 Comanche Restoration and Modification
RustInMyEye replied to RustInMyEye's topic in Member Projects: Your Comanches
Front frame stiffener is in and there is a pretty solid connection between the stiffener and new frame section. Still a little more to go. And right now I'm running the welder off a 100ft extension cord. Its been doing pretty well but really I'm just trying to get this thing to be a rolling chassis again. So consider these welds as just some serious tacks until I can wheel the jeep from its spot to the other driveway where there are outlets. -
My 88 Comanche Restoration and Modification
RustInMyEye replied to RustInMyEye's topic in Member Projects: Your Comanches
Trying to keep the frame was too hard. I cut it off New frame is 3x4 3/16 box. Fits perfectly between the old frame rails where I left them. The front frame stiffening will tie the front and mid sections together nicely. I bought the hooligan offroad ones which are nice since they wrap around on the under side. Which will make it easier to build in some inside of rail plateing https://www.hooliganoffroad.com/collections/xj/products/xj-front-stiffeners This is currently heavily tacked in. and this our pile of tube for cages. -
My 88 Comanche Restoration and Modification
RustInMyEye replied to RustInMyEye's topic in Member Projects: Your Comanches
I have this tube positioned and tacked on where its going to go. Cut off a little to much in some places. Its squared up to the inside lip and flat section of the door frame. The floor between the frame rail and door are completely cut out. Supports will be run from rocker tube to plated frame and some sheet will be put in underneath these supports as the floor. Hard to see but I'm pulling and replacing the top of the frame rail. the floors on these are actually sandwiched between it. Mines a little rusty so something unique will replace it. removing spot welds sucks. -
My 88 Comanche Restoration and Modification
RustInMyEye replied to RustInMyEye's topic in Member Projects: Your Comanches
Bought a tube, took out the carpet and did some poking around. Dash will be out sooner then later. -
My 88 Comanche Restoration and Modification
RustInMyEye replied to RustInMyEye's topic in Member Projects: Your Comanches
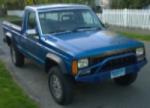
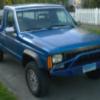
And at this point it was back on the road. I then proceed to drive it around for a year and put like 10-12000 miles on it. Then summer 2015, I graduated college, took the summer off, got a job, parked the comanche as it was finally about to rattle itself apart, went hiking for a few weeks, bought a Nice subaru legacy and well then the real build began -
My 88 Comanche Restoration and Modification
RustInMyEye replied to RustInMyEye's topic in Member Projects: Your Comanches
Basically done and drivable -
My 88 Comanche Restoration and Modification
RustInMyEye replied to RustInMyEye's topic in Member Projects: Your Comanches
and then this cleaned up these covers and painted them blue new freeze plugs newwater pump and thermostat here's the valve cover cleaned, mocked up with a set of pacesetter headers blue -
My 88 Comanche Restoration and Modification
RustInMyEye replied to RustInMyEye's topic in Member Projects: Your Comanches
Then this So its coming together I guess. The engine is out, along with the transmission and transfer case. Last weekend I picked up an engine from luke95. I'm not rebuilding it but its getting all new externals expect for the pulleys. anyway the new engine is on the stand, so far ive done the timing chain and cleaned of gaskets and $#!&. Some pacesetter headers should arrive today, they might be total $#!& but hopefully not. Bolts. -
Empty Post
-
88 No Start After Engine Swap
RustInMyEye replied to RustInMyEye's topic in MJ Tech: Modification and Repairs
ok this is dumb but i havent hooked up my throttle cable because, well, i can't find it in my garage. Anyone have a picture of how these linkages get rigged up? -
88 No Start After Engine Swap
RustInMyEye replied to RustInMyEye's topic in MJ Tech: Modification and Repairs
so cranked it for a while and it didnt move. so i just started it to not kill the starter and it went up to 40psi and we started to see oil up top. what a relief!