

OneOverZero
-
Posts
29 -
Joined
-
Last visited
Content Type
Profiles
Forums
Gallery
Everything posted by OneOverZero
-
1990 Comanche: Daily-Driven Autocross Build
OneOverZero replied to OneOverZero's topic in Member Projects: Your Comanches
April 24, 2013 Hmmm, interesting. I'm having a hard time deciding how exactly I want to go about that. The barbs themselves are good and I have new clips and O-rings, but it seems like FI hose clamps to secure the lines directly to the rail should work well so long as I have enough strain relief to keep them from kinking. If nothing else, it's probably the simplest/safest solution for break-in until I can bend/flare a proper hardline. Hoping to bring it to life electrically on Sunday. Need to clean the contacts, scrape the grounds, and triple-check wiring before I pop in the battery. Got some u-joints on the way (thanks) and if I can get the flexpipe welded into the crossover early next week, I should be ready to fire it the first weekend in May. I drove my friend's '92 this afternoon and it definitely rubbed in the fact that I am moving much too slowly. May 1, 2013 Ahahahfafaafff. Pretty sure the yokes at either end of my DS are tweaked, and I likely toasted at least one of the Spicer u-joints in the process. One (axle-side) rotates freely until pressed the last thirty thou or so necessary to seat the second cap clip, at which point it binds worryingly. The other binds somewhat in the DS, but won't seat that last fraction of an inch in the yoke and is unremovable at this point (until I throw it in a press tomorrow). I'm pretty sure I shifted and crushed a needle bearing in my well-thought-out and -conceived plan to fix the situation. I'm guessing that the yokes themselves are tweaked, though certainly no clue which direction(s) unless I happen to find a gage of comparable diameter to the joint caps at work. Might be easier trying to find another DS at this point. (Installing an SYE and Tom Woods DS in my XJ was so much easier...) At least I have the strap kits and a really nifty Northern Drivetrain roundel! Thanks for the recommendation; I'll definitely be going through them in the future. Excellent! Hopefully this and the Jeep thread hold you over for the time being. I still need to type up my list of free-to-take parts (clean door cards/panels, seats, EVERYTHING Renix, etc) - might come in handy for you and a few others. May 5, 2013 Raining for I think ten days now with an least another week or rain predicted. Rebuilt the carb on my KLR650 and am going through the new leaky stainless lines on my SV650 (what). Truck has been doing a good job sitting. Well dang! That looks... a lot better than my method. I supported the yokes well, but my method was probably less than consistent. Gonna throw some new joints in there (I bet I can use the two current ones to re-pack one "good" joint) and see how that goes. If nothing else, a well-regarded local driveline shop will weld on new yokes for ~$40ish per side and balance the thing. Very tempting. I'll do what I can to propagate that video. I have clean gray Pioneer door panels (see early photos on the first page) and Agate '97+ (color I believe was '99+, though it's the correct trim for '97+ Sport with PW/PL and '97-'98 Classic). Center consoles, "mini" consoles, clocks, kickpanels, armrest assemblies, dash bezels, OEM radios from '90-'01, vents, buckets identical to the ones in my photos, Renix and HO steering columns and wheels, cloth and vinyl MJ benches... all but the vinyl MJ bench are in great condition. Everything's that same awful gray shown there. And yeah, Renix is a pain and not particularly conducive to fine control. I should've done the full swap when I had the dash and engine bay stripped. Definitely intending to go to Megasquirt after this and a few other projects are manageable. May 5, 2013 If you want to keep the doors, you're stuck with early door panels as far as I know - the '97+ panels have a different mounting configuration along with different cam positions, etc. I'm sure there's a fabrication solution, but I've never seen anyone attempt it. I know the Renix-era XJ Country came with the high-bolster buckets (along with matching upholstered door panels, which I haven't seen in good condition), but I think '91-'92 Country may have received the same. Maybe Briarwood too. Limiteds could get them in leather. -
1990 Comanche: Daily-Driven Autocross Build
OneOverZero replied to OneOverZero's topic in Member Projects: Your Comanches
November 30, 2012 In the process of mocking things up to see what hardware I need, and... Intake is a '94, and I believe the bracket (though obviously toast) is as well. Water pump is a Flowkooler and appears (visually, at least) to line up with the OE piece. Is there a subtle difference somewhere in the '91-'98 range that would explain the misalignment? All I have handy for reference my are '90 and '01, so no help there. The last tricky bit on the agenda is adapting the front HO fuel lines to the Renix rear system, necessary since the HO fuel rail relocates the return and supply. The HO lines lead to a quick-connect pair near the bellhousing, but the Renix lines locate the disconnect differently. I'm clueless regarding lines, so either I find a way to add a junction (possibly iffy) or run new lines all the way back (urgh). Definitely replacing all connection fittings and O-rings so I don't burn. I'm well behind thanks to a series of setbacks (absurd scope creep, mispackaged trans seals, and a place that sent about $100 of incorrect thread/pitch hardware but won't respond), but I'm hoping to have this thing together within a couple weeks. December 5, 2012 The intake is flush against the head (admittedly sans gasket for the time being), max gap being about 0.008". Aligning the PS bracket means pulling the top away by about 1/8". The APN header is causing me some grief, as its flange is thicker than the intake flange. Gonna have to mill some material off the header flange to let the retention washers sit flush. (Hate clamp plates in all their forms, but at least this kind doesn't rely on bent bolts to provide preload.) If I can't get the bracket to align, I'll clean off the OE water pump enough to test-fit it. I don't believe the pump configuration changed for the 4.0's production run (at least, Flowkooler listed a single PN). Tomorrow I'll take a look at the fuel line situation. Thanks again, folks. :) December 28, 2012 Only significantly-goofy thing is the oil pressure sender adapter - the 1990 piece is compatible with the 1994 block (both NPT), but sits about 120deg out from the ideal orientation. Hopefully it doesn't interfere with the distributor. Took a break, as other projects that actually have time constraints came into play - my KLR needed a carb rebuild (float seems to have sunk) before inspection to renew registration and sell to my dad by the end of the year, and the XJ developed the inevitable crack at the collector and RMS leak (110,000 miles, so it went 10,000 further than most). I'll probably give it to my mom shortly since her ZJ is well-seasoned. When I get home in a week or so, I'll be dropping the engine into the truck to make room in the garage for a Dart. MJ probably won't run for a few weeks while I finish up a few things and troubleshoot whatever electrical/sensor gremlins arise. February 5, 2013 I didn't want to spring for another CSF three-row last summer, but I found a new Koyorad locally for $60. Looks to be of decent quality, but the fill spout interferes with the OE airbox. I'm tempted to adapt a cone filter to the intake (similar to this Rusty's piece), but I don't know how the Renix GM MAP will react to that. Hopefully nicely. My buddy's '90 4.0L/AX15/NP231 has since been replaced with a red '92 4.0L/AX15/2WD featuring godawful brakes and moderate front-end damage (hmmm). It's otherwise quite clean and intact. I've been espousing the virtues of the HO management versus Renix, so hopefully it doesn't let him down. March 6, 2013 24-year-old PS pressure and return lines were both seized on either end, so I mangled the everloving heck out of them when swapping the '94 pump in. As for replacement lines, I would've assumed they were the same, but I'm seeing different PNs for '87-'90 and '91-'96 lines on what appear to be cross-compatible line arrangements. Maybe I'll luck out and run across a '99 Durango box rather than tool about with this. Decided to stick with an A/C-compatible top rad hose - the rest of the system is gutted, but I'll mount the compressor until I find a non-A/C bracket/pulley. Seems all ~25 XJs the local yards have at any given time are equipped with A/C, but Greenville is hot... And that harness, that TERRIBLE HARNESS. It contained more oil and duct tape than proper conductive material. I don't know how or why, but I swear that every section has either shrunk or stretched while the engine bay was apart, whichever is worse. It's tight from the firewall to the header panel, long down the injection harness, and taut throughout the ignition side. The tanks on the Koyorad radiator pinch the light harness between the header panel and crossmember, so I'm planning on running a direct lead via relay like I did in my XJ. Reflashed Mopar ECU is in, so maybe it'll idle better on cold mornings. And nothing in that bay is carried over aside from wiring, battery, and junction block shield. March 12, 2013 Thanks for the tip! I'm still looking for the upper alt bolt - completely forgot to grab one at the junkyard Sunday. Darchangel, you should have the easiest-to-find cluster around, if that's any consolation. I found the tilt column easiest to install by pulling the shaft off the steering box and threading the column/shaft combo through the firewall - so much simpler to align that way. Pushed forth into the outdoors on its own four tires! And miracles of miracles, there's another hour of daylight to finish up the last few arduous bits. No immediate progress to report, but I spent a few hours sorting through the excess parts (of which I need a make a list - pay shipping and anything's up for grabs) and found probably the most important bit: My grandfather (who himself bought Jeeps after returning from the Pacific, hence my old-man-spec XJ covered in antennae) kept this tape kicking around for years in various iterations. Rather than packing 33s into a motorhome, he and my grandmother would transfer things onto cassettes before heading out each year. Walt Wanderley's 1966 version of "Summer Samba" was his favorite song and at least two AI regulars can attest that I blasted this in the Comanche all last summer from the Appalachians to the coast and in-between. I think that's from the day he taught me how to drive in a new '93. Letting out the clutch and idling down an access road in low range is an elementary-school dream. Planting hibiscuses, I think? And that's why a bootleg cassette is one of the most meaningful things I have. It'll degrade, but that's only right. April 16, 2013 Decided to update this if only to keep it a step ahead of the archive's gaping maw. Other projects have led me astray from the true path, so I ended up running a goofball FWD car at this month's autocross. The truck sits largely as it did before, but brakes are bled at all four corners (hanging onto stock brakes while I source KJ/WJ bits) and all wiring is hooked up. A few remaining tasks: 1) I wasn't paying attention and pressed the clutch pedal with the slave cylinder hanging loose of the bellhousing, thereby shooting the plunger across the driveway like a polycarbonate-tipped Tomahawk. I see what appears to be a bleeder screw on the slave, but I don't know how effective that will be. 2) Still haven't nailed down how I'm going to adapt the Renix fuel lines to the HO fuel rail. The HO lines, unlike the Renix, have a quick connect positioned roughly flush with the firewall. If I manage to screw up (or use most any "solution" I've seen elsewhere) the pump will spray fuel all over the crossover and cat. :supaburn: I know nothing of fuel line adaptation/splicing best practice. kastein, I'm pretty sure you gave me the good word regarding this at some point, but I can't find it! The HO lines have new clips and O-rings on the rail, so hopefully those don't let go. 3) I need to hotwire the fuel pump and dispense of all the E10 crap that's been in the tank since August. I have a new Wix filter ready to plug in (though the PO evidently replaced it) and a friend willing to consume a few gallons at a time in an '88 Ranger. 4) Need to cut up the factory closed-system overflow tank bracket to accept an open reservoir (in this case, an '80s S10 piece). 5) Turbo. wait let's get it broken in and understand Megasquirt first 6) edit: and it needs a yoke & u-joints on the driveshaft. Good thing no reference is consistent on the latter. -
1990 Comanche: Daily-Driven Autocross Build
OneOverZero replied to OneOverZero's topic in Member Projects: Your Comanches
September 6, 2012 Thanks for the encouragement. I'm sure I'll need it when I inevitably hose something. Saw this tribute to functionality at work: Don't be tricked into thinking that I'm efficient. The seasons changed in those photos, after all! The GRM XJ was a pretty strong inspiration to actually accomplish something. A friend drove it once a year or so ago and said it was the most fun thing at the track - I won't be going that far, obviously, but it's encouraging to see. The vee'd front is great. Definitely staying 2WD if only so I don't have to find another AX-15 housing - maybe I'll find a cheap NP242 and AX, though I'm admittedly unfamiliar with the internals of Jeep TCs aside from the 231. That said, the MC/booster/frontbits swap is taking place ASAP because this blows. September 17, 2012 What do you do when a engine needs transportation and your only tiedown-equipped vehicle is out of commission? Borrow a friend's '90 MJ, separated at birth by a few days. It's the next link in the chain - the engine from my truck will be rebuilt in largely the same way and dropped in this'un with an external slave swap. Fourth 4.0L pull in as many months? Hell, maybe that one should go into an Eagle. Aside from being 4WD, his truck is largely what I'm going for in terms of mechanical updates. We noticed some... accelerated blowby and head gasket leakage on the way back from the junkyard, so these rebuilds are right on time. Hopefully he'll hop in on this thread as well. Picked up a MC/booster from a '04 WJ with 34k, though I left all the good front suspension bits since I wasn't immediately familiar with what I needed. Should've brushed up before I left. Hopefully they don't go anywhere before Saturday (likewise for the KJ 8.25). The engine is coming along nicely: 0.030" over, balanced assembly with ARP rod bolts, Cloyes double-roller timing, otherwise pretty standard. I wasn't entirely on-board with the head gasket and cork valve cover gasket that came in the rebuild kit, so I'm waiting on some Fel-Pro pieces (copper seemed unnecessary for the time being). VC, timing cover, oil pan, and intake should all be tanked and ready for paint tomorrow - hopefully I don't incur bad karma by painting it a shade that isn't quite AMC canon (Chrysler engine blue is more readily available, who knew). That said, the cast-aluminum '94 valve cover has a pair of baffles underneath the breathers, each sealed by a metallic gasket, while the stamped-steel '96 has a baffle that spans the top of the cover. I'm moving forward with the '94 for the time being. Grommets ahoy. September 17, 2012 My understanding has been that valve covers are interchangeable between years (at least among HO, and HO VC on Renix head) so long as you use the corresponding gasket - head machining should accept it regardless. (Never changed the gaskets on my '98 or '01, but I imagine they're similar if not the same throughout the HO era.) I guess I'll find out soon enough. That said, I did already goof by buying '94 grommets and PCV valves, which will completely throw off idle speed dictated by the 1.6mm orifice in the '90. October 7, 2012 Finally picked up a clean 39psi '93 FPR/rail with lines and the correct power steering pump and bracket. Engine bits are turning blue and wiring/vacuum harnesses are becoming simpler. Same procedure, but it involved the post office and second gear. Don't even bother with the BA. I believe you'll need the bellhousing, trans itself, and crossmember along with the master/slave assembly for a BA-to-external-slave-AX swap. The '94, external-slave AX I pulled in April was $150 without core. I should've just swapped it in place of mine altogether (though mine has 177k, it has 396k), but my friend and I used it as a science experiment and pressed all the gears off in preparation for rebuilding our own. Turns out it was mechanically flawless. Good luck finding an external-slave AX15, though. I'm desperately looking for another bellhousing and bearing retainer but am coming up dry in a 150-miles radius around Asheville. You'd think that '94-'99 (AX) and '00/'01 (NVG3550, but same bellhousing) would be easier to find. I may have been presumptuous in assuming that the intermediate plate on the '90 AX is cracked. Looking at the components of the '94, it appears to be a parting line for the casting, although a very oddly-placed one. Might as well pull the tail and verify that it's a surface feature anyway. The input shaft seems to have at least 25 thou of diametrical play, so between pulling it to check runout and replacing the bearings, it's just tempting to get another. Front drawbar on the XJ makes it easy to tote the rolling chassis. (An MJ sans driveline sits higher than a XJ lifted 3" - who knew?) October 17, 2012 I took a three-day weekend to go to Barber Motorsports Park (thus breaking the goal from the first post). Vacuum line reroute/simplification is complete, so the next step is deciding what I want to do with that fried AX15. And if anyone finds an external bellhousing and bearing retainer in the junkyard, by all means, I'll pay for the trouble... My friend who received the spent 4.0L made some discoveries and passed along the visual evidence: The ridge on #1 and #6 is 0.030" max, 0.005" min, diametrically-opposed (no surprise given the condition of the rod bearings, which appear to be a few thou thick, and the crank journals). #2 and #5 are lesser with #3 and #4 down to ~0.008" max. Given that and the taper he measured, he'd be looking at going over a bit more than is comfortable without checking block core shift carefully. That, combined with a split/impacted pair of threads on the bellhousing, mean that we'll be looking to source him an alternative block. November 5, 2012 As of a couple days ago: Not seen: new OEM LUK clutch and external-slave AX15 with 133k on the clock. That oil pan was scrap so I used it for masking - good one is in place while I'm trying to press the pump and pickup together. Melling states a nominal six thou press between the two, but I'm having no luck even with cooling/heating. Will probably run by the machine shop to have it pressed and tacked quickly rather than continuing to without the right tool. I'm having a heck of a time determining what length pushrods I need - I ordered standard-length (9.641") rods, and some lifters bottom out while others leave a little lash. I've ordered an adjustable CompCams rod since I evidently don't know what I'm doing, and am aiming for about thirty thou of preload. Guessing that they need to be roughly twenty thou shorter than stock based on the deck height and maybe ten thou cleanup of the head. And who'd have guessed that Renix-, HO-, and HO/NVH-era 4.0s would all have different dipstick tubes? Renix tube, sitting flush in the block, won't bolt securely. Gotta drive to South Carolina to grab a junkyard one. At any rate, the rolling chassis is equipped with new swaybar/endlinks/bushings, fresh shocks, and Brown Dog motor mounts while I'm dicking around with the driveline. Replaced the heater core since the rest of the cooling system is new - not so bad on a '97+, but AWFUL in this thing. Once I realized that removing the entire HVAC box assembly was the quickest move, I could probably repeat it in a couple hours, but I'll be darned if it doesn't take at least six if you're clueless. November 7, 2012 Yeah, I'm really impressed with the quality of these mounts, not that I expected any less. I'd certainly rather pay for someone's craftmanship once and never have to replace a pair of $6 units made by a marketing company. I've never had to replace the OE Mopar units on an XJ or ZJ, but the suckers in this truck were beyond toast. After doing the heater core, I really don't know how it would be possible to do any more quickly by making a cutout - frankly, seems that it would be worse, as I have no idea how you'd properly secure the new core without a clear shot at the entire heater box. If you pull the four firewall studs for the evaporator box and the blower motor (along with some awkward manipulation of the screws holding the evaporator and heater boxes together), you can finagle the core out and replace it with minimal fuss. I should've pulled all six firewall studs and yanked the entire unit. The '97+ is admittedly complicated to do, but think Legos rather than ship in a bottle. That was the real problem when I did the MJ, being 6'4" on your back with your knees against your chest while trying to hold a flashlight, box wrench, and driver. The late-model dash needs to be gutted, but you have room to maneuver. Mine's leak-free after twelve years and I hope it stays that way. Dipstick tube appears to be strictly a press operation (at least, it was for the Renix tube, though I'll see if the '94 piece has a lip for a crush ring). Might as well put some Loctite 640 on it regardless! -
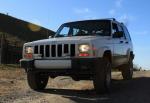
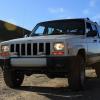
Hi all! I've been lurking a while and decided to copy/paste my build thread from another forum. It starts off with a history of the MJ - forgive me if all of you are more familiar with it than I am, but if nothing else, it shows the background of why I bought this particular truck! Since CC won't accept so much quotes in one post, I'll be separating some of my relevant posts by date and breaking this up to keep it under the character limit. Notice out the timeline I occasionally mentioned and compare it to what I've actually achieved. Depressing for me, comedic for everyone else. Also, it appears that this truck was discussed here before I owned it (and yes, the sticker is staying). :yes: September 5, 2012 This thread is terribly anticlimactic for the time being, but I thought I’d get it ready for the engine build & swap taking place over the next two or three weeks. I’m hoping to have it and the trans installed, broken in, and ready for the drive to Barber Vintage Festival in October. The early ‘80s marked a transition from full-sized, V8 SUVs to lighter-duty offerings based on smaller truck platforms. When Reagan took office, GM was developing the S10 Blazer and Ford the Bronco II, but American Motors lacked a truck smaller than the Eisenhower-era SJ. Only its Concord/Spirit/Gremlin-based Eagle, powered by the ‘60s-era straight six and featuring a legitimate transfer case, slotted in below the venerable CJ series; however, it lacked the capacity and capability of its larger stablemates. As such, the United States’ lit’lest automaker began work on a small SUV that retained off-road capabilities while using components common to its siblings and other manufacturers’ supply chains. This became the 1984 Jeep Cherokee (XJ), a distinctive design that mated a unibody with an integrated ladder structure - indicative of SUV design practices until the “crossover” trend neutered all the good things about everything in the early ‘00s. The XJ was perched atop a four-link “Quadralink” front and leaf-sprung rear solid axle, rounded out with driveline, steering, and control components pulled from existing Ford, GM, Peugeot, and then-parent Renault parts bins. It's an obvious conclusion. Also, no pants. All this effort notwithstanding, AMC still lacked a compact pickup to compete with the Ranger, S10, and increasingly-competitive Japanese counterparts. The full-sized S/J-series (underpinning the Grand Wagoneer) was twenty years old and the long-wheelbase CJ-8 “Scrambler” had failed to find a market. The solution presented itself in a common platform to be built alongside the XJ in Toledo, Ohio. By developing a high-capacity ladder-frame rear section that slotted into the XJ unibody, AMC retained almost all four-door XJ components from the B-pillar forward aside from floorpan changes required to accommodate the unusual marriage of monocoque and ladder. This Comanche (MJ) was sold in parallel with the XJ for seven model years (’86-’92) and received updates accordingly, including an updated variant of AMC’s early-‘60s straight six after the first model year. Short-wheelbase, six-foot-bed models dominated, while a seven-foot bed offered a Metric Ton payload option for 1987. Even ads neglected to mention the available GM V6 in '86 When a newly-revived Chrysler purchased AMC for its Jeep and Eagle divisions in 1987, a step-sibling rivalry emerged between the independently-developed MJ and Dodge Dakota. Notable was the fact that “Dakota” entries in Baja were re-paneled MJs, which themselves claimed manufacturer's championship titles under the controls of Tommy & Bobby Archer and Walker Evans for SCCA and SCORE, respectively: While nearly three million XJs would roll off the Toledo, Ohio, production line by the time US production ended in 2001 (overseas until 2006), the MJ was discontinued after the 1992 model year with less than 200,000 produced. Less than 6,000 featured the '91+ updates. As Chrysler intended to replace the aging XJ Cherokee with the larger, unrelated 1992 ZJ Grand Cherokee, it originally made financial sense to focus on the Dodge Dakota rather than produce an orphaned XJ-based truck. Ballooning sales of the XJ Cherokee cancelled Chrysler’s 1992 euthanization of the platform to the extent that it received minor changes in ’96-’97 before all manufacturing capability was shipped overseas in 2001. I didn’t set out to find an MJ, as I’m already saturated with 4WD XJs. The plan was originally to find a ’94-’96 LT1 Roadmaster wagon, but after looking at flawless, one-owner 30k-mile examples, I couldn’t see myself actually using it for anything aside from long trips and autocross comedy. I wanted a project, not a time capsule, regardless of how smooth and suave the capsule may be. As such, the goal was simple: find a rust-free, manual ‘87+ MJ. The ’86, whether fuel-injected 2.5L AMC I4 or godawful carbureted 90-degree 2.8L GM V6, is undesirable due a firewall incompatible with the long AMC straight six (allegedly the work of an engineer who wanted to see the six phased out). ‘89.5+ examples were preferred since they saw the addition of an Aisin AX-15 in place of the troublesome Peugeot BA-10/5. ’91/’92 models received Chrysler’s open cooling system and a much-needed electrical update, replacing the maligned Bendix/Renault “Renix” ignition system and cable-operated gauges with something befitting the nineties. The rare Renault 2.1 TD was also a strong option, but two exist in pieces spread across three continents. Enter a rust-free 1990 2WD, short-wheelbase Comanche in Charleston, SC. With a build date a week too early to receive the Chrysler updates, it comes equipped with a knocking 4.0L and Aisin AX-15 that won’t shift when hot, but brake lines, calipers, drums, stater, alternator, exhaust, clutch, and other bits are all new - roughly $3500 of parts & labor since August 2011. The owner decided to pass it along when the engine developed a horrible top-end rattle, but remained steadfast in finding a good home dedicated to reviving the truck rather than parting it. I promptly roped my patient girlfriend into driving my autist self many hours to retrieve this blue beast under the guise of fresh seafood and the beach. After picking up the truck, FSM, a thick stack receipts, and documentation from the friendliest, most helpful couple you could ever meet, I trekked off in a truck that wouldn’t shift and made single-digit oil pressures at 2500RPM. People turned and stared at the source of this racket when it passed. At best, a collapsed lifter was the sole problem; at worst, oil pump and bearing clearances had increased to the extent that the top end was starving. Solid bet on the latter. Radio promptly replaced with functioning OEM Though otherwise clean, those pop-out vent windows guaranteed a surly find: Only a few through holes... leaking MC and forty pounds of wet carpet pad didn't help. Patched and POR-15'd After driving the truck 2500 miles with negligible oil pressure, once adding five quarts of oil to top off the six-quart capacity (rest was in the airbox), the decision was made to pull a junkyard 1994 4.0L with an external-slave AX15 to rebuild while continuing to (ab)use the existing driveline. It made a suitable transport for the 396,000-mile donor: Ground up the speedo cable with that weight in the bed... Only looks to be a clean driveline Although a friend offered me an SLP LS1 and T56 pulled from a late WS6 for a pittance, I made the poor decision to stay the AMC course with my ’94 donor driveline. (In retrospect, the LS swap would have cost roughly the same even after Novak adapters were bought.) This itself bore a surprise, likely explaining why an XJ equipped with a new clutch was sitting in Pull-A-Part: Not my pliers. I'm guessing they were left in there during a clutch job. The engine was torn down and dropped off at a good machinist with the intention of using a 258 crank for a stroker. More on that later. Around this point I gutted a junkyard XJ Limited of all its distinguishing interior & exterior bits to create a trim package that never existed. Also found a clean, matching MJ headliner. "Chrome won't getcha home", etc. Wet spot is somehow not the rear main seal And stripped & refurbished a nasty pair of XJ bucket seats and tilt column. Thus far all work has been either cosmetic or only mildly mechanical, but when the year-old internal slave cylinder (the source of my shifting woes) blew itself in a USPS parking lot, the decision was made to use the external slave bellhousing and shift fork purchased previously. This is where the truck sits currently. The plan!: channeling the spirit of the Archer brothers’ SCCA arrangement above while keeping the truck true to its daily-driver, motorcycle-totin’ roots. Throw some lower-profile tires on the 15x7" steelies and autocross it on Wednesday nights. Keep total investment under $4.5-5k. The ’94 HO block (taken 0.030” over), head, crank, and blueprinted rods should be ready within the coming week. If a set of 258 rods (5.875”) can be procured, I’ll use them with a 258 crank and cast pistons to build a stroker; if not, I’ll stick with the 242 crank and rods (6.125”) to avoid the additional cost of forged, offset-wristpin pistons. Using a ‘96+ main bearing girdle and painting everything AMC engine blue. I’m going for an 8.8:1 CR and associated DCR/quench (might as well leave my induction options open). Was hoping for 250hp/320lbfts stroked, but will gladly settle for that turbo'd. Open cooling system conversion is compiled and ready to go in. Eliminate the nest of vacuum lines wherever possible, largely mirroring the changes Chrysler made for '91. Later models lost EGR due to a different cam grind, and I’m taking out the R12 AC system since Asheville is pretty temperate and my XJ has strong AC. Mopar external slave/master cylinder will enable replacement without dropping the trans, but it’s so vastly superior to the internal arrangement (for which only Chinese replacements are available) that replacement shouldn’t be necessary for many years. Dana 35 rear to be replaced with a Chrysler 8.25” with discs from a KJ Liberty. Spring perches will need to be re-welded, as the MJ is spring-under, XJ 8.25” is spring-over, and KJ 8.25 is coil spring. Axle-mounted load-sensing brake proportioning valve is getting the boot. Dual-piston MC, booster, and knuckles from a WJ Grand Cherokee should improve braking and steering response tremendously, while swaybars from a V8 ZJ Grand Cherokee and some budget Monroes will reduce body roll. I do worry that I’ll incite some snap oversteer with this setup, especially since the stock MJ leaves are terribly prone to axle-wrap. The SCCA teams used fiberglas monoleaves, so I'll have to make due with a pair of steel packs I'm piecing together. So please forgive the slow progress while I get my parts in line! It's certainly not as impressive or involved as the majority of folks' projects, but I think it's a unique approach to take with an uncommon truck. Part 2 to follow.