


Delox
-
Posts
11 -
Joined
-
Last visited
Delox's Achievements
Jeeper (1/11)
-
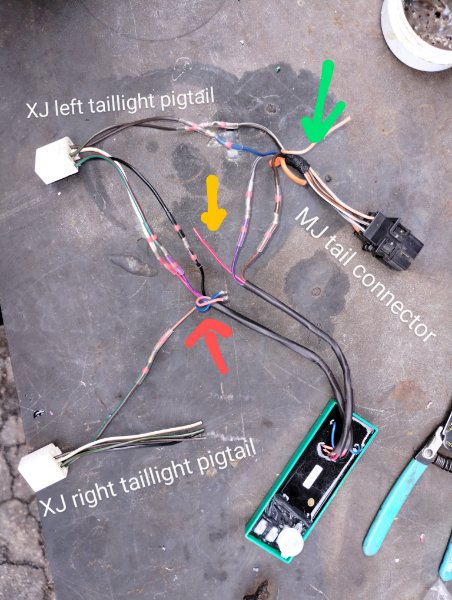
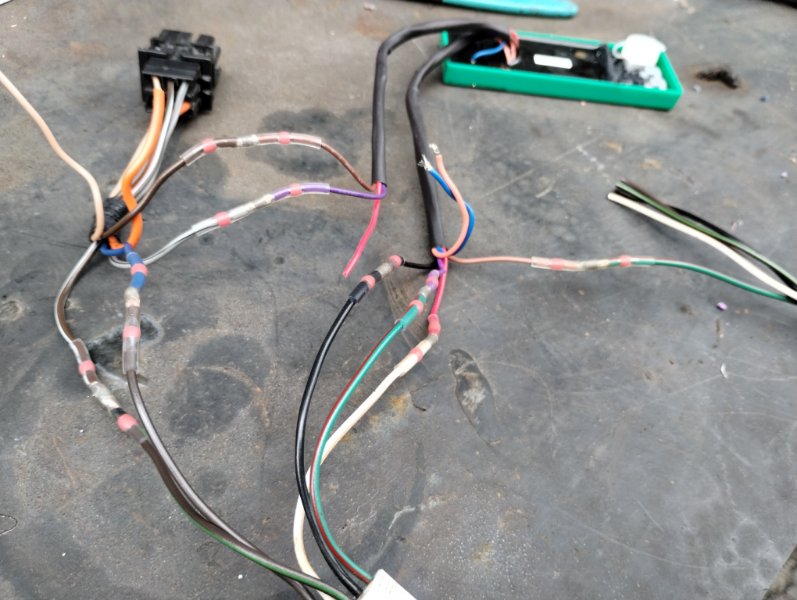
Here is the very basic wiring. You will pick one of the taillight pigtails as your primary (run, brake, turn, reverse, ground). The other will only be used for it's turn signal. The running lights and reverse lights pass directly from the XJ pigtail to the MJ rear connector (which exists the cab under the driver's seat) The brake, ground, and turn signals run to the new device as input. On the output side, you will only use the left and right tail wires. The orange arrow indicates the 3rd brake light output, if using. The green arrow indicates the two fuel pump wires, if using. Finally, the bundled blue and orange wires indicated by the red arrow require a switched (IGN) 12v source for the device to function. There are a few of these on the XJ harness you can find with a multimeter. Works excellent. The only setting you need to set is by following the instructions on dimming the run lights. You will follow the instructions and turn the rotary switch all the way until the run lights turn off. (We don't need this functionality since we have separate wiring for running lights)
-
I have bought and installed this item, and can confirm it works. This solves the issue that anyone doing the 97+ conversion has had to tackle. Having this device between the XJ tail light output wires (from body harness) and the MJ tail light wires (running out from the cab to the rear) makes the MJ tails function like stock. No having to run and extend the XJ wires to the rear. No having to run passenger side wires. No having to run an additional wire for brake lights. No having to split the upper and lower MJ lights to function independently as a brake light and a turn signal. No having to find a way to hack the MJ tails to accept the XJ bulb sockets. I will update with some pictures of the install once its finalized to help visualize how I wired this. Everything is wired in the cab and the stock MJ tail harness is intact.
-
Until you press the brakes and have the turn signal on at the same time.
-
(This is specific to those doing a complete 97+ XJ wiring, dash, engine etc. swap into a comanche, but may apply to others) For those looking to retain the stock MJ tail light function (integrated brake and turn signals) instead of having to split the taillights into brake and turn sections like the XJ has, you may want to consider a device common on motorcycles. An integrated brake turn controller AKA a run-brake-turn controller such as this universal device https://www.amazon.com/Universal-Smart-Triple-Play-Controller/dp/B00BFXJM3M there are several available online with varying function, but as I am about to begin integrating my 98 cherokee harness with my MJ rear harness, this has been something I have been looking to accomplish. It appears this will allow all of the tail wiring changes to take place inside the cab. I plan to retain as much of the XJ harness as possible stowed away behind/below the drivers seat. edit: This may require an LED style flasher to be installed, since the controller may or may not use the individual turn signal pulse to power the bulb in all conditions, which may cause a fast flash.
-
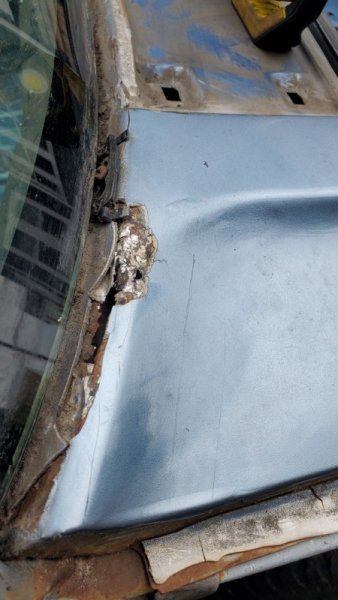
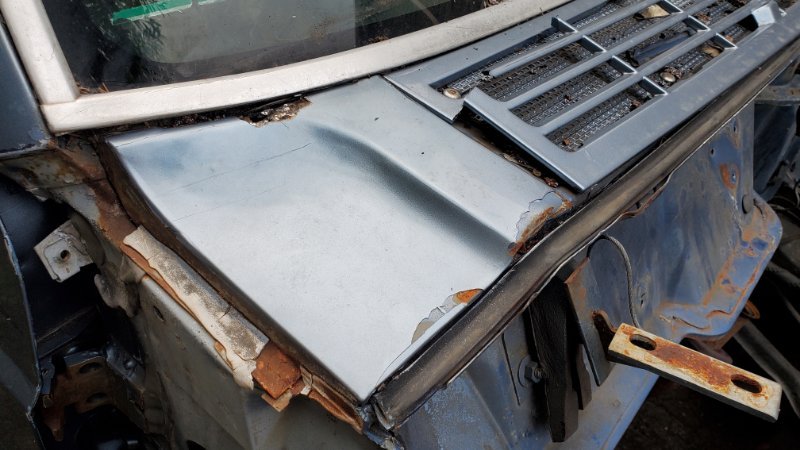
The end sections of my cowl were damaged by the hood hinges during an accident. Further, it looks like some old rust or damage along the windshield was repaired at some point. I have an XJ donor with good cowl end caps, but have realized it will be fairly invasive to cut the old ones out, including having to pull the windshield. I'm looking for opinions on whether I should spot repair the current ones or cut out the whole end caps and weld in new ones.
-
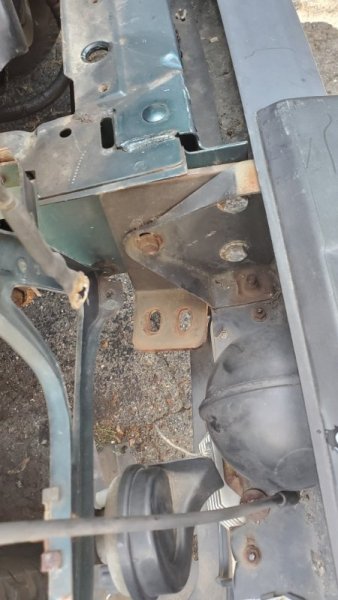
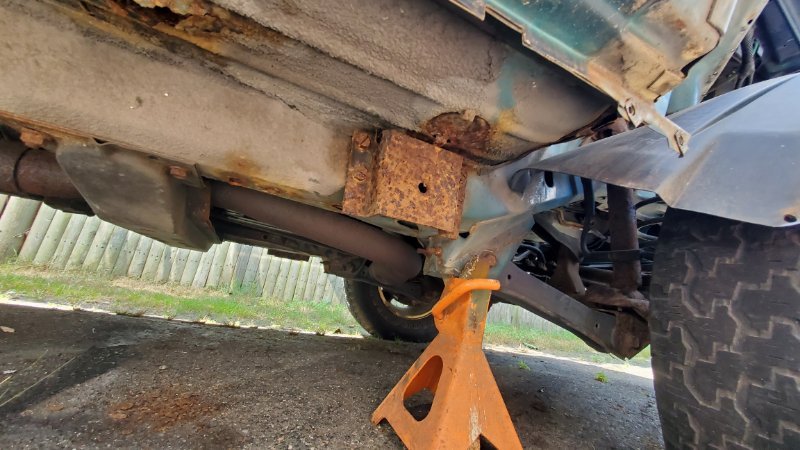
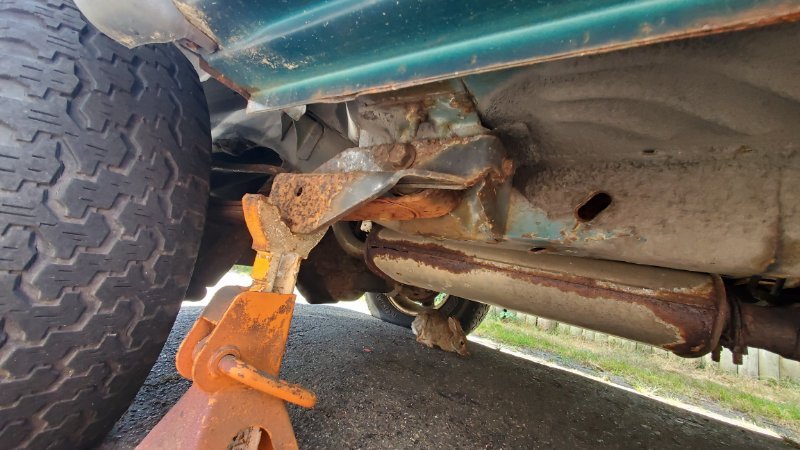
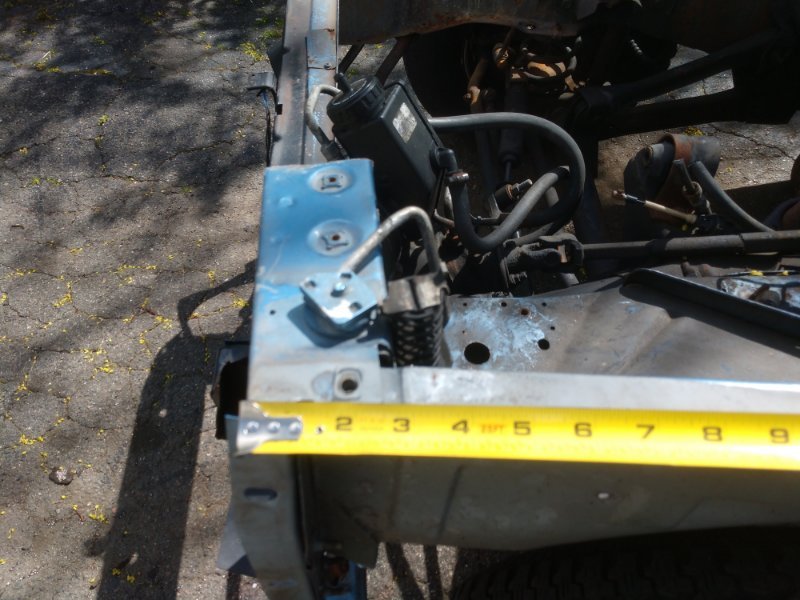
Working on tearing down this 98 xj for a swap into my 89 comanche. I noticed a few fairly heavy duty mounting brackets and I'm trying to figure out what they could have been for. Any ideas? First image is looking down at where the front bumper mounts to the frame rails.
-
Wow great, no problem I can adjust my measurement locations to match yours. I forgot about the expansion tank. Those should get me close enough to make up for the differences with the body panels. Thanks!
-
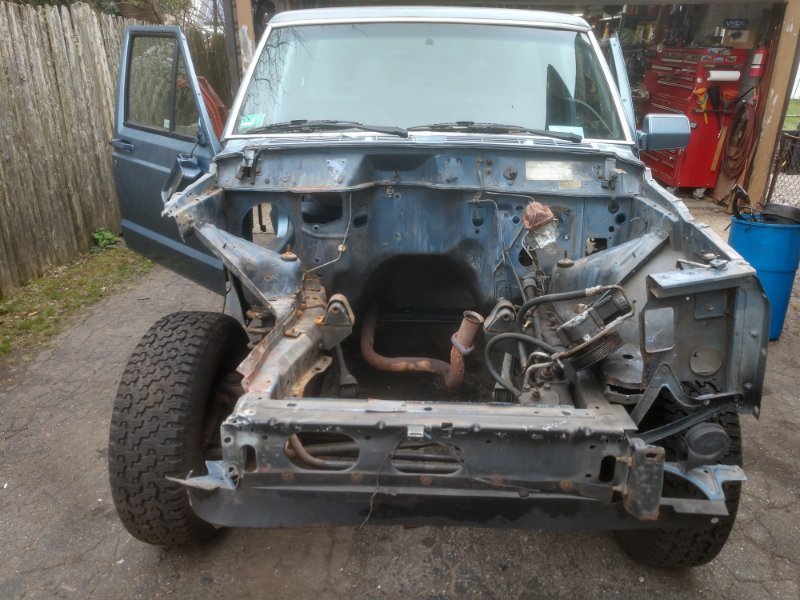
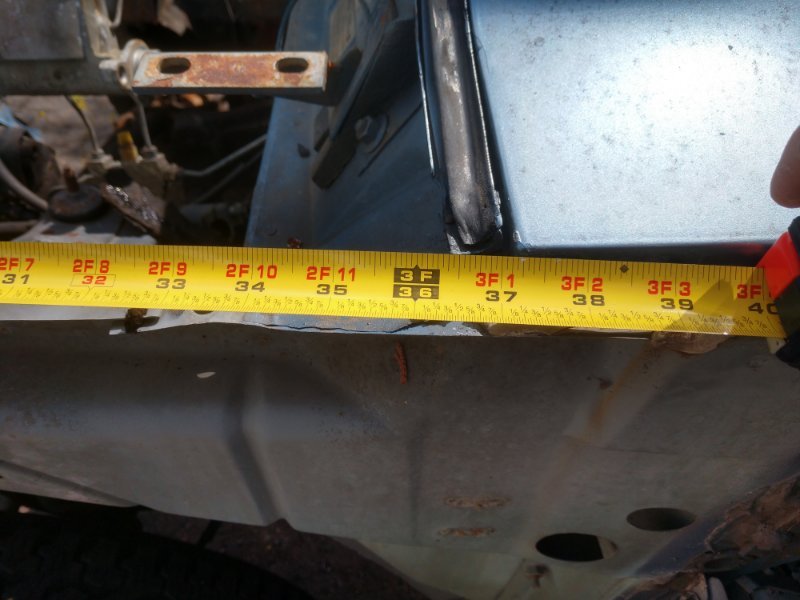
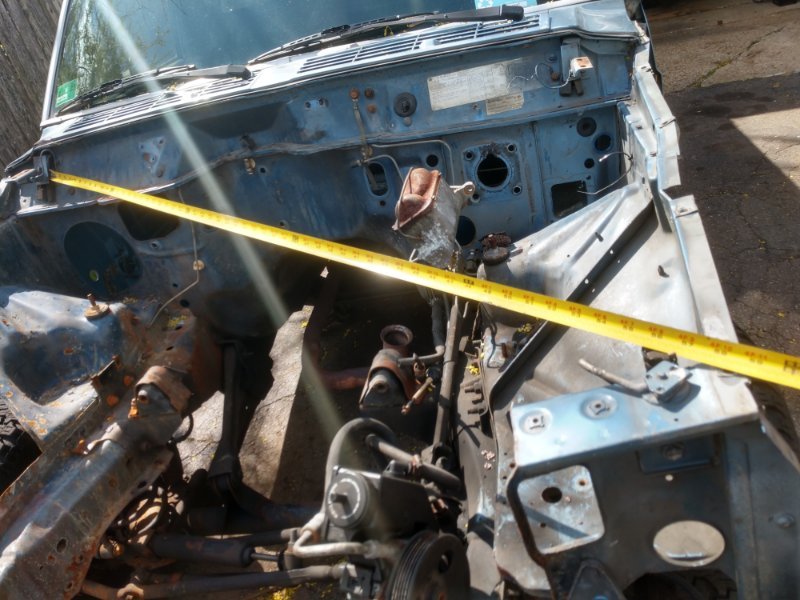
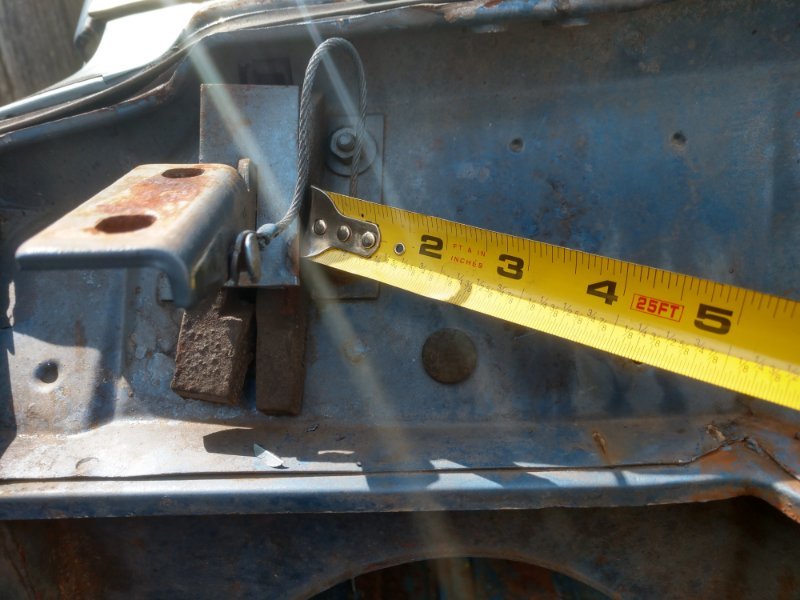
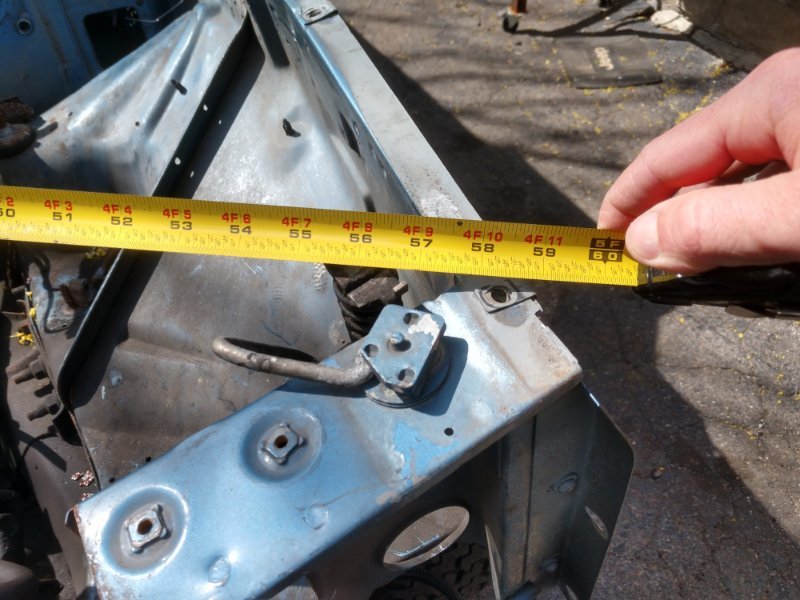
Looking for a few measurements as I begin to repair the body. If anyone could provide the following, it would be great help. First picture is an update. Pic2/3 are along the driver's side from the (removed) radiator header panel up to the windshield cowl Pics 4/5/6 span from the lower, inner bolt of the hood hinge (passenger) to the front most upper fender bolt (drivers). Hopefully my pictures make sense. If I have these two measurements on a decently straight vehicle, I can get mine 95% straight. Don't be confused by my numbers, they are certainly way off...
-
A bit disappointed from my research so far. Seems like the only reasonable (4wd 5spd) manuals trans option for an LS swap is the ax15, which I do have sitting around, but which will limit my power options. The NV4500 seems to be more work than its worth. Suppose I need to decide if I'm looking to build a 2wd prerunner style, which would open me up to plenty of options, namely a t56... With my DD Cherokee, I do not really need another 4wd, and I think this thing would be a blast with a ~400hp/6spd mill.
-
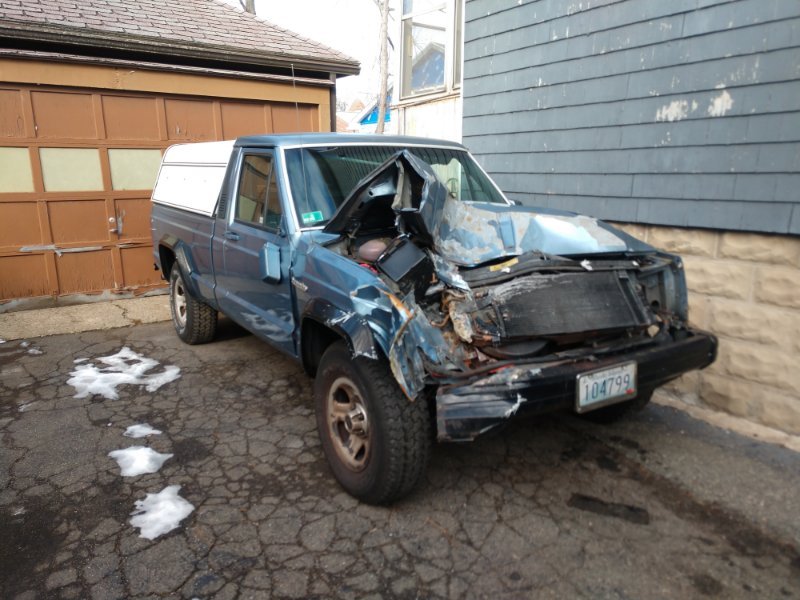
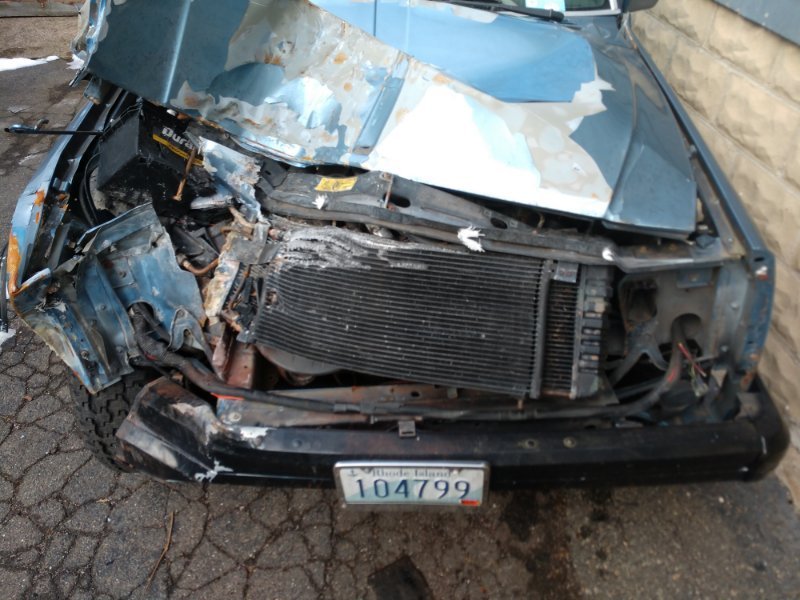
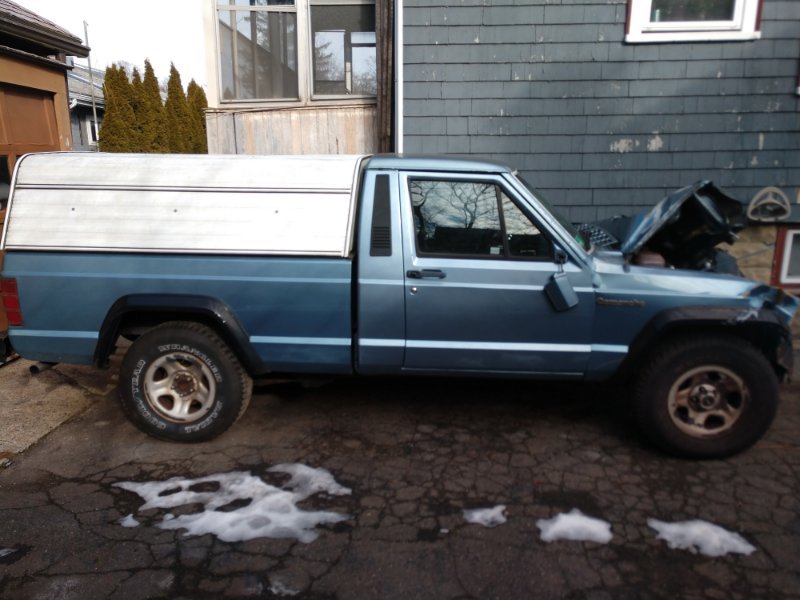
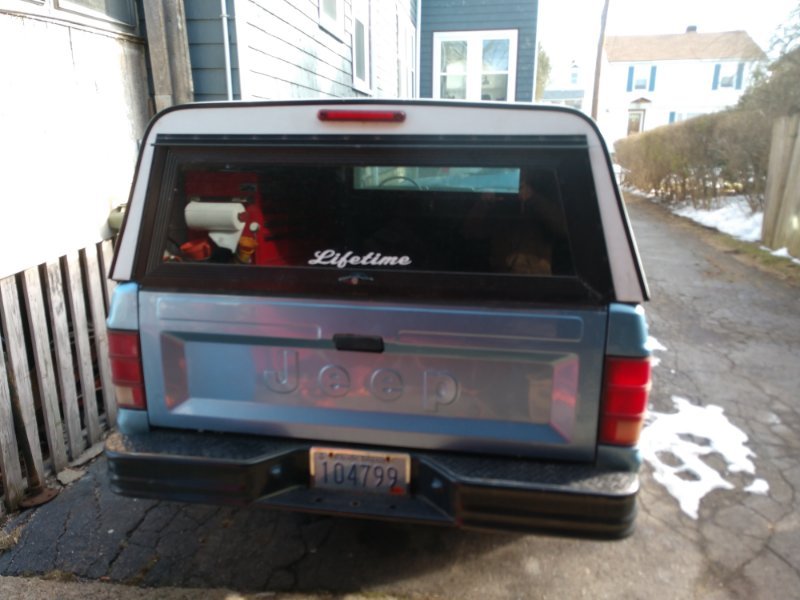
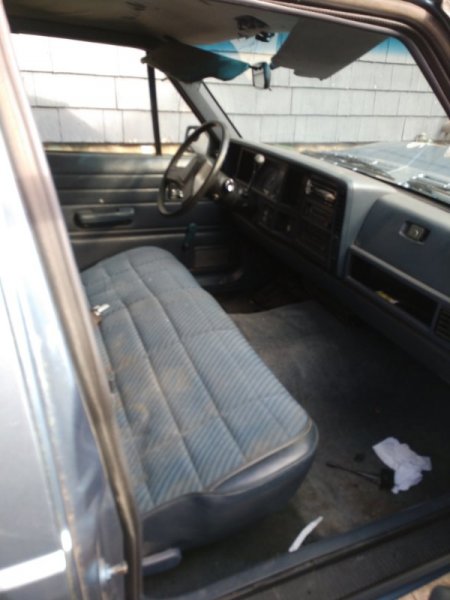
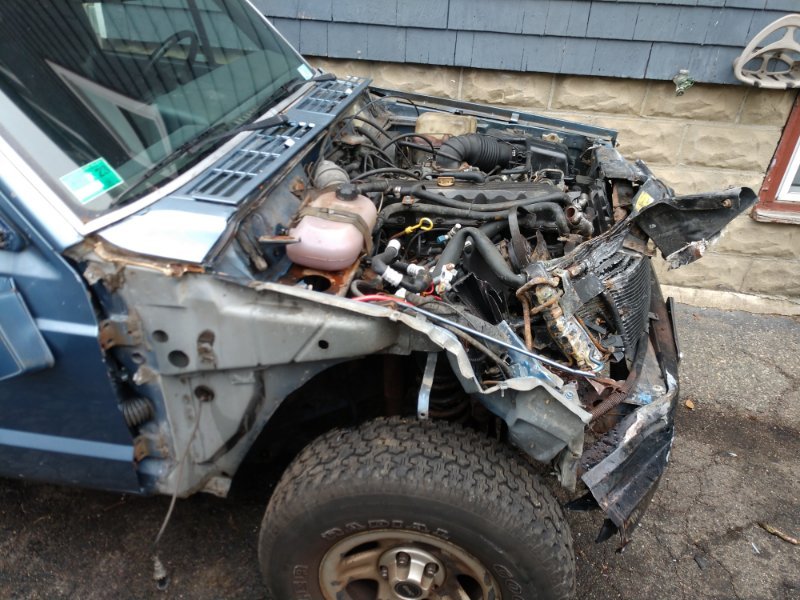
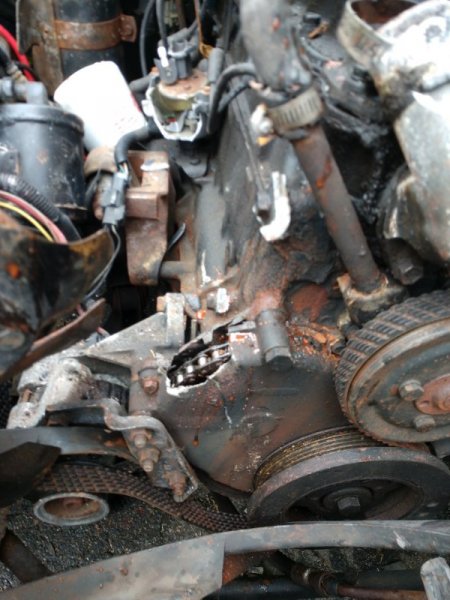
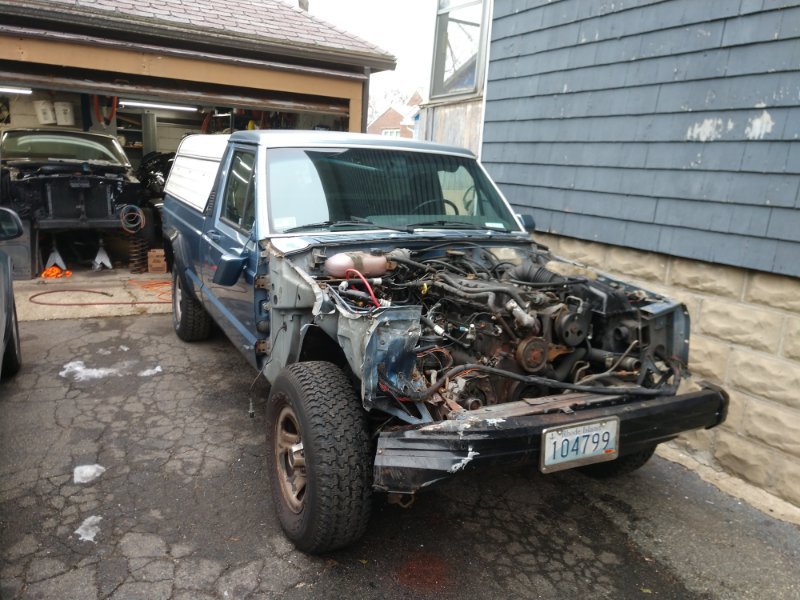
89 2wd auto swb Been keeping an eye out for a swb that was not rusted out for a few years, which is asking quite a bit in New England. Found this poor truck which the previous owner left in gear and stepped out. Went down his driveway and met a steeply angled tree. Damage is amazingly fairy isolated. As of now, cab/firewall back does not appear to have any damage other than the cover between the hood and windshield being cracked up. Truck was originally from California and is 2wd so it has seen very little snow/salt, if any. No real rust noted yet. Pulled off the hood and discovered the A/C compressor had been snapped off, the timing cover cracked, and the mount surface of that cover cracked off the block! Distributor was blown out of the way too. I have not made precise measurements yet, but the frame does not appear tweaked. Given the damage, I'm opting to swap over everything from a 98XJ 4x4 I have had sitting for a few years. Toying with the idea of an LS swap if I feel like it once I dive into the project and see what condition everything is in.

-
89 4.0 2wd auto swb, in Massachusetts. Being repaired following last owner leaving it in gear and getting out...

