
Eriko5000
-
Posts
41 -
Joined
-
Last visited
Content Type
Profiles
Forums
Gallery
Everything posted by Eriko5000
-
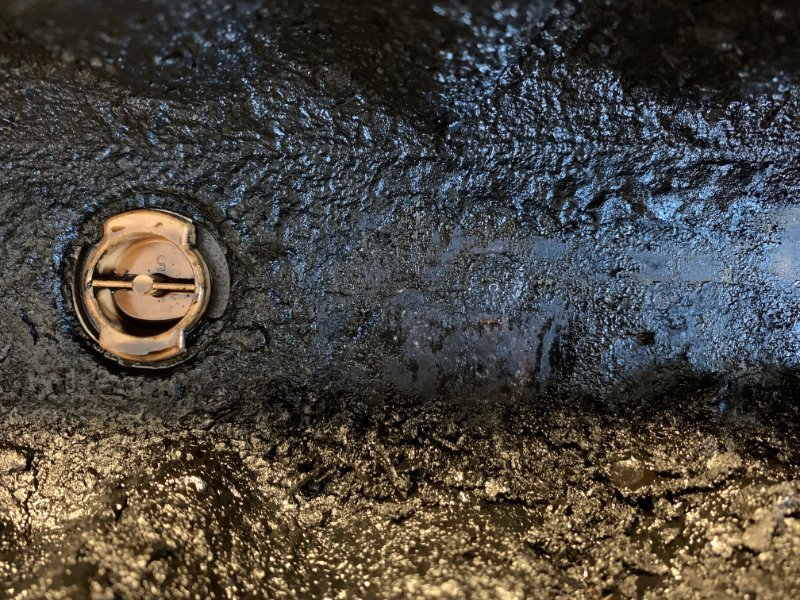
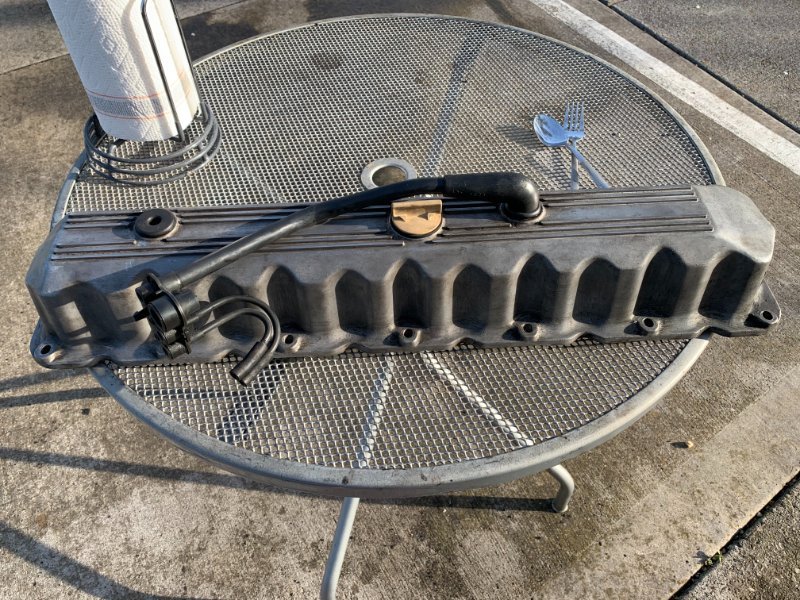
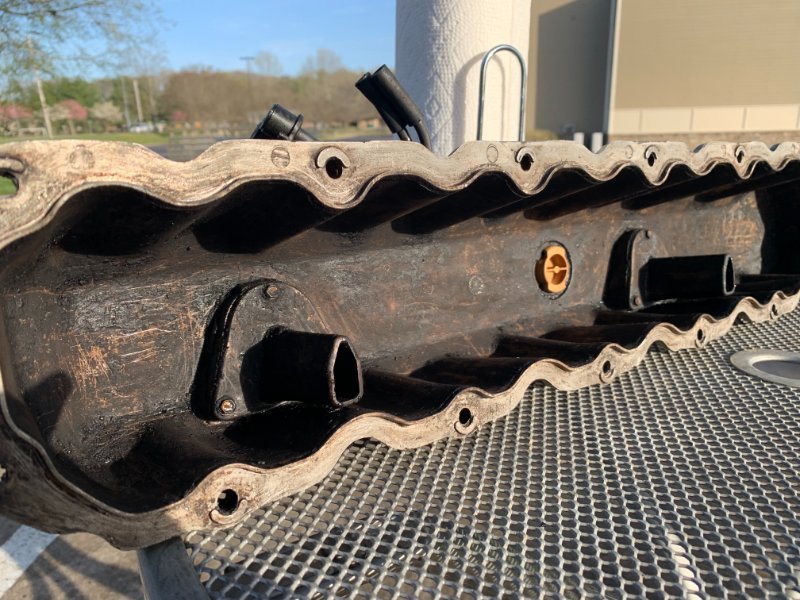
I replaced my valve cover gasket a few weeks ago, and upon pulling the cover, found significant gunk build up in the engine (See picture). I cleaned the valve cover out, and just put it back together. I've heard that Seafoam does wonders to break down build up inside the engine, but want to be sure if I put Seafoam in, that it dissolves it safely, rather than potentially breaking any pieces loose that might clog something. I'm also trying to figure out if there's an amount of build up that it's not worth cleaning out until you need to just do a rebuild. Any thoughts? Are there any other options for cleaning up the gunk build up safely?


-

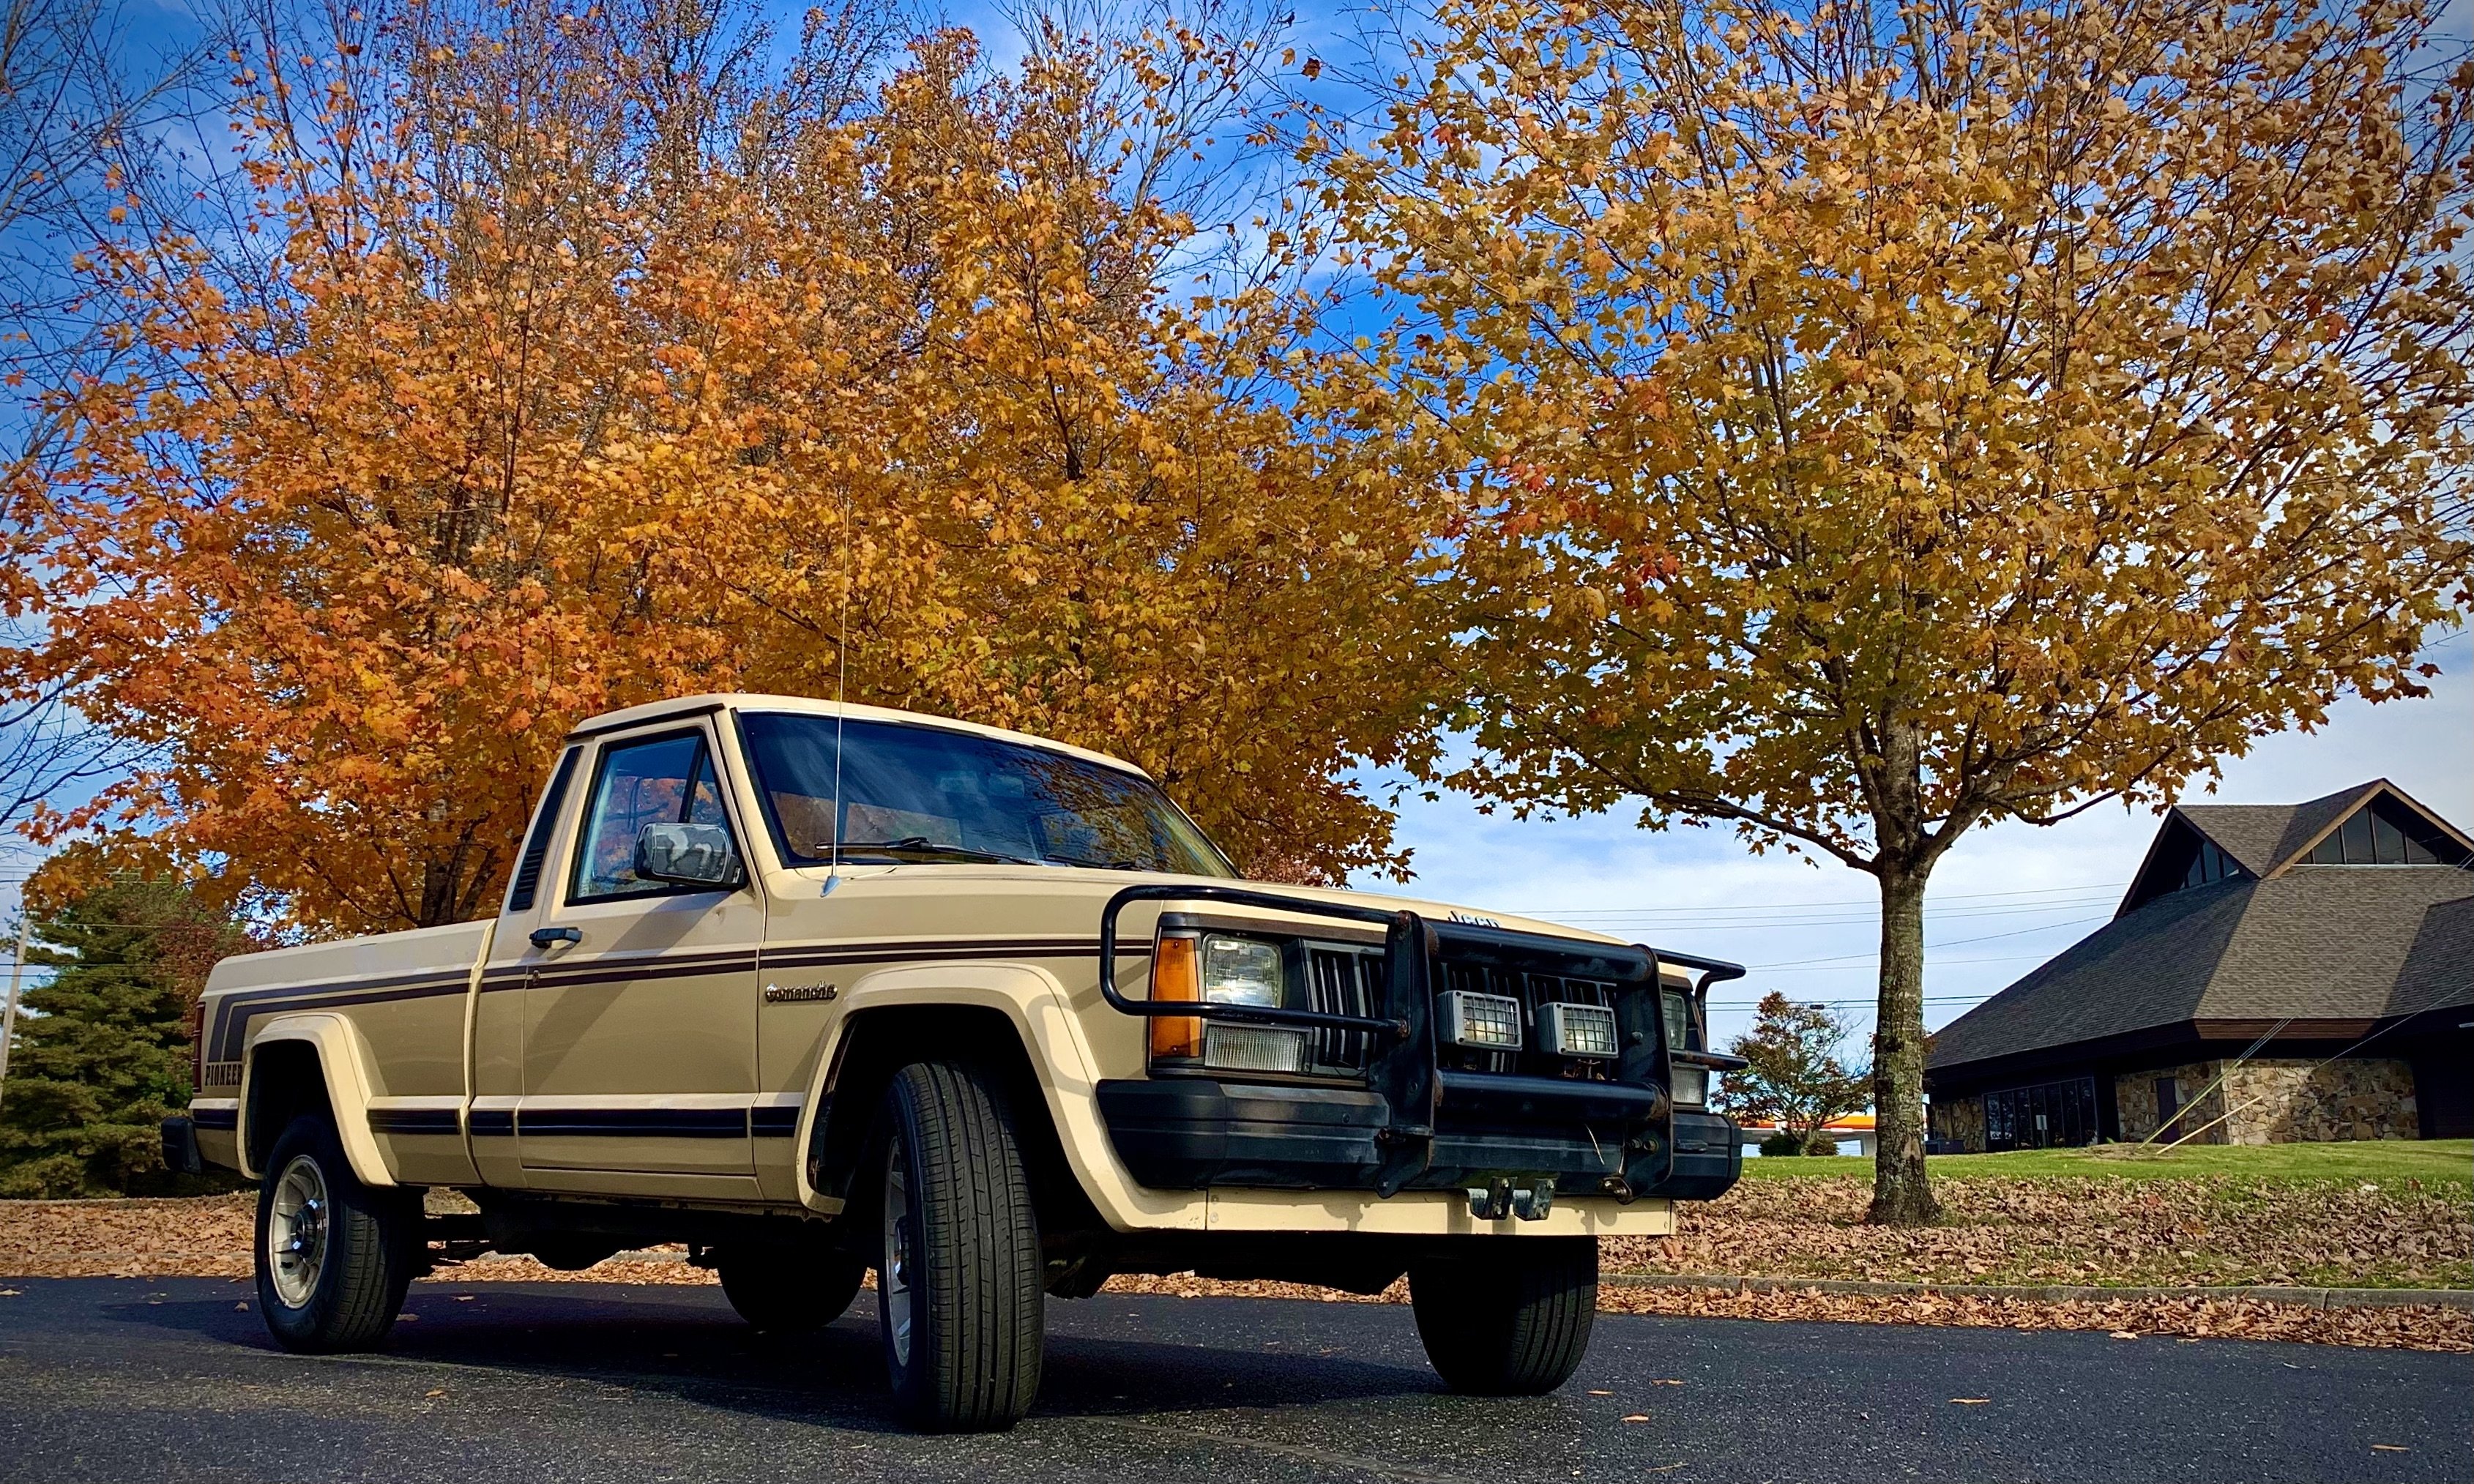
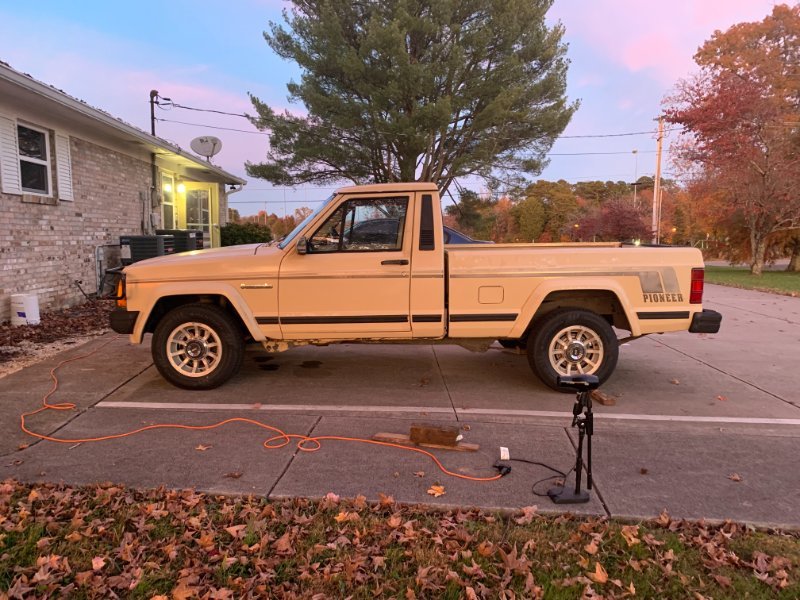
Jeep Comanche Pioneer '89 Build
Eriko5000 replied to Eriko5000's topic in Member Projects: Your Comanches
My most recent project- Replacing the valve cover gasket Upon getting the valve cover off, the top of the engine and inside the cover looked TERRIBLE. So much gunk built up.. Tried to research how bad that is for the engine, and basically came to the conclusion the only thing to do is clean the cover while it's off, put it back together and use Seafoam in the oil to break down the build up, before doing an oil change. So, the cleaning process for the cover.. It still doesn't look great, but it's way better than where we started! Had some issues getting all of the bolts to line up with the new FelPro gasket on, and because it's a thicker gasket, some some of the bolts don't feel like they're threaded very deep, but we got it back and she's on the road! Still leaking some oil, but I'm hoping maybe that's left over oil finishing dripping off the outside of the engine.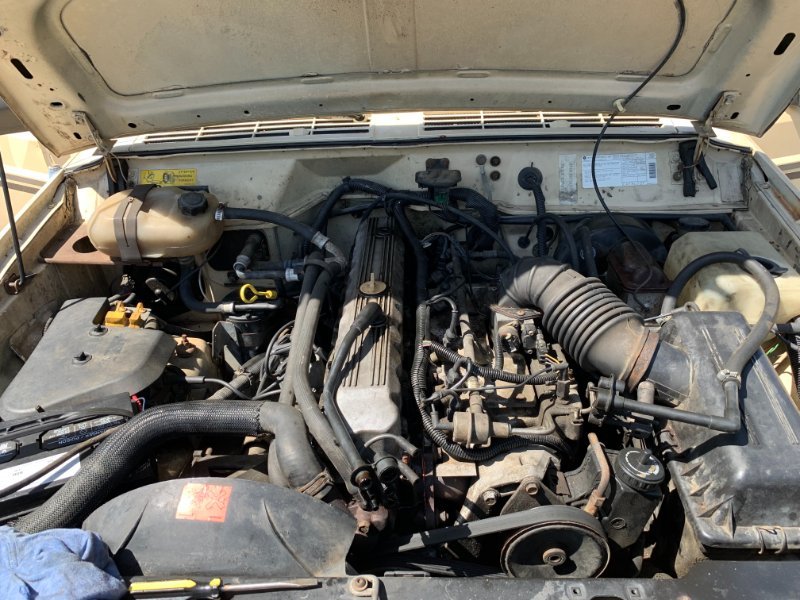


-
Jeep Comanche Pioneer '89 Build
Eriko5000 replied to Eriko5000's topic in Member Projects: Your Comanches
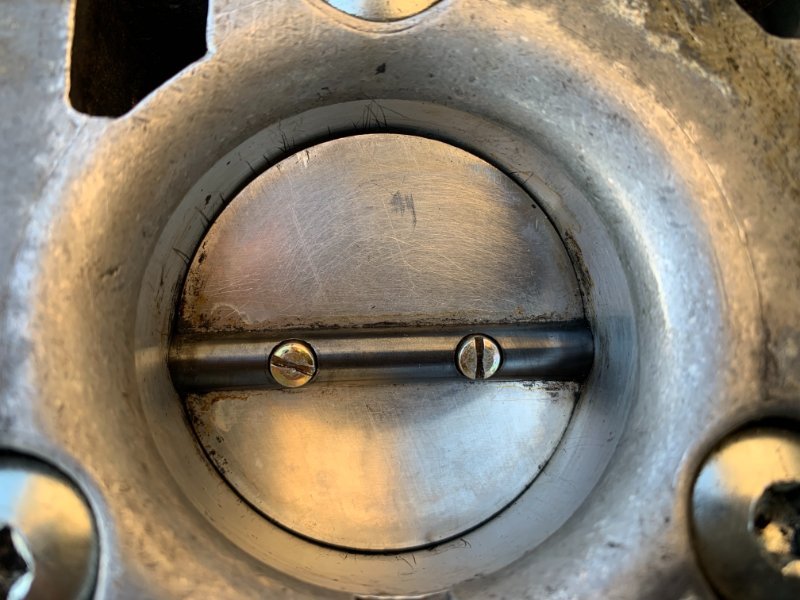
It is still a bit high! There's a bit more room that I could bend that stop plate straight, which will hopefully bring my idle down to the 700-900 range. Prior to cleaning the throttle body, it idled near 2,000, and after cleaning it went up to 2,500 so I'm pretty satisfied with the current win! I think that stop arm had it bent open, but the carbon build up sealed the opening a bit. -
Jeep Comanche Pioneer '89 Build
Eriko5000 replied to Eriko5000's topic in Member Projects: Your Comanches
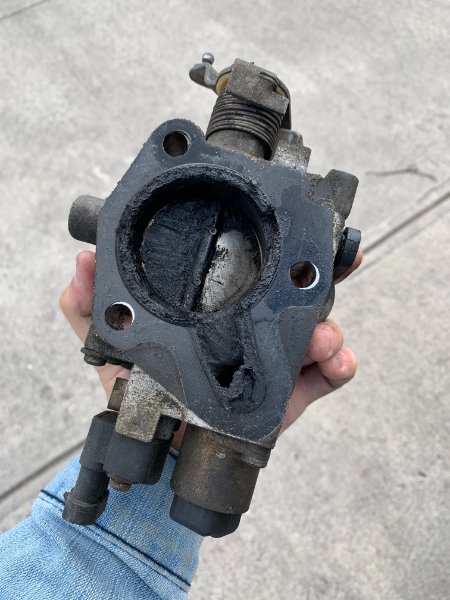
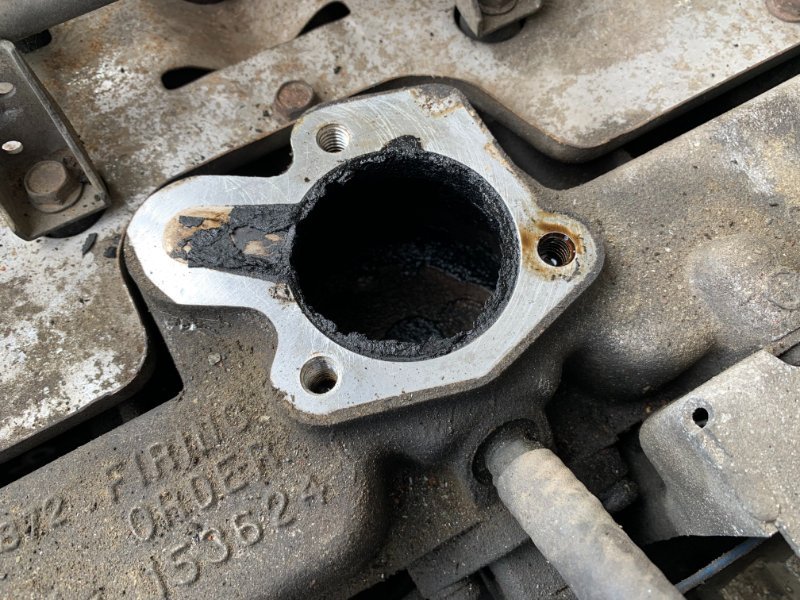
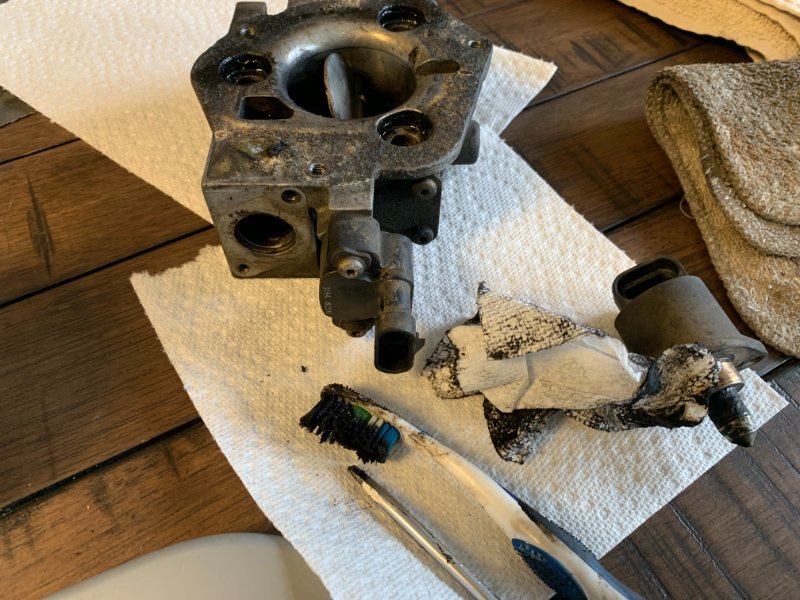
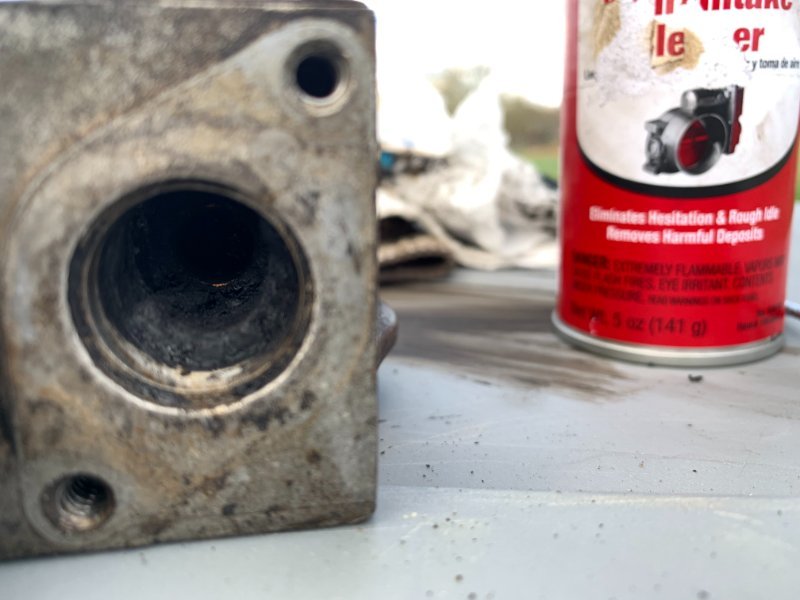
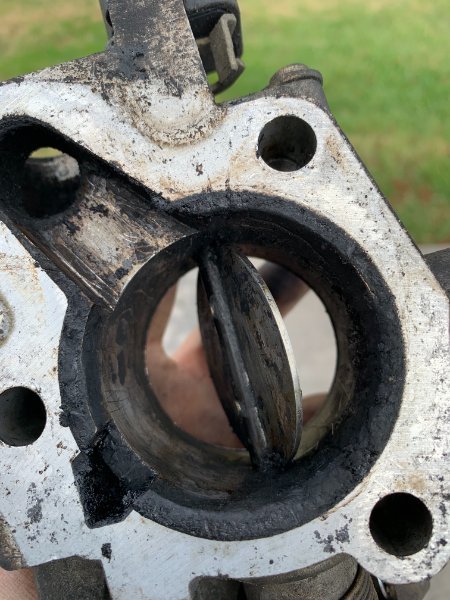
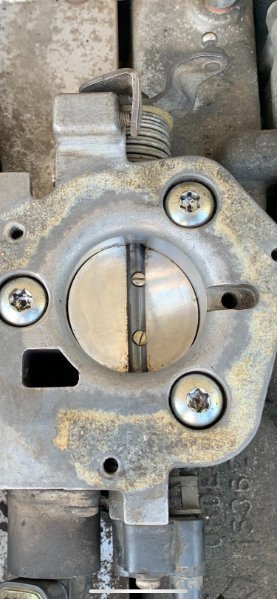
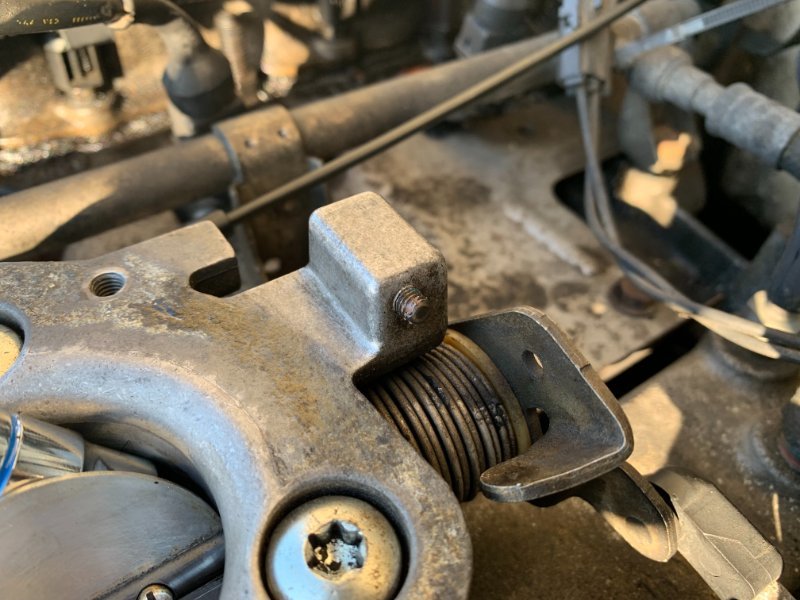
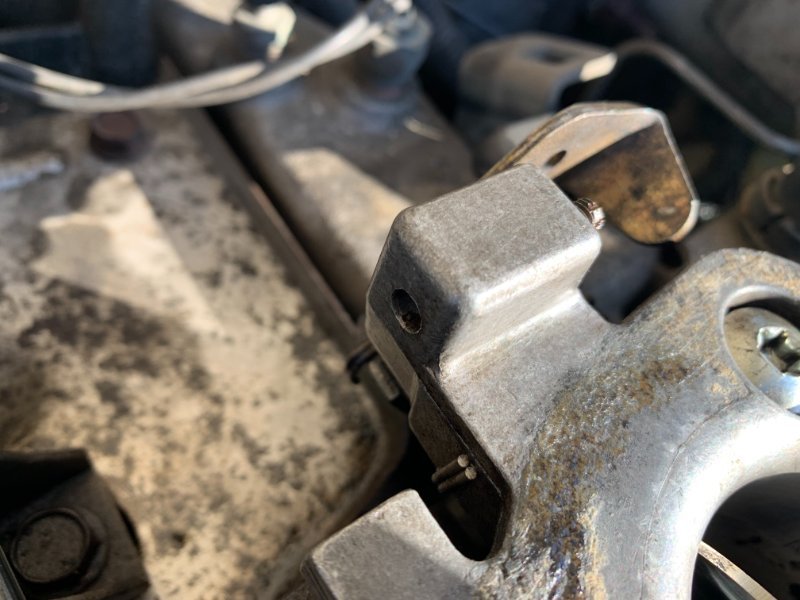
Next up, cleaning the throttle body. Never done this so it was all a learning curve. It was filth inside. Like, has possibly never been cleaned in the truck's 32 years of existence dirty? Took a toothbrush, paper towels, and a screwdriver to clean it out (Screwdriver was to carefully chip off chunks of the carbon build up) Once I got it all back together, started the truck- It was idling at 2,500 RPM's. I thought maybe the IAC went bad during the cleaning process- Or possibly a vacuum leak that started somewhere in the process? Or was the valve not closing enough? I tried to adjust the stop plate screw but it was locked tight, and wouldn't budge. Then, after looking through old Comanche Club forums and asking for help on a Jeep Comanche facebook page, I noticed the stop plate looked bent in, potentially holding the butterfly valve open too much So I took a pair of pliers and tried to carefully bend it straight. After a bit of effort, I got the butterfly to close a bit more, and now the truck is idling at about 1,200 RPM's.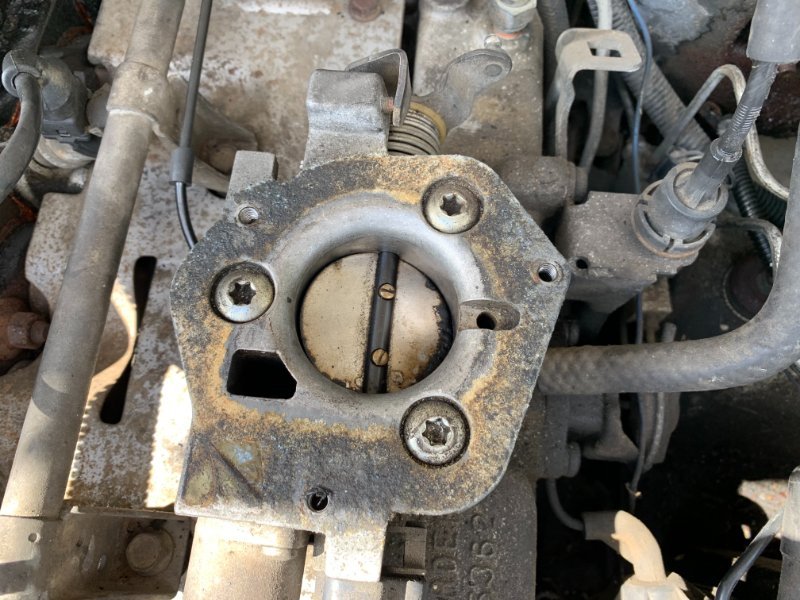


-
Throttle Body Position Adjustment- Help!
Eriko5000 replied to Eriko5000's topic in MJ Tech: Modification and Repairs
As I was trying to figure out how to adjust the butterfly position via that screw, I noticed in a picture I had taken of it that the arm that sits against that screw looked a bit bent, holding the butterfly in a slightly more open position. I took some pliers and bent it back straight a little bit, and now the truck is idling at about 1,200-1,500 RPM's. Way better than 2,500 RPM's! There's still some room to bend it straighter, so I'm hoping that'll help me get it down the rest of the way to 700-900 RPM's at idle.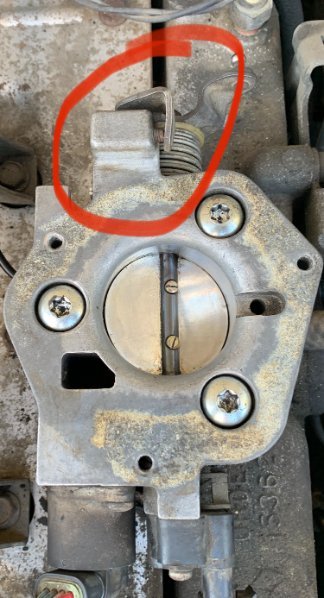
-
Throttle Body Position Adjustment- Help!
Eriko5000 replied to Eriko5000's topic in MJ Tech: Modification and Repairs
I did see somebody talking about the IAC, that when installed you may have a high idle, that driving the car at normal temps and over 40 MPH for a few minutes would allow the ECU/computer to reset the IAC so it controls the air like it's supposed to. Could that be my issue? -
Throttle Body Position Adjustment- Help!
Eriko5000 replied to Eriko5000's topic in MJ Tech: Modification and Repairs
I cleaned the IAC and was able to reuse the gasket. Checking for vacuum leaks if my next step before I kill myself trying to adjust that screw. I read where car computers will typically take a bit of time to correct and adjust the idle air levels. Is an '89 Comanche too old for the onboard computer to do that itself?? -
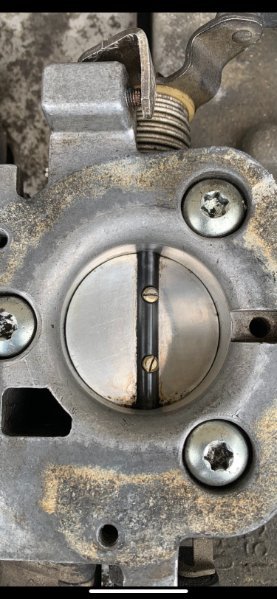
So yesterday I pulled my throttle body off to clean it. The thing was filthy (Like, maybe has never been cleaned in its 30+ years of existence filthy). Cleaned the throttle body and and got it put all back together, test drive the truck and it's idling at like 2,500 RPM's. Checked everything and the butterfly valve is cracked open in its resting position. So I've found the screw that I need to adjust to get it to close tighter. A little hex screw.. With the Hex head inside this hole.. I can't get it to budge.. I'm hitting it with PB blaster, WD-40, and it won't move. How do I break it free? Without breaking any hex wrenches? Can I grab the threaded part, sticking out with Vice Grips? That would probably wreck the whole thing. Also, could there be another cause of the crazy high idle? Anything I need to look out for?
-
New coils? Coil Spacers? Helper springs?
Eriko5000 replied to Eriko5000's topic in MJ Tech: Modification and Repairs
I found the difference.. The springs I bought were off a late model Grand Cherokee, which I assumed was still a ZJ. Turns out, Jeep changed the Grand Cherokee to the WJ model in '98. So the springs won't fit. What an oversight on my part. Here's to hoping I can resell the springs and get my money back out of it *sigh* -
New coils? Coil Spacers? Helper springs?
Eriko5000 replied to Eriko5000's topic in MJ Tech: Modification and Repairs
I didn't get to pull the springs myself- The guy who was parting out the ZJ pulled them before I came so he could scrap the rest of it, but I told him I needed the front coil springs, and the guy runs a shop. So I don't necessarily know for sure they're ZJ Front springs, but the guy seemed to know what he was doing. -
New coils? Coil Spacers? Helper springs?
Eriko5000 replied to Eriko5000's topic in MJ Tech: Modification and Repairs
Alright, I picked up the ZJ Springs today. In the process of trying to clean them up well.. Here's my new question- I noticed the top rung on the MJ springs are slimmer than the rest of the coil. These don't have that same taper. Is that an issue for installation?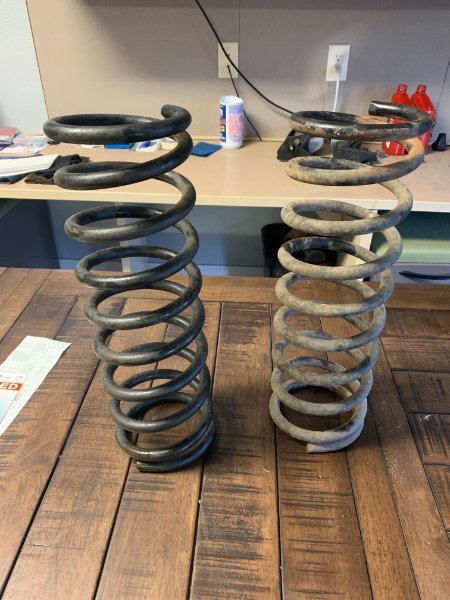
-
Is there a quality difference as well? Or just the difference in tread? I did notice that the ones Wal-Mart sells are not the AT3s but I've still seen relatively good reviews from them.
-
When you say you can find good deals by hunting around, are you suggesting calling local tire shops to see what they've got? Or can you generally find those deals via their websites? I've had a good experience with PepBoys when I've used them to put a set of tires on a car a few years ago.
-
I'm planning to upgrade my tires to all-terrain 235/75/15s soon and am wanting to get some opinions on the best options. I'd rather keep it as cheap as possible as I don't drive the truck much currently, and am not planning to take it off-road in any extreme conditions. - The Cooper Discoverer tires seem like the best option. I can buy them from Wal-mart for $105 per tire (Plus whatever installation fees wal-mart charges). They've got pretty good reviews and they're relatively cheap. - Wal-Mart also has Dextero DAT1 tires that ate $73/tire. They're certainly the budget option, but I have no idea what the quality looks like. - I've seen a lot of great reviews on the GoodYear Wranglers as well and they're not too expensive. What's the best option for a set of AT tires, that won't empty the pockets? I'm also hoping I can hang on to the current set of tires and resell them as they've got probably less than 500 miles on them. That'll (hopefully) help offset the cost.
-
Jeep Comanche Pioneer '89 Build
Eriko5000 replied to Eriko5000's topic in Member Projects: Your Comanches
I appreciate the response and encouragement! I've got quite a to-do list, and looking through your build threat, seeing how much you've done rewiring the electronics makes me worried that that's a project I'll have to add to the list.. That looks overwhelming! But I'm super excited to follow your build as well!! -
New coils? Coil Spacers? Helper springs?
Eriko5000 replied to Eriko5000's topic in MJ Tech: Modification and Repairs
Love the suggestion of having a BBQ and getting the job done with some buds over! -
New coils? Coil Spacers? Helper springs?
Eriko5000 replied to Eriko5000's topic in MJ Tech: Modification and Repairs
Thanks for the advice! I'll be sure to lift the front on jack stands before dropping the axle. Replacing the coils seems like a straightforward enough job but I'm honestly not excited for it. Oh well, c'est la vie -
Jeep Comanche Pioneer '89 Build
Eriko5000 replied to Eriko5000's topic in Member Projects: Your Comanches
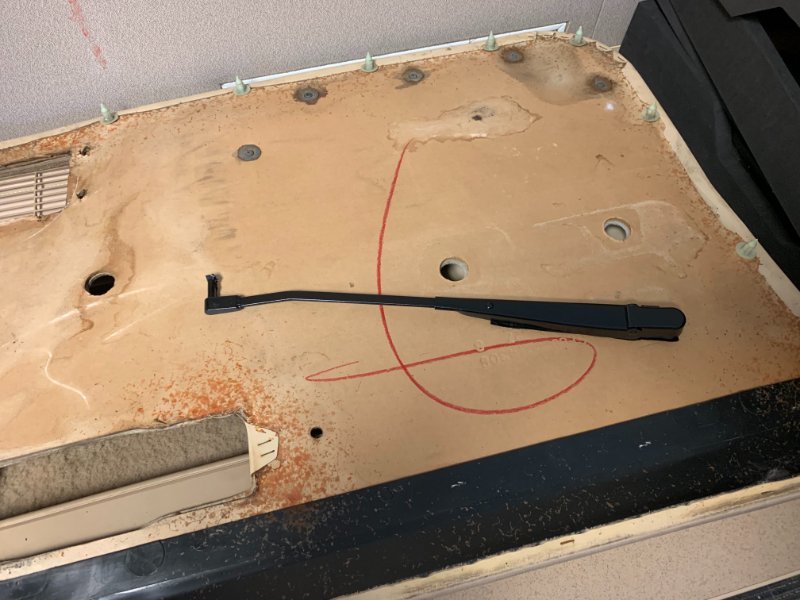
I upgraded my mirrors to a set that wasn't nearly as faded, and painted my windshield wiper control arms and windshield trim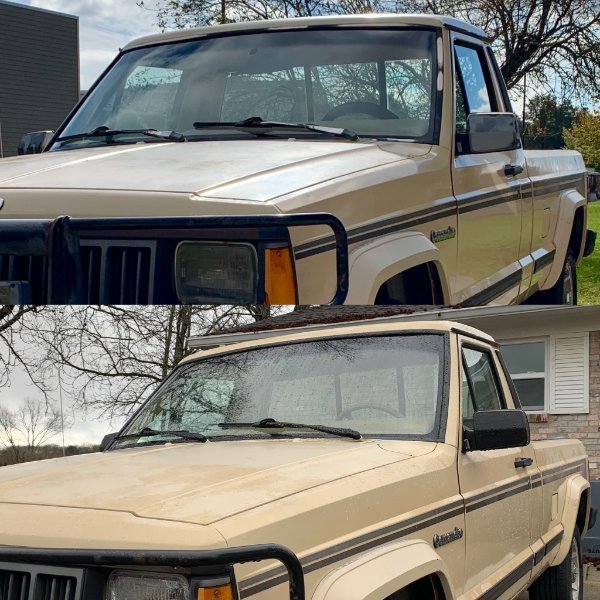

-
Jeep Comanche Pioneer '89 Build
Eriko5000 replied to Eriko5000's topic in Member Projects: Your Comanches
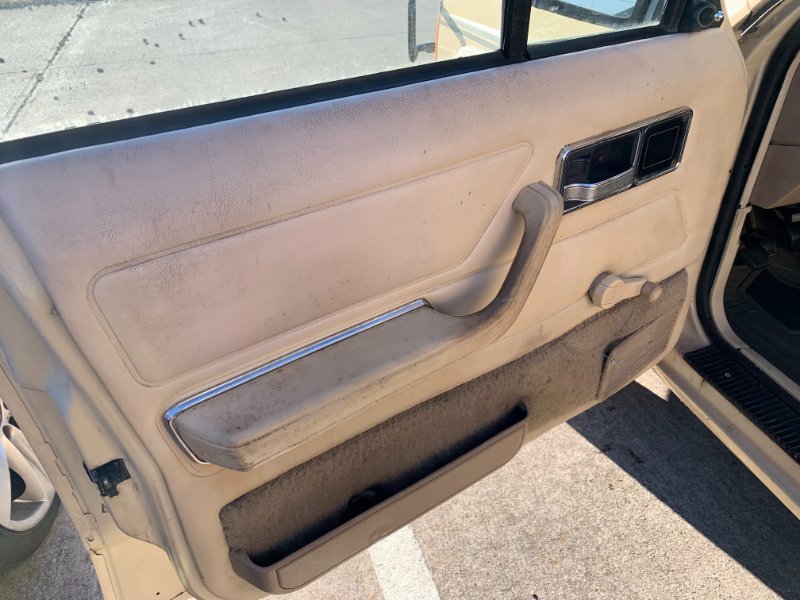
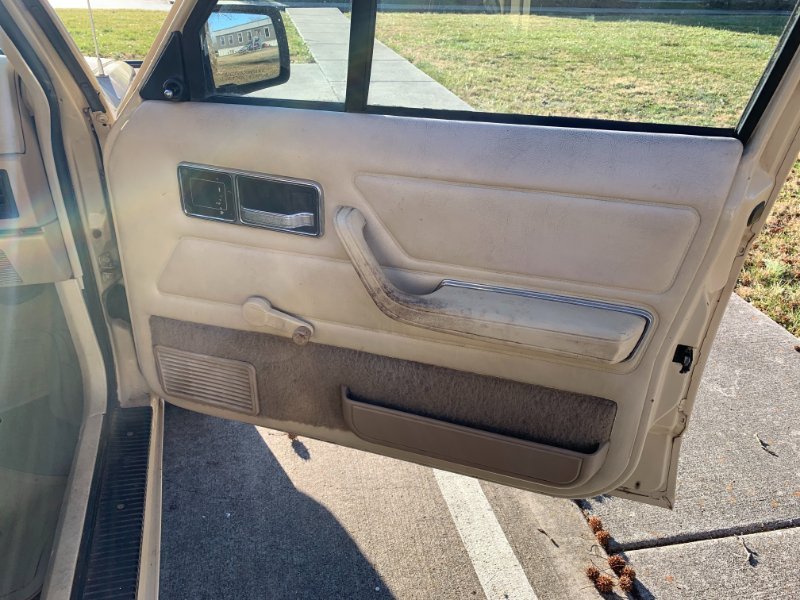
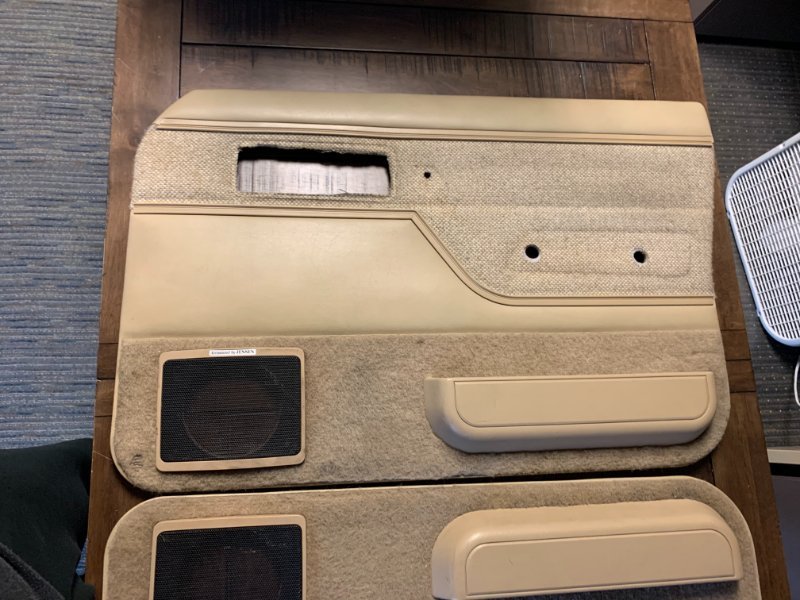
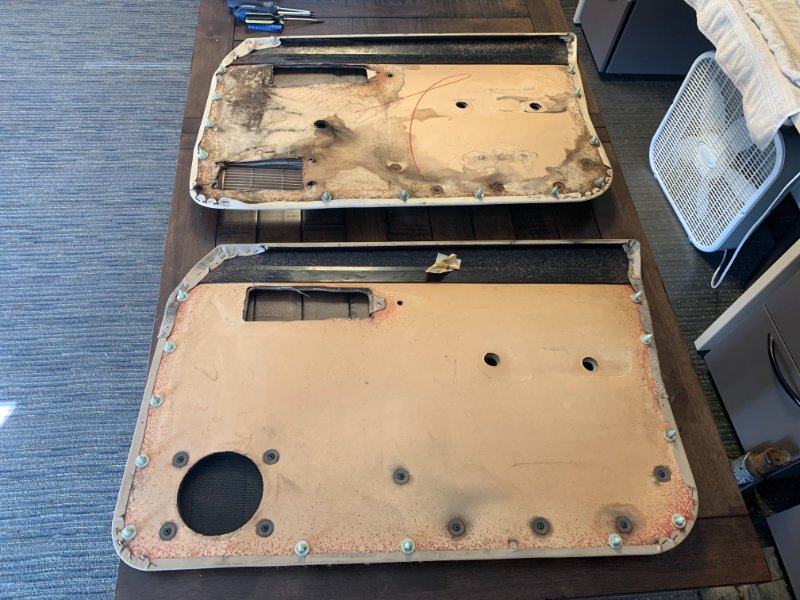
Next, the door panels. The stock ones had some bad water damage I found someone selling the tweed door panels out of an early 90s XJ Picked them up and put them in my MJ. I had to cut holes for the window cranks, and right now, the cranks hit those Jensen speaker covers (You've gotta pull the crank out a bit to clear it), but the new panels look super sharp.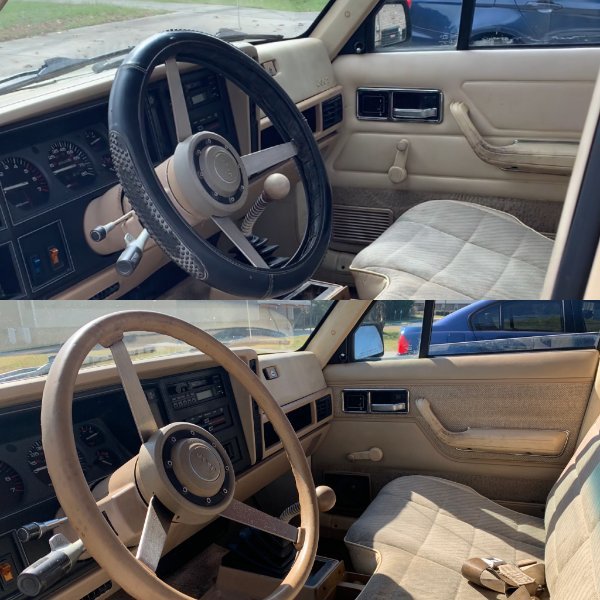
-
Jeep Comanche Pioneer '89 Build
Eriko5000 replied to Eriko5000's topic in Member Projects: Your Comanches
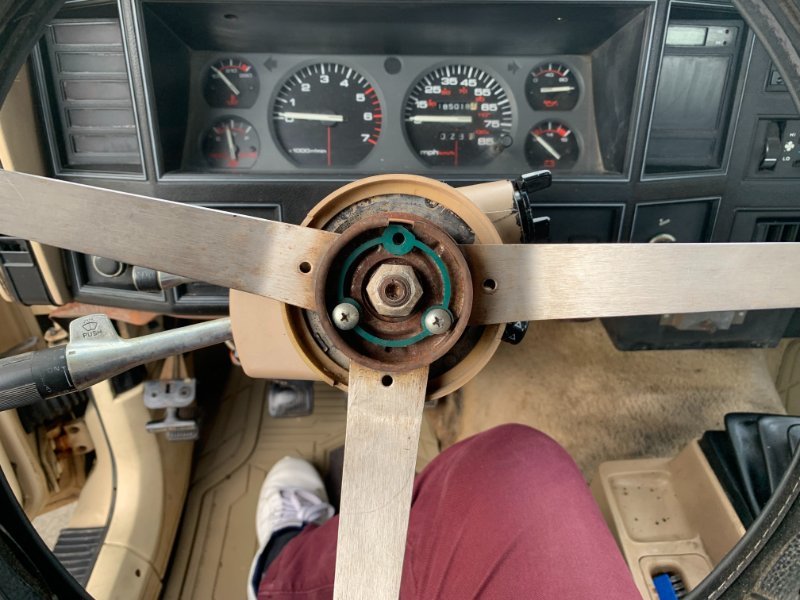
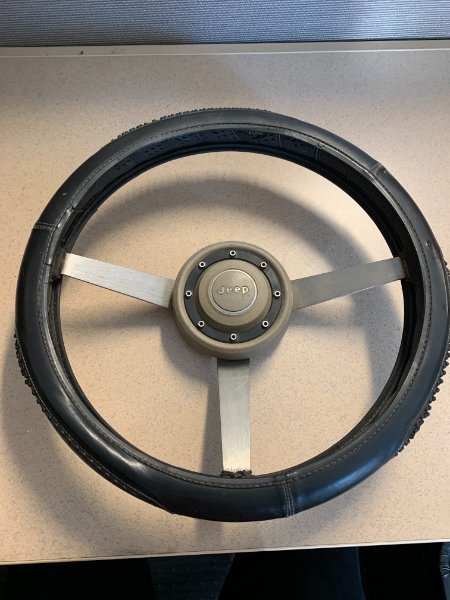
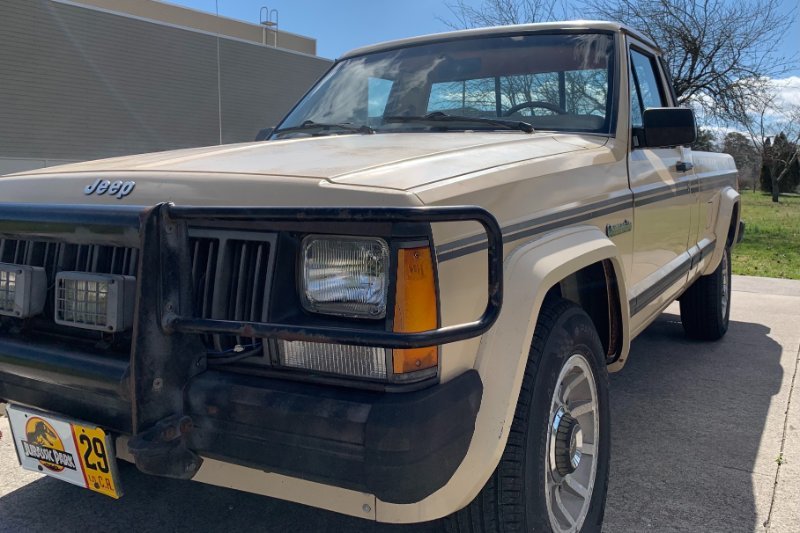
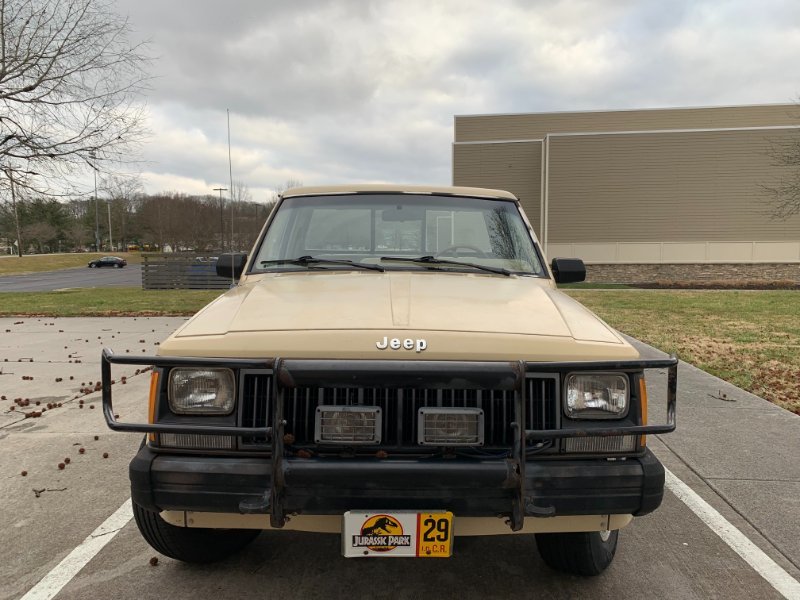
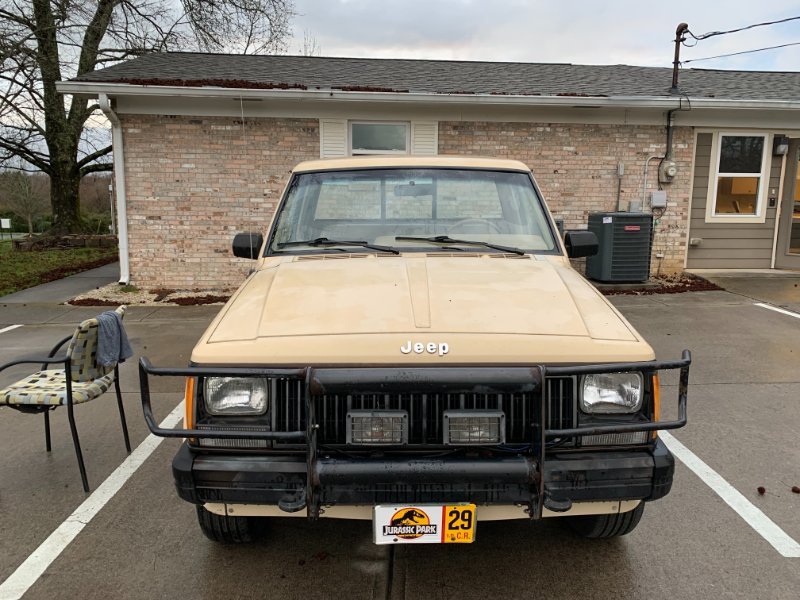
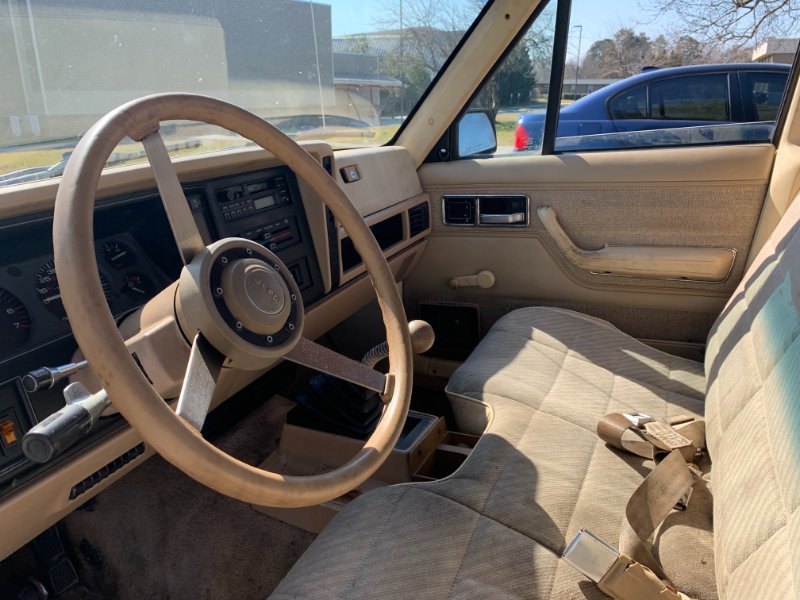
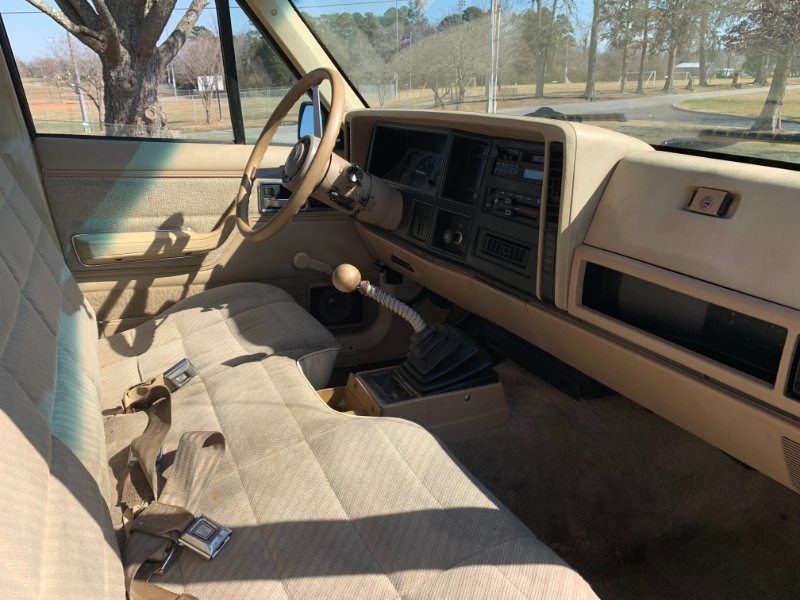
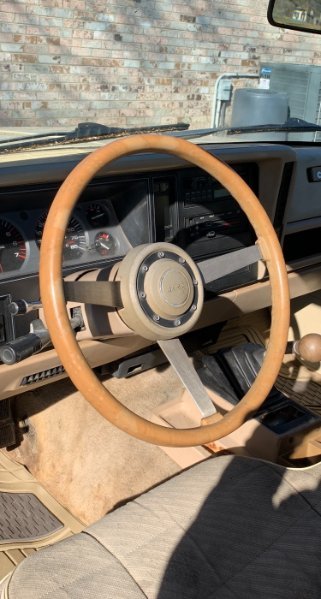
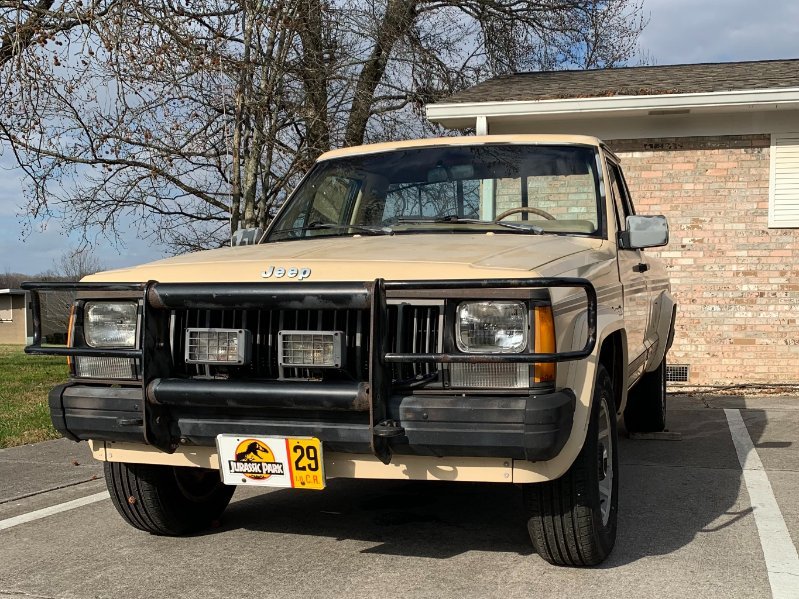
A few aesthetic things.. Pulled off the steering wheel cover that was on the truck Turns out, the original steering wheel is a beauty.. A front vanity plate that fits the age of the vehicle..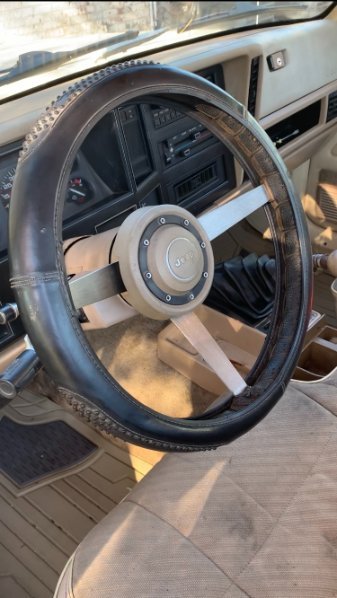
-
Jeep Comanche Pioneer '89 Build
Eriko5000 replied to Eriko5000's topic in Member Projects: Your Comanches
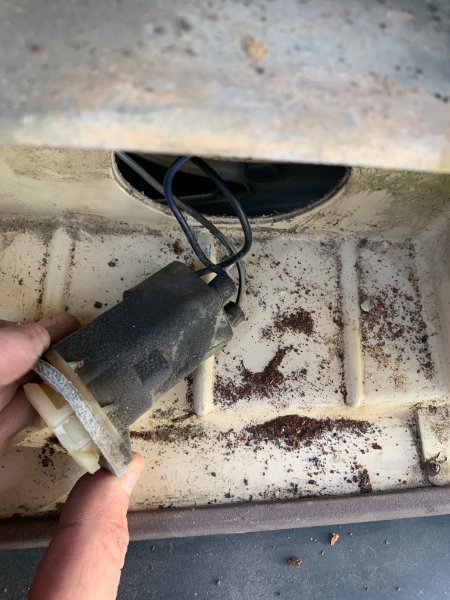
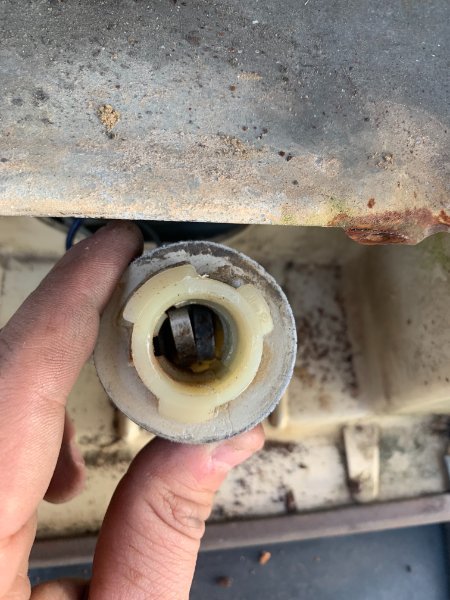
When I bought the Comanche, half of my running lights didn't work. Both front blinkers were out, one tail light / rear blinker was out on each side, the license plate lights had been replaced with aftermarket ones which had burned out, one headlight was old and dim. This front blinker socket is a visual representation of the lighting situation when I bought the truck.. After replacing some blown bulbs, replacing the license plate light fixtures, dim headlight, and splicing in new front blinker sockets.. I finally got all of the essential running lights working.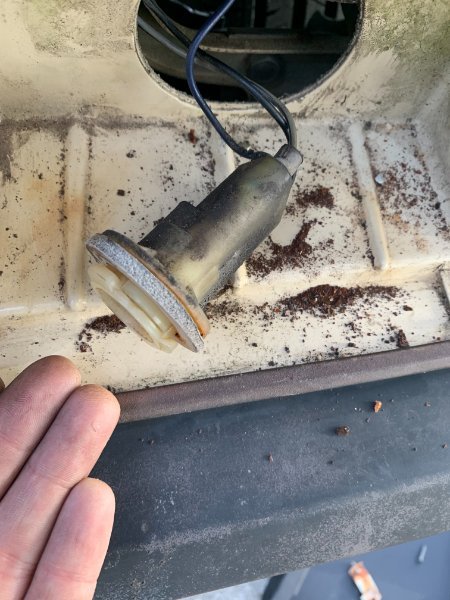

-
Jeep Comanche Pioneer '89 Build
Eriko5000 replied to Eriko5000's topic in Member Projects: Your Comanches
Thanks Pete!! Hopefully I can get her living up to the quality she demands! It's been a great learning curve, researching and taking on the repairs! -
Jeep Comanche Pioneer '89 Build
Eriko5000 replied to Eriko5000's topic in Member Projects: Your Comanches
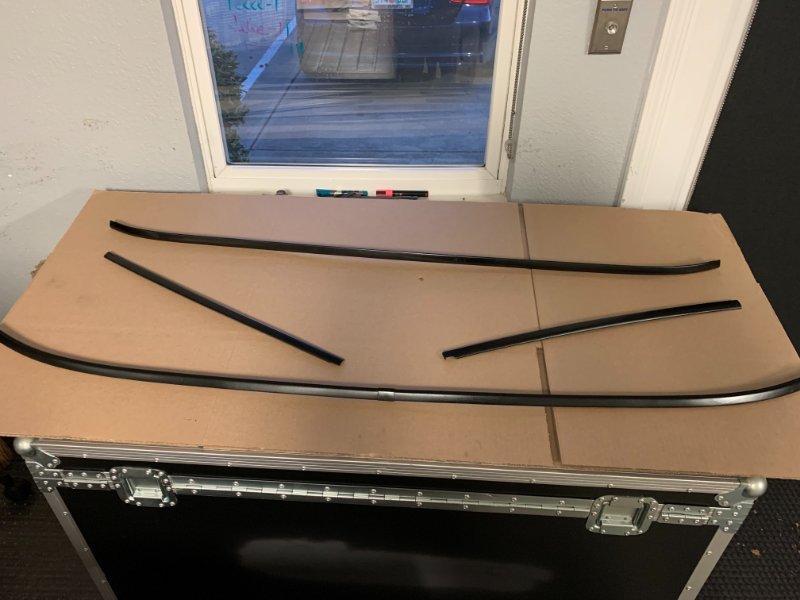
When I bought the truck, it was missing a single piece of the body side molding (And some other pieces were loose/coming off) I was prepared to pay a somewhat high price for the piece, since nobody makes them and they're hard to find. I found 88MJSally right here on CC, and he sold and mailed me the piece I needed for a great price! Threw it on with some 3M body molding tape, and I've had no issues with it! The 3M tape also helped me secure the other pieces of molding that were loose.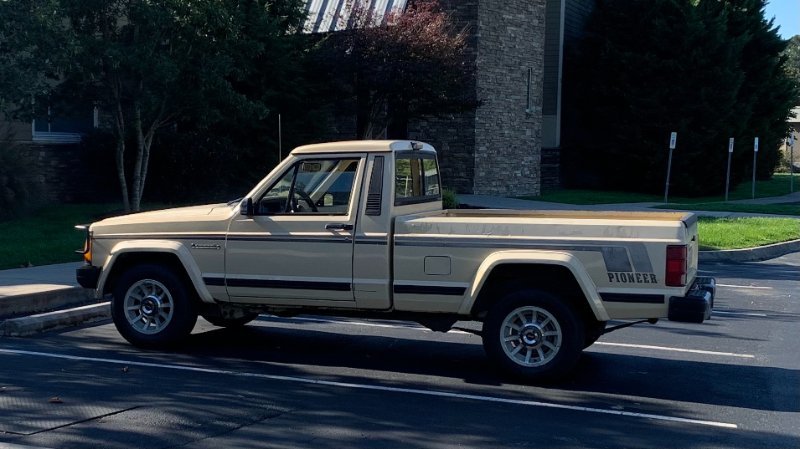
-
Jeep Comanche Pioneer '89 Build
Eriko5000 replied to Eriko5000's topic in Member Projects: Your Comanches
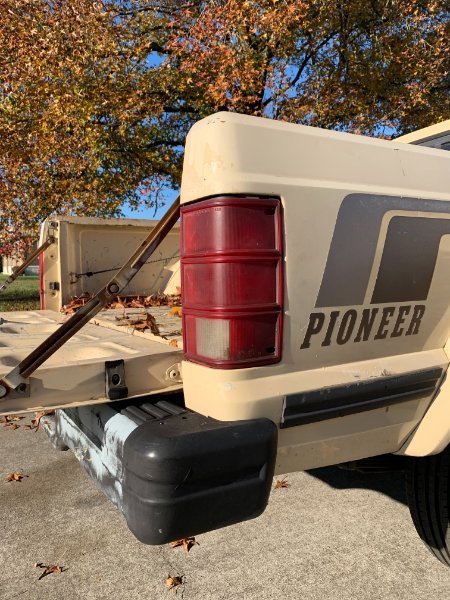
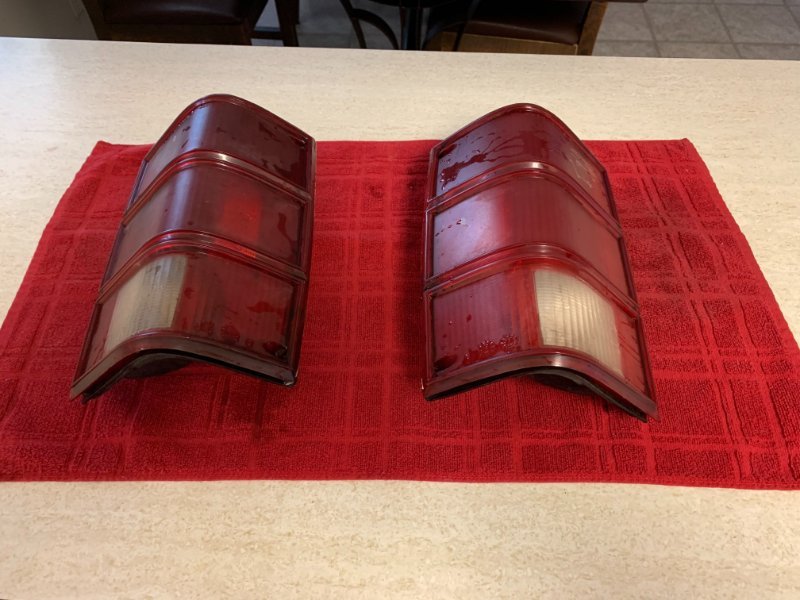
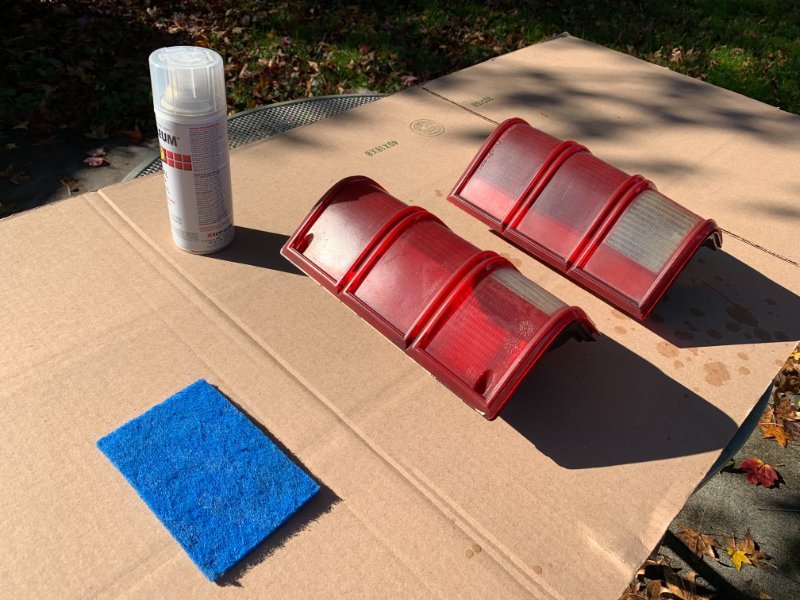
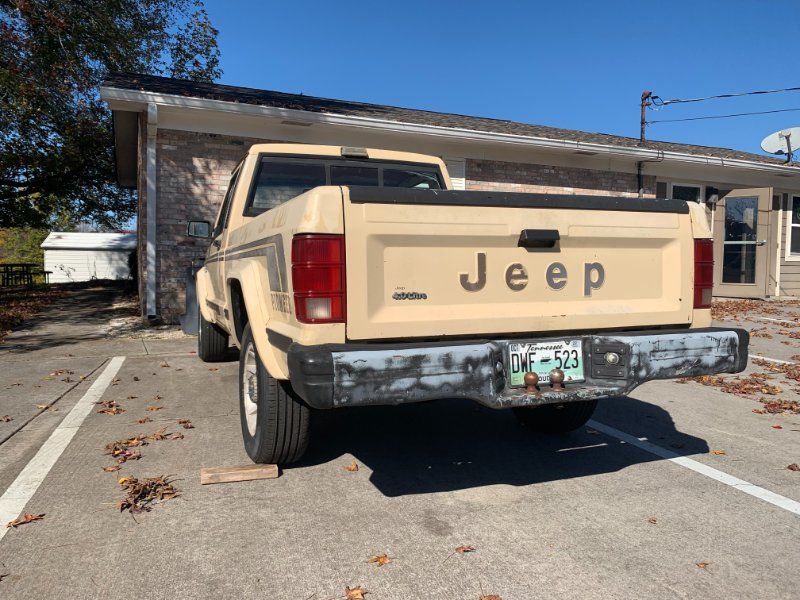
Next up was an attempt to restore the tail lights. A good thorough washing Spraying them with Rust-Oleum crystal clear enamel And finished product Before / After Honestly, the lenses didn't hold up as well as I would have liked. This job was done months ago, and the lenses are somewhat faded again, but they still look a bit better than they did originally.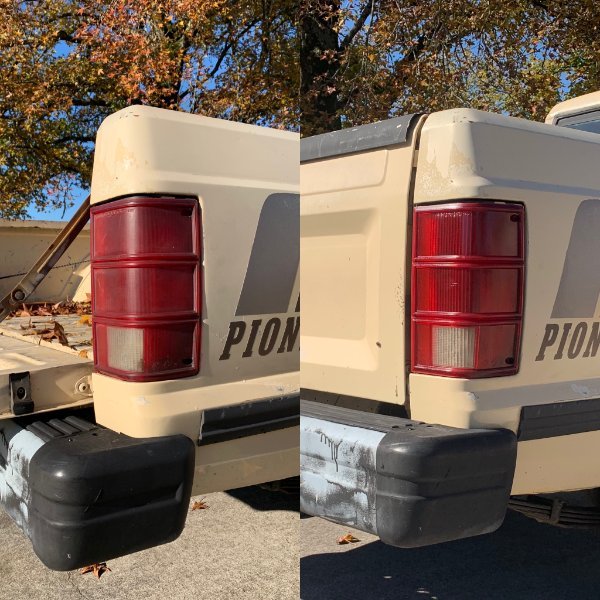

-
Jeep Comanche Pioneer '89 Build
Eriko5000 replied to Eriko5000's topic in Member Projects: Your Comanches
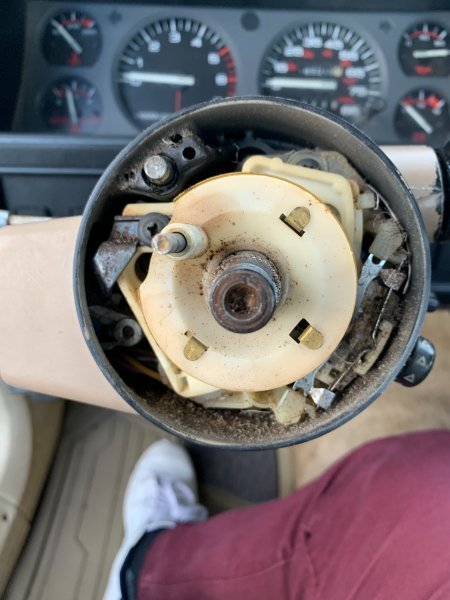
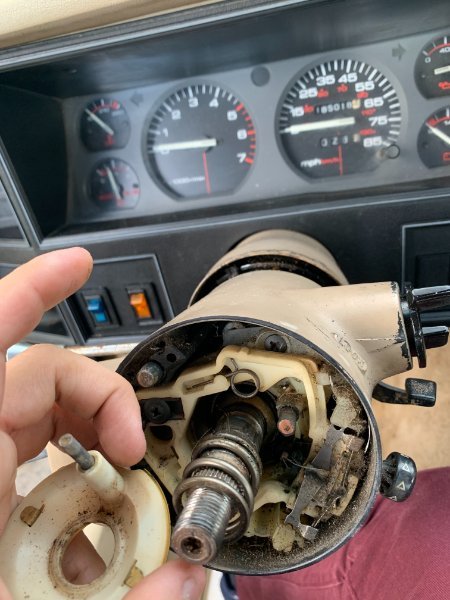
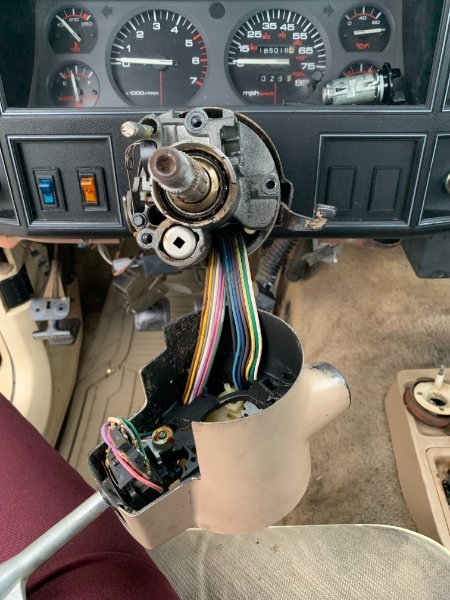
The first big repair I did: Tightening up the steering column. Not a fun project, and super tedious, but the column was really loose, and it felt so much better once I got it tightened up like it needed to be. I hope that's a repair I never have to do again (Thank you, thread locker)