


87ComancheMJ
-
Posts
22 -
Joined
-
Last visited
87ComancheMJ's Achievements
Jeeper (1/11)
-
Found my oil leak -.-
87ComancheMJ replied to 87ComancheMJ's topic in MJ Tech: Modification and Repairs
Sorry got very busy and haven't had time to check around. It has the 2.5 in it. Are there any specific year/model Jeep I can get a metal cover off of that will fit for this? Still new to doing my own work and the names of parts are not my strong suit but the two rubber hoses running off the top of the valve cover are also shot and need replacing. Edit: Crankcase Ventilation. Think I found the appropriate part on Napa https://www.napaonline.com/en/p/NDP7151365?partTypeName=Air+Intake+Ventilation+Hose&impressionRank=1&keywordInput=ccv+ventilation -
Found my oil leak -.-
87ComancheMJ replied to 87ComancheMJ's topic in MJ Tech: Modification and Repairs
Where some of the bolts hold it down its cracked all around the bolt like it was way over tightened and up into the side of the cover itself is cracked in one spot. Going to find a non plastic replacement and get some new bolts and try to get the old broke ones out. -
Found my oil leak -.-
87ComancheMJ replied to 87ComancheMJ's topic in MJ Tech: Modification and Repairs
One in the passenger center, driver front, and driver near the firewall. Think the second bolt from the one in back. Also found when it was done before they were rammed on there because there are a lot of cracks where the bolts go in and a nice crack in the back by the firewall. -
Found my oil leak -.-
87ComancheMJ replied to 87ComancheMJ's topic in MJ Tech: Modification and Repairs
I appreciate it all the feedback, gonna google around with all this information and go from there. Still a newbie and doing things I've never done before but I love this old truck -
Found my oil leak -.-
87ComancheMJ replied to 87ComancheMJ's topic in MJ Tech: Modification and Repairs
No they are broken down in there. Trying to undo the previous owners and they're junk. I went to undo the bolts and it spun with zero effort so I hand checked the rest and more were broke so they just got sat back in there and now it's my problem. -
Finally got around to getting an oil change with rotella, new filter, some mystery oil, and though why not do the valve cover gasket. WRONG. Found 3 broke bolts just sitting in there and the the back side is all split around the 2 bolts I couldn't really get a good look at. Unsure how to get those bolts out of the holes but guess it is time for a new cover and all new bolts. She does run way better thought with proper oil and a new gasket although still leaking bad. 🤦♂️
-
I am considering attempting it. Just don't have a lot of storage for anything at the moment. Maybe once we get this giant shed we have been looking at I will. Until then I have ball joints, a U joint, and a bunch of front end stuff to replace. It is terrifying above 25mph. All over the road and there is so much play in the joint it vibrates horribly in the back. I got adventurous and brought it up to 55 and that was a mistake lol
-
Ahh yeah you saw the photo on facebook too! It is awesome being able to drive it finally but the little ones fight over who gets to go for a ride and when. Gonna see what a welder will charge me for the floors and rockers since I have never welded and trying to learn on a this vehicle may not be the smartest move. So much to do don't know where to begin D:
-
Yeah he also had the wiper fluid filled with coolant 🙄
-
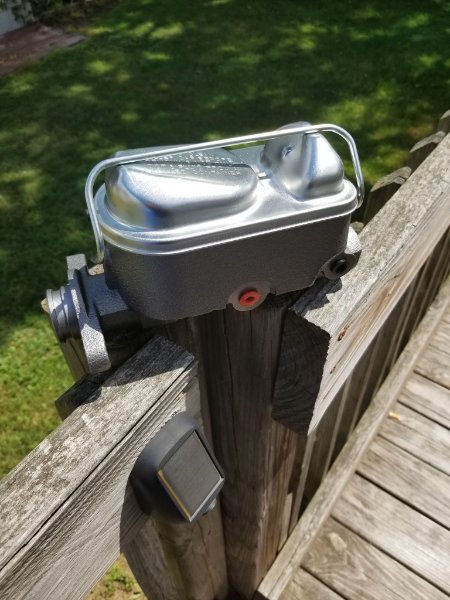
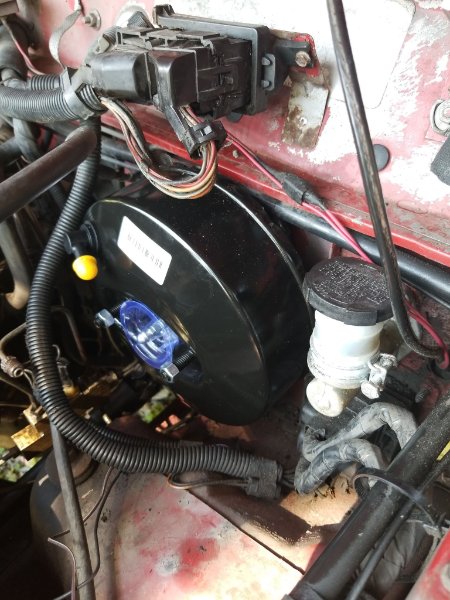
Got a new booster and master installed, working on bleeding the brakes. Also threw new calipers on, the front pads were already new and untouched. Next is rotors, drums, and all the pieces inside the drum.
-
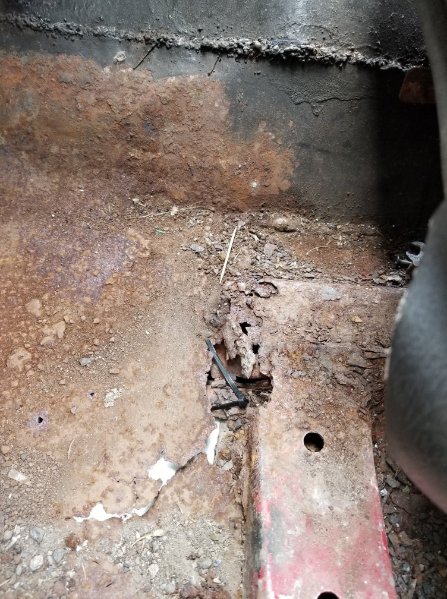
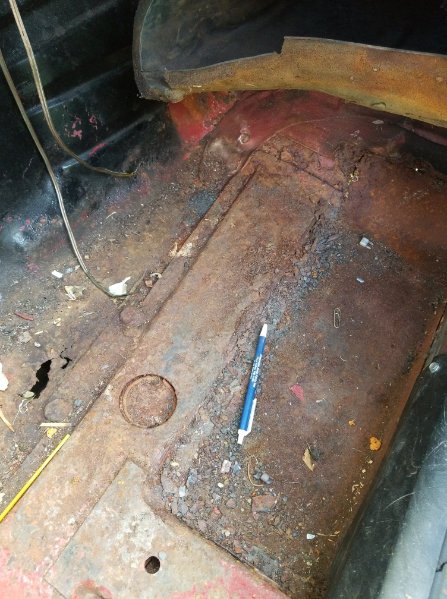
These are the floors, notice the fantastic previous owners work with wire sticking out of the welds.....
-
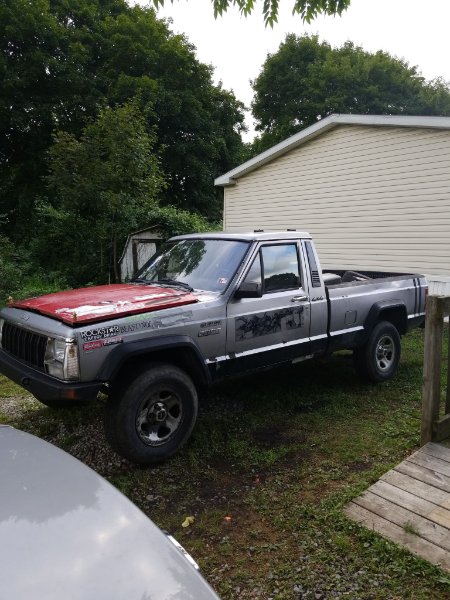
Picked up this 1987 last August. Drove it home about an hour and has hit the road ONCE since then and only around the block. Needs quite a bit of TLC but the kids love it, the future wife loves it, and I am way to impatient waiting for extra money to throw to it. Underneath is rust free minus the usual floor pans and a small section of rocker you see in the photo. EDIT: The stickers and the 4x4 emblems on a 2wd comanche were previous owners doing. It is a 2wd 4 banger.
-
Starting the brake lines! Advice?
87ComancheMJ replied to 87ComancheMJ's topic in MJ Tech: Modification and Repairs
So I bled all the brakes following the steps in the other forum after finding it on google. My issue is when you open the front bleeder and hold the pedal for 10 seconds I have no light to tell me when to stop and bleed the rear for the line leading to the load sensing valve. The brakes are still crap after so thinking of starting the bleeding process over again. The directions said, bleed RR, LR, RF, LF, crack a front, hold the pedal until light comes on, bleed RR, LR, close front, then re bleed them all again? Is that correct? EDIT: Also replaced the previously replaced master as it was leaking near the booster and made sure to bleed that. -
Starting the brake lines! Advice?
87ComancheMJ replied to 87ComancheMJ's topic in MJ Tech: Modification and Repairs
Thank you all. Newbie here and greatly appreciate the help and would rather do work myself than pay someone. Plus it is fun and the kids and wife (the real surprise) love helping. -
Starting the brake lines! Advice?
87ComancheMJ replied to 87ComancheMJ's topic in MJ Tech: Modification and Repairs
So autozone asked for the size of the drums and shoes. Drums are a measure of the inside diameter right? Not sure on how to measure the shoes.