gogmorgo Posted May 23, 2018 Share Posted May 23, 2018 So as some of you already know, on Friday night I took a 500-mile round trip to pick up a one-family factory Grand Cherokee base model 4x4. Manual locks, manual windows, no a/c, and of course, 4.0 with the the 5-speed. Its overall in good shape, just a little rough around the edges. The biggest thing is there's a bit of rust in the rockers and it's starting in the fenders. For the most part it's been mitigated somewhat, cut out and/or painted over with what I hope is a rust converter paint, but that will need addressed eventually. The other bigger concern I had was that the seller said it had "some wobble", initially at 80km/h, then he stuck some procomp 33's on it and it happened at 60km/h. (50 and 40 mph). He told me he thought he left a bushing sleeve out of one end of the Kevin's Off-road adjustable track bar he had on it. (Two inch lift, terra flex coil spacers and skyjacker shocks, shocks will probably go away because they ride fairly harsh, don't know if I'll be keeping the lift on it yet). After a test drive around the block after getting it registered last night, I decided there was way too much of a clunk coming from the front end, so I pulled off the frame end of the track bar, and everything looked okay, but there was quite a bit of play at the other end. I don't know if this is a feature of the Kevin's OR track bar or what, but the axle end had a distorted-thread nut that may have hit torque spec, but wasn't close to tight. There was almost a 1/4" of thread showing below the nut. It was not at all easy to get a wrench on the nut, but I managed it, then busted out the grinder and booger-stacker and made myself a crude flag nut with a regular 1/2" nut and a chunk of scrap 1/4" plate The clunk from the front-end is gone now. There's still a bit of shimmy in the wheel, but it's pretty good overall. It cruises at 100 km/h pretty well. Although even with 3.55's it doesn't take much of a hill for it to start scrubbing speed in 5th. I took it for a cruise down to Athabaska falls last night after swapping the MJ's wheels and tires onto it. Mostly just cause the ones on it were winters. I kinda like the look of the steel wheels better, but the 235/75/15's fill the wheel wells a touch more than the 215/75's do, which looks better with the lift. It did backfire the one time I stomped on the gas, and the check engine light went on and off a couple times. Idle is even but random, sometimes 500rpm, sometimes 1500, or somewhere between. Code 24 if the same as MJ/XJ codes is the TPS, so I might swap one off the MJ/XJ horde tonight to see what happens, pretty sure I have a newer one somewhere. And RockAuto says they'll interchange at least. But I like the Jeep. Definitely happy about it Link to comment Share on other sites More sharing options...
gogmorgo Posted June 1, 2018 Author Share Posted June 1, 2018 Well the MJ TPS did the trick, no cel, no codes. So that's great. I've really been enjoying this as a daily. I get a bit of a kick out of driving a unicorn that most people won't realize is unusual. I got the oil changed in the trans, tcase, and diffs. Oil looked like it had last come out of the trans a looooong time ago (fill plug still has paint lines on it from factory) and the diffs puked watery milkshake, so pretty glad I did that. I'm also pretty sure that I drained gl5 out of the trans, and I'm not super excited about what I found on the drain plug magnet, but it's all just fine particles so if it's been it there a while it's hopefully okay. But shifting has been a bit unwilling. Having 10w30 in there has improved things a bit but it still resists going into gear. I'm almost thinking the clutch isn't fully disengaging, since the 1/2" at the bottom of travel seems to make a bit of difference. I glanced around for adjustment or a bleeder while I was under there and didn't see anything, reservoir level seems okay, so I'm not 100% on what's going on. Might have to stop in at the "local" FCA dealer and get their reaction when I order a master/slave combo for a Grand Cherokee. The diffs still looked good inside, although there were scars from shrapnel on the inside of the d35 which have me slightly concerned, but I'm guessing 3:55 rears aren't hard to find on a ZJ if things do go south? Both axles still had the tags on them which is cool. I also noticed while I was under there that my Tcase says it's a 231, despite having the full-time shift bezel inside. I stuck it in 4x for loading and unloading, also while swapping wheels, and thought it seemed to shift kinda funky... Now I know why I guess. I got a folder full of service records with it. I suppose I should look through it at some point, might lean some stuff about tcase or interior swaps. Link to comment Share on other sites More sharing options...
gogmorgo Posted June 3, 2018 Author Share Posted June 3, 2018 In a bit of a wtf moment today I got into the ZJ just to move it closer to where I was going to be putting the stack of GM parts in it onto the Saint, and noticed that the handbrake button seems to have exploded on me. And now the handle is sorta stuck in the middle. It doesn't go down quite all the way, so the brake light's still on, but it's not staying engaged if I pull it up either. I'm assuming I need to pull the threaded rod bit out, somehow, stick the spring over it, and glue(?) the button back onto it? I haven't been able to find much info on the Googles, although I didn't look super hard. It just kinda seems no one with a ZJ uses their handbrake often enough to have any failures other than the drum hardware being seized from lack of use when they move between states and need an inspection. Also sorta answered my question about the Tcase I think. Using the vin lookup I posted in the pub a while back I found out the 231J dated February of '92 is probably the original, at least it was originally a command-trac Jeep. I guess it's pretty common for weird shifter bezels to be present as they're easily damaged if they got pulled to replace the light bulbs under them. Link to comment Share on other sites More sharing options...
gogmorgo Posted June 7, 2018 Author Share Posted June 7, 2018 Pulled the console today after work, looks like the whole handbrake lever shouldn't be too much to replace if I have to. But I figured I'd attempt a fix as the nearest wrecking yard is two hours' drive from here. Between buying the jeep, paying tuition to go to school in the fall, and ~$700 in parts just to make the Jimmy comfortable to sell to someone else (not worth it I know) May has me not wanting to spend any money in June. So I grabbed some Poxipol I had kicking around (from Ukraine, supposedly the best stuff for gluing a Lada's vent window latches back onto the glass, seems to work okay for that... but also looks, smells, and behaves exactly like JB Weld), put some threads into the button's hole with a screw just slightly bigger (from the Lada's door mirrors) so it would adhere better, put a healthy glob of ЖБ Велд into the hole, put the spring back in place, and shoved the thing back on. Having the console off gave me access to the ratchet, so I could engage it with the lever up, which pushed the button's rod up far enough I could do stuff with it. How do you maintain clamping force on a button with a spring under it that you can't push in or it releases all tension? Like so: The ratchet strap is a perfect tool for this because it's infinitely adjustable and not elastic, so the perfect balance is achieved of putting pressure against the spring without risking pushing the button too far down and releasing the handbrake. I'm letting it cure overnight before releasing even though I'm pretty sure this stuff is good after an hour. Link to comment Share on other sites More sharing options...
johnj92131 Posted June 7, 2018 Share Posted June 7, 2018 Really like the wheels and 235/75 x 15 tire combination. Have exactly the same combination on both of my Comanches. Nice to see this truck in the hands of someone who appreciates it! Link to comment Share on other sites More sharing options...
gogmorgo Posted June 8, 2018 Author Share Posted June 8, 2018 Yeah, they're the wheels and tires I had on my MJ, which is currently just parked waiting for rust repairs before an out-of-province inspection. At first I wasn't excited about the aluminum wheels on the ZJ, was debating putting just the 235/75 AT's onto the ZJ's steelies or maybe the 30's that are on my Jimmy. Now I'm not positive I want to go back to the steel wheels, simply from an aesthetics standpoint. But for the sake of originality I might still. They definitely don't look as good on the MJ though. But the tires on them are way too small for the ZJ right now with the 2" lift. Plus they're winters. I'm kinda digging the way it looks with the lift and how it is to get in and out at this height, so I'm thinking I'll leave that, maybe add a stiffer sway bar. But it needs less harsh shocks than the skyjackers for sure. Could also probably do with new rear springs, they seem a bit saggy. Link to comment Share on other sites More sharing options...
INjake89mj Posted June 11, 2018 Share Posted June 11, 2018 There was a manual tranny ZJ that came up for sale near me a while ago. This one was too far gone for the price they were asking. I always wanted one though! Good find! Link to comment Share on other sites More sharing options...
gogmorgo Posted July 6, 2018 Author Share Posted July 6, 2018 Crazily enough I recently saw another one get posted on a province-wide Jeep group not long after I got mine. Needless to say it was long gone waaaaaaay before I even saw the post, haha. Woulda jumped on that even though it would've cost me more than the $350 to drag it home. But back to my own ZJ. So the button-gluing lasted all of about 16 hours. I threw a couple more attempts at the wall but couldn't get one to stick. Was going to just wait till I went to the city to pull one at a wrecking yard, (sucks living 200 miles from the nearest one) but after spilling my third drink I gave up waiting and ordered one off eBay. Used from a '96 Laredo from a yard near Houston, TX, I think. Slim pickings for ZJ handbrake levers, so the $80 was worth it. For chuckles I stopped in at a dealer on the way past and they could order one for me, from "Mopar Vintage" (WTF, it's younger than I am!) to the tune of $350, which, um... No. Because I'm just about already doing this: But I digress. ZJ handbrake lever. Right. Top is the "new" one, bottom is my original. The two are different. eBay said it wouldn't work, I figured there was no reason they would've changed it. But there is a difference. My original looks a lot beefier at the bottom end, the pivot and mounting points. Not sure if that's a '93 vs '96 thing or a manual vs auto thing, being the manual one would maybe need to be more durable? I dunno. The newer one has fewer and bigger teeth on the ratchet though. They also have almost no wear on them, surprise surprise. Seems like almost zero ZJ owners ever bothered using their handbrakes. Pretty well the only results for handbrake stuff I found online were all along the lines of "I moved and need to pass an inspection and OMG all the handbrake parts are seized so it failed". But the newer lever fit perfectly and works great. It's a simple change, just two bolts once the centre console is off. Which is the thing I'm most excited about: CUPHOLDERS!!!!! YAY!!!! Been driving around without the console so I could manually engage and disengage the ratchet. No cup holders and mi amigo Manuél is difficult. Also, yeah it's kinda dirty it there. It came that way. Once I've got all the interior niggles sorted I'm going to get it detailed professionally. The biggest thing there is the driver's door card armrest is duct taped together. Gonna try to junkyard that, I can live with it for now. I also need to get rid of the nasty purple stick-on window tint which has fun-house-mirror effects on my vision through the windows. Thinking about trying to find some factory tint windows for it, if I can figure out how to pull them. Link to comment Share on other sites More sharing options...
gogmorgo Posted August 19, 2018 Author Share Posted August 19, 2018 This is mostly just documenting the fact I did these things for my own reasons. New radiator (went through six gallons of water in <100 miles if highway) in Lake Louise parking lot. The one that was in there was crumbling, almost no fins left. The one in there also had fittings for the trans heat exchanger, left unhooked. The replacement obviously did. The parts store had a listing for manual trans but naturally couldn't source one. I kept telling him just to get me the automatic but he spent twenty minutes calling all suppliers first, so that was annoying. I also did pads/rotors/shoes/drums all around, because I embarked on an journey to get this: And needed to cross a continental divide via one of the steepest and highest passes in the country. Going down was fine, stuck it in third and occasionally used brakes to reign it in a bit. Going up was another matter, 1st gear, 3000+rpm was all I could do going up a grade better than 10% with 5500lbs in tow, but coolant temp stayed rock steady the whole way, despite 40°C heat, tracing the same route I ended up changing the rad partway through on. I wouldn't do it again though without heavier springs in the rear end though. Link to comment Share on other sites More sharing options...
gogmorgo Posted September 2, 2018 Author Share Posted September 2, 2018 Looks okay in a hat. I need to find a better storage solution for this cargo ship. Link to comment Share on other sites More sharing options...
cruiser54 Posted September 2, 2018 Share Posted September 2, 2018 We're enjoying our 98 Grand. I put all 4 power locks/latch combos in it yesterday. What a b*@ch for a guy with big hands and recovering from broken elbow surgery 2 weeks ago. Link to comment Share on other sites More sharing options...
gogmorgo Posted September 3, 2018 Author Share Posted September 3, 2018 That's good to hear. I don't have power options to worry over on mine though At the rate I'm going I'll be racking up the miles pretty quick. Going to school is about 300 miles one way, and doing that run and back over a weekend adds up. I came back this weekend to pick up some stuff I neglected to bring the first time around, and facilitate the sale of my least favourite ride. Depending on what I decide about the little MJ I'll be running back and forth to work on that too, and then there's the XJ that needs parting out and scrapping... I don't know that I'm quite as thrilled with the ZJ as a daily driver as I was initially. I definitely enjoy the manual and the feeling I'm driving something pretty rare and know it's unlikely anyone else realizes. But now that I have two MJ's sitting here I can't drive... I'd definitely prefer to be driving them! Link to comment Share on other sites More sharing options...
gogmorgo Posted September 9, 2018 Author Share Posted September 9, 2018 Took it out with a few members of the Grande Prairie Jeep Club to Tumbler Ridge in BC, to Red Deer Falls. Not a particularly challenging trail, apart from a couple washouts, but I made it everywhere the big boys on 35's did, despite my stock tires and open diffs. They gave one of the JK drivers $#!& cause the ZJ was outflexing it over a few of the obstacles. Link to comment Share on other sites More sharing options...
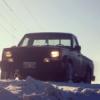
gogmorgo Posted September 10, 2018 Author Share Posted September 10, 2018 And there's the money shot. Link to comment Share on other sites More sharing options...
gogmorgo Posted September 18, 2018 Author Share Posted September 18, 2018 Well after doing a ton of driving hundreds of miles in the middle of overcast nights with only more of that to come given the onset of winter this far north, I've decided something needed done about the super yellowed plastic headlight lenses. Found an NOS assembly for each side on eBay for not much more than the Crown re-pop. I went with the e-code export version, less because of the better pattern and more because they're apparently a glass assembly, not plastic, so hopefully will last longer. Although I suppose I shouldn't really complain about that given the originals are still okay... Not great, just okay. I guess I'll see what they're like when they get here. In terms of export variants, it looks like there's a few options. The generic e-codes which I went for, the Japanese/euro ones (wrong-hand-drive of course) and then there's a specific French and German version. I suspect the German ones have the manual height adjustment from a switch on the dash (to compensate for heavily loading the rear suspension, which aims the lights up), and I'm guessing the French variant would be the yellow tinted lenses required on all vehicles sold in France prior to 1993. I was almost tempted by the French ones because they'd be pretty unique, and yellow light is softer and noticeably easier on the eyes than most white lights are, but I can't find any. I bet they're a pretty rare part any more, given they'd probably only be on French models built in '92. The German market ones are super plentiful, but I don't really care to mess around with the headlight adjust. Have that on the Lada, and it doesn't work at all, so my headlights are just stuck pointing sorta downwards. Link to comment Share on other sites More sharing options...
gogmorgo Posted October 10, 2018 Author Share Posted October 10, 2018 Well, got the e-codes in this weekend. It's not quite as straightforward as it was made out to be in the odd reference I found online to the mod... Lots of dead links from ca2000, though. I'm doing a bit of a write-up here because of that, although it seems like I wasn't so good at taking pics all the way through. I used NOS Mopar units, part numbers 55054576 (passenger) and 55055577 (driver) which aren't as common to find in North America (only a couple on eBay) but they're more commonly available from the aftermarket. You'll also need a pair of H4 bulb sockets and wire slicing connections. I used the Grote sealed-beam pigtail which was like $3/side at my parts store. You may be able to find adapter pigtails online to avoid cutting, but this was something I forgot to pick up and that's what the local parts store had. The main draw to the ecodes for me was the glass lenses. I'm expecting them to last a bit longer without getting scratched and yellowed than the plastic DOT lenses. But I was also curious to try them out after hearing so many people talk about how much better the E-code is to the DOT. Can you tell which is the ecode? If you said driver's side, you guessed wrong. Removing the grill is mostly unnecessary, unless your lights are really on there, although I don't know that it gave me any better access to anything, just seemed like it would. The first step was to pull the turn signal lenses. There's a diagonal screw into the top that you need to open the hood to get at, and the other one is between the turn and parking light lenses. Your cheap socket set's multi bit screwdriver won't get at it because the socket won't go between the two, but probably any #2 Phillips will do the trick. (One of the write-ups I saw said #2 Torx... that's not a thing, a t2 would be tiny, but it's also not a Torx.) The next step is to carefully pull the headlight lense straight out. There are three ball/sockets holding it in, at both bottom corners and the top outside corner. The top one and the diagonally opposite one are respectively your up/down and left/right adjusters, so you want to avoid damaging them. I used a forked prybar to carefully pop them out because I was pulling harder than I liked, at least for plastic below freezing. You can see the two outer attachment points here. The top one clips in to the square slot at the absolute top. The bottom one is central to the photo, underneath the arm of the Y in the wiring harness, but above the upside-down T. The screw at bottom left is for the turn signal lense. This is the inner bottom corner mount (the third one, not in the photo of the other two). This one was harder to locate a prybar on because everything is plastic around it. I eventually stuck a rag down to protect paint and went off the upper rad support. Once you get the lense assembly pulled back a few inches, you'll need to cut the headlight socket off, unless you're using an adapter pigtail, in which case this is when you just unplug the headlight bulb. If you are cutting wires, for hooking it back up, black is ground, purple is low beam, and red is high beam, at least on my ZJ. Respectively black, yellow, and orange on the Grote pigtail. Instead of a straight splice, I used spade terminals, to make it easier if I ever decide to go back to DOT lenses and the factory 9004 bulbs. At this point you'll probably want to make sure your adjusters aren't seized. (yeah the photo's a repeat). The up/down adjuster is the round hole just behind the bolt in the upper rad support. There's a plastic bit with an internal hex. I used a 6mm Alan key in it, I couldn't get a 1/4" into it. I couldn't get mine to turn, and hit them with some penetrating oil, which freed up the up/down movement. Hopefully there are no negative effects on the plastic... Before the ecodes go in, you'll need to swap out the clip for the vertical adjuster, detailed here: https://www.jeepforum.com/forum/f13/kolak-e-code-headlight-conversion-detailed-write-up-1310947/ That's a pretty good write-up of the process, but the Mopar housings are chromed ceramic, not plastic like the Kolaks, and there's no way you'll just pop the US clips into them without opening up the sides of the hole a bit. The tip of a small file worked for me to slightly expand the square holes. I also found filing a bevel into the edge helpful for popping in the clip. Now plug in the h4 socket and carefully line up the three mounting sockets with the three mounting balls, then push firmly. I gave them a couple firm taps with the heal of my hand to pop the sockets onto the balls. You don't want to hit or push too hard, because again you risk damaging the adjuster mechanisms, but you do want to seat all three balls in the sockets. A tug at each corner will confirm if they're seated. Now you just need to put the turn signal lense back on, and the grille if you took it off. Then you can adjust them properly, following the regular procedure, and you're done. I I tested them out with a trial by fire on a 300 mile drive up the "scenic route to Alaska" on an overcast night, with a bit of snow in the air. They do alright. It's tough to compare them directly to the factory ones in my case because my lenses were pretty badly yellowed, but they do a decent job. It took a bit of getting used to having a ton less light on the driver's side than on passenger on low beams, given the ecodes kick up on the right to better illuminate signs. But they definitely are more than adequate. I don't think I'd want much brighter either than the bulbs that came with, especially in the snow. And now of course I need to replace the turn signals and parking lights so they match the new shiny headlights. Whoops. Link to comment Share on other sites More sharing options...
Pete M Posted October 10, 2018 Share Posted October 10, 2018 excellent writeup! I had the opposite post-project issue in my Dakota. I replaced the crappy marker housings with new aftermarket and that showed how awful the headlight housings actually were. Link to comment Share on other sites More sharing options...
gogmorgo Posted October 19, 2018 Author Share Posted October 19, 2018 On October 10, 2018 at 11:24 AM, Pete M said: excellent writeup! I had the opposite post-project issue in my Dakota. I replaced the crappy marker housings with new aftermarket and that showed how awful the headlight housings actually were. Huge difference, even on an overcast and drizzly day. Or maybe flaky, it was snowing more than raining. Unfortunately, After putting almost 1000 miles on them in the dark, I can't really say I'm super excited about the ECE regulations. The high beams do throw quite a bit more light forwards than I was expecting, which is nice, but there's not as much light getting cast outwards into the ditches, especially on low beams, which is definitely an issue. It also brings up some thoughts on the development of regulated headlights. The two common headlight designs are the SAE/DOT, and the ECE. The DOT are effectively just a light bulb. There's some focussing and projection, and more recently some cutoffs to control the light a bit more, but generally it's just a big scattered dispersion of light; low beams are mostly just dimmer than high beams. ECE's on the other hand, projection and cutoffs are critical to the design. The lights project mostly straight forwards, without much going off to the sides. The low beams have sharp cutoffs especially on the left hand side of the beam, to avoid sending light upwards at oncoming drivers or into the mirrors of the car ahead. The aiming of the lights is also regulated, with specific requirements that higher-mounted lights on taller vehicles will be aimed further down, to maintain the cutoffs and avoid blinding other drivers. This is all well and good, and you'd imagine it would be better than the DOT's, but there are some serious disadvantages. Here's a handy comparison between the two beam patterns, to help illustrate: NB. This a single low beam, you actually have two patterns like this, from each light. The left side of the white ECE pattern is pretty sharply cut off. It doesn't go up at oncoming drivers, and projects the cutoff light forwards onto the road instead of bleeding it downwards or to the dudes. The DOT beam in yellow underneath doesn't have a sharp cutoff, it just scatters the light sideways until the beam has faded out, meaning it doesn't illuminate the road as well, and there's more glare into oncoming traffic. But what it does do is put some admittedly dim light wide into the ditches. If you go back fifty odd years (70? I haven't really looked into it) to when headlights were starting to be developed, there were some significant differences between European and North American development, in particular western North America. Comparatively, drivers in Europe were driving shorter distances at lower speeds on narrow winding roads, going from village to village. North American drivers, especially in the west, were driving faster on far longer distances on straight, wide, roads through largely undeveloped areas. Why is historical development of the west a big deal? I present to you a modern light pollution map. Phone screenshot, yes. See any difference between Europe and western North America? And this is much later than when headlight regulations were being established. Why is this relevant? Well, if you look at it you'll notice there is significantly more light pollution in Europe. There are straight up holes out west where there is basically no ambient artificial light. I'm lucky enough to live right smack in the middle of the big dark spot above the N in North America. On a clear night the moon is the primary source of light. If there's a new moon, the stars are it. Overcast? Nada. No light at all. This is a very similar driving environment to the one American auto makers needed to develop adequate lights for over half a century ago. ECE regulators were less concerned about rural driving because such a high percentage of the population is so highly urban. Not blinding traffic and pedestrians on busy inter-urban routes is far more important. The E-codes do a fantastic job of sending light onto the road, but there is no light whatsoever outside the beams, and the increased brightness on the road contrasts so much more with the completely dark ditches that it's even harder to see something outside the beam. The more concentrated high beams mean you're causing way more distress to oncoming traffic much sooner, meaning you're using the low beams more, so quite a bit of your field of vision is simply dark. Also that kick up of the low beams on the right does a damn fine job of illuminating reflective signs, meaning you're dazzling yourself as you approach them against a pitch-black background, and the somewhat focussed light going upwards and to the right means if you meet someone on a right-handed corner, you're pointing light straight into their windshield. Probably 25% of traffic I encountered on right-handers flashed me after I had already dimmed my lights. In contrast the DOT lights are less focused and less bright, but at least they're putting some light outwards into the wide ditches, and downwards too into the deeper ones, and also the lower contrast between lighter and darker areas mean your eyes can adjust far better to the dimmer light. The E-codes definitely rely pretty heavily on ambient light. I realized this, as my 300-mile (one way) commute takes me through 50-60 miles of what I've come to know as Frack-Land. Gas wells, compressor stations, (I really don't know what all it is), gigantic open flames everywhere, generating near ridiculous levels of light pollution. I have no problems with my headlights travelling through that section of highway. The yellowed originals weren't great through that section, but the ecodes work quite nicely there. Outside that zone, not so much. With the ecodes in, I've come far closer to hitting wildlife than I ever did with the super dim yellowed lights, because I simply had no clue it was in the ditch moving towards the road. With the original lights, I may not have picked up stationary wildlife as easily, but moving deer were easy enough to pick out. With the ecodes, I'm lucky to even catch eye-shine on low beams, let alone the silhouette of a deer, before it starts running up onto the road. And the whitetails are only the little deer. There's also mule deer, elk all over the place, the occasional moose, even the odd caribou that I've seen along the edge of that highway, not to mention bears during the summer, big-horn sheep, and tons of other wildlife attracted to all the road salt or the prey animals that come to the salt licks. All big, none going to be comfortable to hit, none easy to avoid on increasingly slick roads. So yeah, basically I'm saying that the E-codes are so much better at illuminating the road that they're actually inadequate at illuminating anything else, which is what I had trouble seeing. Even old and yellowed, the original lights provided enough forward visibility to allow reasonably safe night driving, even if the lack of light was a bit uncomfortable at times. The Ecodes definitely do a fantastic job of illuminating the road and I can see why they're popular and considered a significant upgrade. But they're just not the correct lights for my application. That scattered light from the DOTs is simply critical when there's no other light around. I'll be leaving them in for now because I don't really want to spend the money for another set of lights, but I'll probably end up replacing them sooner rather than later which is unfortunate, because they really are good at illuminating the road, provided all the obstacles stay put while you drive by. Link to comment Share on other sites More sharing options...
CheapXJ Posted January 22, 2019 Share Posted January 22, 2019 if ya ever need a rear wiper switch for it LMK, I have a few in stock. Still trying to find the original shifter knob for mine... it's the only thing I'm missing. what kinda seats did you get in yours? also, have you determined if it's long pinion or short pinion? early build 93 ZJs actually used the same center section as a CJ Dana 30 (long pinion), they're very uncommon, I think they had a few hundred sitting around and decided to shove them into something, like one last ditch attempt of chrysler trying to be cool like AMC. Mine is definitely my favorite Jeep in the fleet but it's far past 300k miles and I'm just trying to keep it nice at this point. It pretty much stays in storage now. the 5.9 is just an $800 tire shredder with a nice interior... (I basically only use it to make old tires fit in my trashcan... lol) Link to comment Share on other sites More sharing options...
gogmorgo Posted January 29, 2019 Author Share Posted January 29, 2019 mine's more base than yours... Factory a/c delete! Does your vent selector find multiple mystery positions in the blank part of the dial like mine does? Wiper switch seems good for now. I've got these seats: They look pretty similar to yours, just with vinyl backs. As to whether it's got a "long pinion" d30 or not, I don't really know. I guess I can compare it to one of the other d30s I've got kicking around, but they're all high pinion and the ZJ isn't. But what I can tell you is that mine isn't one of the '92.5s. August of '92 makes it a '93 model. I realize they were all '93s, but there was supposedly a distinct shift after a few months of production, where some interior options and a handful of tiny things got changed out. There's a way to tell in the series numbers on the VIN whether it's a '92.5 or a '93, but I don't remember what exactly it is. 11th digit as a 7 or higher or something maybe? I don't really remember. I can't say mine's the favourite in the fleet, that honor probably goes to one of the MJs, but I do like it quite a bit. It's nice that I know I'm driving something fairly unique, without anyone really realizing it. It definitely feels special. I've got one question for you, does your clutch feel pretty heavy? Most of the clutches I've been driving are in class 8 trucks lately, which isn't the best comparison, haha. The difference between my 2.5 MJ and the ZJ is... a lot. After driving the 2.5 around, the ZJ feels like I'm trying to push through glue, and then getting back into the MJ it feels like there's no pressure in the clutch at all, even though it's working normally. It's been too long since I've driven the 4.0 XJ to compare. Link to comment Share on other sites More sharing options...
gogmorgo Posted February 2, 2019 Author Share Posted February 2, 2019 Well, bit of an update. I was getting sick of the lifted+ stock tire look, and frankly wasn't excited about the snow/ice traction of the Terra Trac II's I'd stuck on it for lack of any other reasonable (free) non-winter options back when I bought it. Nothing wrong with them, they're just not particularly winter friendly. So this happened: Grabber ATX in a 31x10.5. Mounted on the Littlest MJ's factory wheels, that came loose in the bed. Just a small difference from before with the 235/75/15s. Maybe you can't really tell, but this weekend was maybe not the best for tire changing... My everything is wet. But after going for a drive, damn, do they ever make a difference. And it's been great weather to test them out. The performance disadvantage is very noticeable, even in this weather. I swear, I only stalled twice... But first gear is much more usable now, in that I now make it almost to the other side of the intersection before I need to shift, instead of being done with it after twenty feet. The ride is also a bit harsher. The sidewalls on these are pretty stiff, to the pointing mounting them was on the difficult side. But I'd say traction in 2wd is now about what it was in 4x4 on the Terras, even still with the open diff. And it feels way better than the KO2's on my old Jimmy ever did, although that's a somewhat different animal and it was a year ago. I've still got a Truetrac sitting around that still needs installed in the d35, and with that and the tires, I bet this ZJ will be pretty much unstoppable in the snow. You'll have to look earlier in the thread for before photos. The stance is good, although it's more apparent I need to correct the saggy rear springs. Slight rubbing at full steering lock, but not nearly what the MJ had with AT2's in a 235/75r15. I'm pretty happy, to say the least. Link to comment Share on other sites More sharing options...
Pete M Posted February 2, 2019 Share Posted February 2, 2019 love it! lookin' like a Jeep should Link to comment Share on other sites More sharing options...
CheapXJ Posted February 3, 2019 Share Posted February 3, 2019 On 1/29/2019 at 4:55 PM, gogmorgo said: I've got one question for you, does your clutch feel pretty heavy? Most of the clutches I've been driving are in class 8 trucks lately, which isn't the best comparison, haha. The difference between my 2.5 MJ and the ZJ is... a lot. After driving the 2.5 around, the ZJ feels like I'm trying to push through glue, and then getting back into the MJ it feels like there's no pressure in the clutch at all, even though it's working normally. It's been too long since I've driven the 4.0 XJ to compare. The clutch on my SE feels exactly the same as the external slave AX5 in my MJ but it does have a later master/slave combo from an XJ in it... one of those prebled chineseium ones... Mine has Laredo seats in it (the fronts had power bases but no wires to plug them in but they do match front and rear) mine is the only one I've seen with Laredo seats and SE outside molding... 6/92 build date. Had long pinion frontend until I gutted the white 5.9 for axles/suspension/steering/skids/hitch/towhooks and "upgraded" it. Now it's got one of them Bluetooth front axles until I retube my front driveshaft to make up 2 extra inches... As far as phantom notches? Yep, and my 5.9 does that too, and it's got that electronic nightmare thing goin on... sometimes it turns the blower on full blast with the key off for no reason... I think this is just standard ZJ stuff, lol. Link to comment Share on other sites More sharing options...
gogmorgo Posted February 3, 2019 Author Share Posted February 3, 2019 Great. Now I have to figure out which one has the clutch problem. The MJ does have the clutch that came on the YJ engine still on it. The disc had more meat left on it, and I was feeling lazy swapping the engine (in the driveway, in the dark and winter) so I took a couple shortcuts like that. Might be part of it I guess. I wouldn't have thought the clutches would be different. I don't really remember the MJ's clutch being super light before the engine swap, but then I didn't really drive it much. My ZJ has no crazy electrical issues... knock on wood. But also with zero electrical options it better not, haha. I've sort of been looking for a factory tow hook setup, just not looking too hard... No real wrecking yards in my area. The couple aftermarket options seem to be missing some of the factory reinforcement brackets, or else they're way more intense than I'd want on just a daily that I'm trying to keep as intact as possible, like the Kevin's off-road radiator support thing. I also want to keep all the plastics, etc, on it. I'm not trying to build a wheeling rig, but I'm more comfortable with designated recovery points at both ends, you know? Link to comment Share on other sites More sharing options...
Pete M Posted February 3, 2019 Share Posted February 3, 2019 there's nothing worse than thinking you have a safe way to extract only to find it ripped out the sheetmetal and mangled the body (plus you're probably still stuck) Link to comment Share on other sites More sharing options...

Recommended Posts
Create an account or sign in to comment
You need to be a member in order to leave a comment
Create an account
Sign up for a new account in our community. It's easy!
Register a new accountSign in
Already have an account? Sign in here.
Sign In Now