JeepcoMJ Posted March 13, 2018 Share Posted March 13, 2018 HI Don, and thanks for the affirmation. Gasser body harness are the same...easy swap Quote Quote Link to comment Share on other sites More sharing options...
HOrnbrod Posted March 13, 2018 Share Posted March 13, 2018 37 minutes ago, JeepcoMJ said: HI Don, and thanks for the affirmation. Gasser body harness are the same...easy swap Hey Pat! Good to see you here again. Link to comment Share on other sites More sharing options...
Pete M Posted May 13, 2018 Author Share Posted May 13, 2018 boring update: I developed another a bad shimmy under braking so I replaced all the brake parts at the corners with nice condition junkyard stuff; soft lines, calipers, pads, rotors. A big thanks to whoever replaced all those parts on their KJ right before scrapping it. from that same Liberty I grabbed LCAs, knuckles, bearings, struts, etc. for the eventual lift (my stuff is just too rotted to reuse). boring update 2: the mirrors now work (was a bad switch) and I've swapped out the why-the-hell-are-they-shiny trim bits inside with base model flat gray stuff. coming soon: functioning rear windows! Link to comment Share on other sites More sharing options...
Pete M Posted May 14, 2018 Author Share Posted May 14, 2018 one window down (then up, then down, then up again ). ran out of energy and light today so I'll tackle the other tomorrow. past-me seems to have unplugged the wire harness to the rear window switches (which are in the center console not the doors) and forgot to leave a note for present-me, soooooo that was a whole debacle-and-a-half trying to figure out why there wasn't power to the rear windows. Link to comment Share on other sites More sharing options...
Pete M Posted May 14, 2018 Author Share Posted May 14, 2018 success! I had a burnt out motor, but as it so happens I grabbed a spare from the junkyard so all is well. if anyone was curious, the motor/gear assembly doesn't swap left to right, but the motors themselves can be popped out and swapped. next up: ABS computer swapping Link to comment Share on other sites More sharing options...
Pete M Posted July 26, 2018 Author Share Posted July 26, 2018 just scored a set of 5 TJ Rubicon rims with 245/75s on them. pics in the morning Link to comment Share on other sites More sharing options...
Pete M Posted July 26, 2018 Author Share Posted July 26, 2018 oddly enough, one of the rims still has the machining marks in the surface. maybe that one is aftermarket? either way, they are going to look sweet. tires still have some life in them. Link to comment Share on other sites More sharing options...
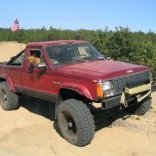
neohic Posted July 27, 2018 Share Posted July 27, 2018 Link to comment Share on other sites More sharing options...
Pete M Posted August 20, 2018 Author Share Posted August 20, 2018 wasn't able to buy a lift before the trip up to the PowWow, but I did find some time to fit the baby swampers. they are only 29" so fender clearance is just fine, but the 15" rims require just a bit of grinding on the calipers to work. Link to comment Share on other sites More sharing options...
Pete M Posted August 27, 2018 Author Share Posted August 27, 2018 the baby swampers worked fantastic I had to trim the inner fender liner a bit, but that was inevitable when the new bumper gets built. I did noticed one little hiccup though. the washer bottle hangs waaaaaaay low, down below the bumper. not sure what to do about that one yet. Link to comment Share on other sites More sharing options...
Pete M Posted September 3, 2018 Author Share Posted September 3, 2018 grabbed some bumper bits from the junkyard so now I have turn signals and then this happened Link to comment Share on other sites More sharing options...
Pete M Posted November 7, 2018 Author Share Posted November 7, 2018 I decided I didn't want to wait for the lift and tried the 245/75s as is. rubs exactly where it should. so I trimmed and hammered and now they don't. love those rims! Now I just need to figure out how to mount the winch... Link to comment Share on other sites More sharing options...
mjeff87 Posted November 8, 2018 Share Posted November 8, 2018 I just noticed your fogs are in the grill....mine are in that lower body valance that you did a delete on Do you know what year they moved them up? Link to comment Share on other sites More sharing options...
Pete M Posted November 9, 2018 Author Share Posted November 9, 2018 05 got the update I have no idea if the front fascias can be easily swapped. Link to comment Share on other sites More sharing options...
mjeff87 Posted November 9, 2018 Share Posted November 9, 2018 Link to comment Share on other sites More sharing options...
Pete M Posted November 9, 2018 Author Share Posted November 9, 2018 learned something new yesterday. apparently I can flip the spare tire carrier upside down and lift the tire up a couple inches. so that's what I did. I added some spacers to the bottom to get the tire more plumb, but I may have to remove them when I get a set of new tires with full tread. the window juuuust barely clears. the real question is if there is enough clearance to open the pintle hitch I use for the MJ trailer... Link to comment Share on other sites More sharing options...
Pete M Posted November 11, 2018 Author Share Posted November 11, 2018 the bones are complete. tomorrow is wiring. but this is just "phase one". it ain't pretty but it's solid. I leave on weds for a camping trip and am in a hurry to get things ready. the beautifacation will occur later. The light location is temporary. eventually I want hoop over the winch and then a skidplate where the lights are now. this is what's inside the frame rails. the close 2 go down through the 1/4" angle iron and the tow hook mounts, the rear one just to a huge washer. trying to attach things to the Libby frame is... more challenging than an MJ. I also added bolts in the middle of the angle iron through the frame crossmember. It's only a 5k winch. this will be more than sufficient. I also upgraded the bolts that mount the winch. I needed longer ones anyway, so why not splurge a bit. Link to comment Share on other sites More sharing options...
JeepcoMJ Posted November 11, 2018 Share Posted November 11, 2018 looking good! just don't let the bumper get too huge. approach angle and all... Link to comment Share on other sites More sharing options...
Pete M Posted November 15, 2018 Author Share Posted November 15, 2018 all wired in and waiting for something to do (note the umbrella stand... 'cause it's been raining for a freakin' WEEK!) Link to comment Share on other sites More sharing options...
Pete M Posted November 16, 2018 Author Share Posted November 16, 2018 got sick of the stupid factory acorns falling apart so I found a set of longer, solid lugnuts for like 13 bucks. Couldn't pass that up! Had the choice of black or chrome and went with black for some contrast. truly an epic upgrade. Link to comment Share on other sites More sharing options...
Pete M Posted November 27, 2018 Author Share Posted November 27, 2018 bought a cover for my winch. no pics because, well, it's just a black neoprene winch cover. I'm sure you'll see it later on when I start work on the bumper. more pressing is now that I have the factory light bar I'm really torn about it vs a modern LED bar. Link to comment Share on other sites More sharing options...
mjeff87 Posted November 27, 2018 Share Posted November 27, 2018 I'm still waiting for one of those OEM bars to show up in the junkyard one day. There was one KJ that had one, but it was snatched before I got to it. That said, I prefer the look of the aftermarket LED one pictured on the silver one. Alot. Can also double as a mini sun visor during the daytime, lol. Link to comment Share on other sites More sharing options...
Pete M Posted December 8, 2018 Author Share Posted December 8, 2018 keeping the light off the windshield is of key importance to me. we did a curved LED bar in that location on my buddy's superduty and there is a blinding glare on the glass. lost a week of time due to a neighbor's house needing a near-complete rebuild of her chimney structure (I originally agreed to help prep for paint, but we found a leak in the flashing that had rotted most everything inside the chimney) so nothing has happened with the lights or bumper. but the time has allowed me to ponder more. I figure I'll need 4 switches (winch lights, outer uppers, inner uppers, and reverse floods). thinking about this li'l guy, but haven't yet found the ideal place to put it. Link to comment Share on other sites More sharing options...
Pete M Posted December 8, 2018 Author Share Posted December 8, 2018 I could also go with a plain-jane panel. I think this might be my best bet since it'll fit on the factory switch panel to the left of the steering wheel. Link to comment Share on other sites More sharing options...
Pete M Posted December 11, 2018 Author Share Posted December 11, 2018 was a good day today. picked up a black grille to customize, a fuel tank skid, and some raw steel to finish up my front bumper. now all I need is some nice weather, free time, and energy. Link to comment Share on other sites More sharing options...

Recommended Posts
Create an account or sign in to comment
You need to be a member in order to leave a comment
Create an account
Sign up for a new account in our community. It's easy!
Register a new accountSign in
Already have an account? Sign in here.
Sign In Now