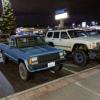
thecodemonk Posted April 11, 2017 Share Posted April 11, 2017 Hey all! Long time lurker and lover of the MJ and XJ platforms! I've wanted one of these awesome trucks since I found out about their existence and, when I got married, the wife was excited about it too! Well...the day finally came. A clean MJ showed up on craigslist at a decent price and I showed my wife. She said "lets go get it!" and so we did! The stats: - 1991 Jeep Comanche Pioneer...long bed. - 4.0 I6 w/Auto - Factory D44 rear, D30 CAD front - Blue - (More to come as I spend time with her) The end goal: - 40s, tons, locked, street legal The timeframe: forever...going to be a long slow build. I want to do things right and I'm not as skilled at fab or auto work yet...but I'll keep learning and enjoying it! Without further ado...I present Rocky, the flying squirrel. Here he is when we brought him home, last night (next to Natasha, my other jeep): Here's a few pics I snapped this morning... Next steps: - Clean interior and hopefully reduce the "old car" smell - Remove the rear bedliner and inspect what's under there - Check what gear ratios it currently has - Fluids check and replace - Spark plugs - Battery and Alternator Boring stuff, I know, but it's gotta be reliable before I start doing anything really big. :) Link to comment Share on other sites More sharing options...
thecodemonk Posted April 13, 2017 Author Share Posted April 13, 2017 Well...some things are about to get re-prioritized. The majority of the smell was from a pair of really bad smelling air fresheners the previous owner had put in the defrost vents. Took those out, drove around, and the smell is much more normal "dirt" smelling. A simple cleaning should fix this right up I got the bedliner removed and the bed is in surprisingly good shape...that gives me some hope that there won't be too much rust when I check under the carpets. Next, I replaced the battery and went down to the local parts store to get the alternator tested. The whole charging system tested good and so I thought I'd just drive it for a few days. Little did I know it would be few days indeed. On the topic of fluids: Oil change is definitely needed. Transmission fluid looks and smells good. Coolant looked a bit...dirty. I figured a flush would soon be in order. So, yesterday, I went down to the parts store and grabbed a TPS and a belt. It started raining so I figured I'd put off doing the work of installing them for another day. The wife and I went for a small drive and on the way home we were surprised with a loud POP and coolant spewing from the hood in thick white plumes of steam. We limped it to a block from the house when the engine stopped running...turns over but won't fire (probably related to the coolant everywhere except where it needs to be). We pushed it back to the house with the help of a passing marine who was out for a jog in the rain. A quick inspection showed that the radiator blew and with enough force that the front grille had been popped mostly off! So...I guess it's time for an overhaul of the cooling system. New radiator should show up tomorrow and I'll pick up what I need for water pump, thermostat (and housing), and hoses from the local stores. I'll take pictures when I get ready to do this all on Saturday afternoon and post them up (assuming it doesn't keep raining). EDIT: Formatting Link to comment Share on other sites More sharing options...
thecodemonk Posted April 14, 2017 Author Share Posted April 14, 2017 Whew! When the radiator pooped, it took the whole side with it! Got the front end disassembled and the clutch fan off. Clutch still feels good and stuff so it's probably fine (debating converting to electric fans or just sticking a zj clutch on, while I have everything apart). Sent from my Nexus 6 using Tapatalk Link to comment Share on other sites More sharing options...
Roper Posted April 14, 2017 Share Posted April 14, 2017 Looks like you've got a good truck to start with. I'll be watching this build. Kudos on the wife, she's a keeper! Link to comment Share on other sites More sharing options...
thecodemonk Posted April 22, 2017 Author Share Posted April 22, 2017 Well...the entire cooling system is replaced now. Radiator, radiator hoses, heater box hoses, water pump, thermostat and housing, and even transmission lines (ended up leaking after I replaced the radiator). While in there, I figured it'd be good to swap out the lights for actual gauges and swapped out the two sensors for that too. The old jeep stays at temperature now...right at 210. It certainly warms up faster and stays warmer than the '01 XJ but I think it's fine there. Summer will tell for sure...though I'm not sure what else can be done there.I swapped out the TPS too, since it wouldn't shift except manually by moving the column lever...the voltage still reads the same with the new TPS though, so I'm not sure it was the problem. I'll keep searching around the forums to see what else it could be. Right now, it reads a range from 0.9 to 3.6 volts on the meter and it appears that the HO motors can't be adjusted. In the meantime...look at those shiny new parts! The odometer is about 25k miles higher than the actual truck...I'll figure out a way to adjust it eventually but, for now, I just keep that 25k figure in my head (that, or I'll find another speedo to swap in, since the trip lever is broken on this one too). Link to comment Share on other sites More sharing options...
Dzimm Posted April 22, 2017 Share Posted April 22, 2017 Looks like a real nice truck. I like the color quite a bit. I have to ask, what's up with the rear passenger flare? It looks like it got into a fight with another squirrel. Link to comment Share on other sites More sharing options...
thecodemonk Posted April 22, 2017 Author Share Posted April 22, 2017 Looks like a real nice truck. I like the color quite a bit. I have to ask, what's up with the rear passenger flare? It looks like it got into a fight with another squirrel. I wish I knew...all the others look really good (the fronts are pristine)! The previous owner didn't really know either. Thankfully, it's mostly just the paint having flaked off that one flare. Link to comment Share on other sites More sharing options...
thecodemonk Posted April 23, 2017 Author Share Posted April 23, 2017 I noticed a bit of a leak and couldn't tell if it was coming from the power steering pump or the steering box...so I figured it's probably best to replace both, rather than deal with one and then having to do the other too later. Didn't take any pictures of this though...doh! The jeep has had a metal on metal grinding noise from the front axle since I got it. I just assumed it was the dust shield being bent into the rotor, so I picked up new rotors and pads, figuring it was probably good to do the brakes anyways. Boy, was it a good thing I did! You can see from the first picture, the rotors and pads are pretty worn... New part! So shiny! When I looked at the pads, I realized they were REALLY worn down. I'm glad I'm doing this! You can see how thin the pads are here! Nice new pads, ready to provide some stopping power! When I looked at the old rotors, I realized something was up...look at the gouging on the passenger rotor! It was about this time that I also noticed the passenger tire would not spin. I took it all apart and thought, maybe it's just a bad caliper or something, so I replaced that...still no fix. I took a closer look without the caliper on and realized the rotor was hitting the caliper brackets! How in the world? I'd taken apart a dana 30 several times in the past without issue and never ran into this. I was stumped. Eventually, a buddy came over and had me set the old hub assembly side by side with one we pulled from the junkyard earlier that day (attached to a 1 piece driveshaft). The difference was obvious!Where would someone even get a hub assembly like that? Here's a better side view to tell just how much difference that is in mount height. So...sent the wife to the parts store to pickup new hubs for me (was tired of driving down there repeatedly) and, sure enough, works and clears great now! I just did the passenger side, since the driver side clears fine right now, but I figure it can't hurt to have good new parts on both sides, so next week I'll put in the new caliper and hub for the other side too, so it matches. Meanwhile, earlier in the day, I also scored another grille! The one on the jeep has a bunch of extra holes where a previous owner had just forced the screws in, rather than getting the proper mounting points. Link to comment Share on other sites More sharing options...
thecodemonk Posted April 27, 2017 Author Share Posted April 27, 2017 The jeep keeps blowing the dash light fuse and the signal lights stopped working...and I realized I had no brake lights (not sure I ever had those since buying it, looking back). After replacing the brake switch and headlight switch and checking all the grounds...I gave in and took Rocky to an electrical shop. They fixed it in under an hour and, $104 later, everything is working. What ended up happening was that the hazzard lights wire to the battery had been cut and the hazzards were on (which was overriding the brake lights and turn signal lights). It must have been messing with the grounding for the dash lights as well, since they no longer blow fuses either. The comanche drives great now and I can drive it around at night without using my phone light to see my gauges! I'll be doing the new ground locations and such mentioned by cruiser54's site eventually...for now, I'm just enjoying driving it. :) No pictures this time but the journey continues. ^_^ Link to comment Share on other sites More sharing options...
thecodemonk Posted May 3, 2017 Author Share Posted May 3, 2017 Been poking around a bit more and I got to wondering what these extra plugs are for and why they're just dangling there...more research needed! Sent from my Nexus 6 using Tapatalk Link to comment Share on other sites More sharing options...
DirtyComanche Posted May 3, 2017 Share Posted May 3, 2017 The extra plugs are for features that aren't installed. They used common chassis and engine harnesses to save money/headaches on assembly. If you have a FSM it's fairly easy to figure out what they're for. As a FYI on the wheel hub/brake issue, there's a couple different generations of hubs and brakes (and knuckles). Somebody bought the wrong parts or got them from a junkyard. Link to comment Share on other sites More sharing options...
thecodemonk Posted May 14, 2017 Author Share Posted May 14, 2017 They look pretty old so I'm guessing junkyard. Thanks for the info! :) I threw in the brown dog motor mounts I had laying around from when I thought I might need them in the XJ and it makes quite a bit of difference in engine feel while driving. Loving it and only took my about 90 minutes to do it! It was one of the easier mods I've ever done on a Jeep so far. :) Sent from my Nexus 6 using Tapatalk Link to comment Share on other sites More sharing options...
DirtyComanche Posted May 14, 2017 Share Posted May 14, 2017 Those are the Ultra Flex rubber ones or the polyurethane? Link to comment Share on other sites More sharing options...
thecodemonk Posted May 14, 2017 Author Share Posted May 14, 2017 I went with the rubber ones. From what I read from others, it suited my preferred feel better. :) Sent from my Nexus 6 using Tapatalk Link to comment Share on other sites More sharing options...
Minuit Posted May 14, 2017 Share Posted May 14, 2017 The first connector is the transmission diagnostic connector. If you have a Snap-On MT2500 scanner with the CHRY-2 adapter or the DRB-II, you can look at the transmission computer's readouts. edit: the one on the passenger side of the dash Link to comment Share on other sites More sharing options...
Comacho Posted May 16, 2017 Share Posted May 16, 2017 You got quite a lot of things to do for it but it's a nice looking truck Link to comment Share on other sites More sharing options...
thecodemonk Posted June 7, 2017 Author Share Posted June 7, 2017 Thanks guys! I'm loving driving it every day right now, even as summer starts to warm up. I noticed the rear bumper had been rattling and bouncing as if loose so I got underneath and saw that it looked like it was only held on by two bolts. They looked loose so I decided to tighten them up with the impact...big mistake. One of the bolts snapped and left the bumper hanging on by one. So, I took it off and taped the license plate to the back window until I could get some solution in place. A good friend of mine built me a quick bumper out of some 2x6 quarter wall metal to use until I figure out a long term bumper design I like. It's attached to the side bolts and seems to be holding strong. I'll probably just drill some holes and attach the license plate to that until I get around to building a cool plate style bumper that provides some armor for the lower rear of the bed too. Snapped these pics this morning. Sent from my Nexus 6 using Tapatalk Link to comment Share on other sites More sharing options...
Airborne Janitor Posted June 7, 2017 Share Posted June 7, 2017 Nice truck man, looks like we're doing similar tear downs, but your truck is in better shape than mine. I live in the valley BTW, we should link up to wrench sometime. Could use an extra hand to pull the bed off in the near future. Link to comment Share on other sites More sharing options...
thecodemonk Posted June 7, 2017 Author Share Posted June 7, 2017 Nice truck man, looks like we're doing similar tear downs, but your truck is in better shape than mine. I live in the valley BTW, we should link up to wrench sometime. Could use an extra hand to pull the bed off in the near future. Sweet! Always nice to meet another Jeeper in the neighborhood. :) I live on the north side of town but I'm up for helping where I can. I'm not super mechanical but I'm learning and can follow directions. I'll send you a PM! Link to comment Share on other sites More sharing options...
DirtyComanche Posted June 7, 2017 Share Posted June 7, 2017 That new bumper should work good for a long time. :thumbsup: Link to comment Share on other sites More sharing options...
thecodemonk Posted February 28, 2018 Author Share Posted February 28, 2018 Wow...it's been a while. I haven't don't much on the Comanche except maintenance. Been spending all my time and money on the shop. I need to get a picture of the structure finished, but here's one of it from a month ago, before siding got put on. Should be plenty of room to work!I've also started on a bed rack build...I have no idea what I'm doing so I just guessed at using 3/16th" steel and some 2x3 steel tube. Looking back, it's probably overkill.Got a work area setup so I have some room to really do some work. This is especially good because of another "little" project for the Jeep...a little Chevy power from a wrecked 07 Silverado. Things will start picking up here so hopefully I'll be able to get more updated posted on this thread. :)Sent from my Pixel 2 using Tapatalk Link to comment Share on other sites More sharing options...
DirtyComanche Posted February 28, 2018 Share Posted February 28, 2018 That shop looks awesome, I really wish I could have gone that big when I built mine. So, it's going to turn into a LS swap project? Link to comment Share on other sites More sharing options...
thecodemonk Posted February 28, 2018 Author Share Posted February 28, 2018 That shop looks awesome, I really wish I could have gone that big when I built mine. So, it's going to turn into a LS swap project? Thanks! I went as big as was allowed and I definitely don't regret it. There's going to be a LS swap now...Hazzard Fab guys recommended it since the long term plan is to get this rig on 40" tires and I figured I might as well do it sooner rather than later. :)Sent from my Pixel 2 using Tapatalk Link to comment Share on other sites More sharing options...
DirtyComanche Posted February 28, 2018 Share Posted February 28, 2018 Yeah, I hear you on the LS swap. I've been itching to pull my 86 out of the weeds to start trying to fit it up for that, as ultimately I think it would make for a lot better truck. But, too many projects and not enough time. Link to comment Share on other sites More sharing options...
thecodemonk Posted March 8, 2018 Author Share Posted March 8, 2018 On 2/28/2018 at 10:31 AM, DirtyComanche said: Yeah, I hear you on the LS swap. I've been itching to pull my 86 out of the weeds to start trying to fit it up for that, as ultimately I think it would make for a lot better truck. But, too many projects and not enough time. I feel you there! A deadline is what motivated this to the top of the project heap. The wife and I are going down to Moab again in September and it looks like most of our friends who were going to go can't. Since we don't want to go wheeling with only one rig (too much risk for my taste), we'll be bringing BOTH jeeps. That means both need to be ready by September...oi! The XJ needs the brakes checked over, the leak on the rear diff fixed, and probably the NSS replaced (sometimes needs to be in neutral to start). Thankfully, only small things there. For the MJ's new heart: I got the trans off yesterday and will be checking over the engine soon. Got an engine stand and will mount it up to that tonight to start inspecting the engine and replacing basic seals. I'm hoping, since it only has around 81k miles on it, that it won't need a whole lot (and the rest of what's needed for the engine swap seems pretty pricey). For the rest of the MJ's needs, I'm going with a SOA lift (ordered the dana 44 swap kit from RuffStuff...will figure out how much lift the front needs after the back is done), and armor (ordered the DBO rear bumper and going to PM Krusty to hopefully get on his schedule for some sliders). I'm still going back and forth on a non-winch front bumper between DBO or JCR. Link to comment Share on other sites More sharing options...

Recommended Posts
Create an account or sign in to comment
You need to be a member in order to leave a comment
Create an account
Sign up for a new account in our community. It's easy!
Register a new accountSign in
Already have an account? Sign in here.
Sign In Now