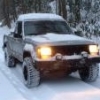
HOrnbrod Posted July 24, 2018 Share Posted July 24, 2018 11 minutes ago, dustyinthedirt said: ... ugly truckling Very good. Link to comment Share on other sites More sharing options...
dustyinthedirt Posted March 7, 2019 Author Share Posted March 7, 2019 I’ve gotte. Lots done just haven’t been posting about it. Welded the truss on the front Dana 50. Patched the holes in the floor and layed down some sound deading. I have the fenders and clip pulled and am in the process of getting a 00’ fenders and clip. Link to comment Share on other sites More sharing options...
dustyinthedirt Posted March 7, 2019 Author Share Posted March 7, 2019 I used thin sticky back aluminum to lay down on the firewall and tunnel. Used the leftover to cover the back of the cab. I am more worried about heat then sound deading since I’m planning on removing the doors Link to comment Share on other sites More sharing options...
dustyinthedirt Posted March 7, 2019 Author Share Posted March 7, 2019 Before I put the interior back together I swapped out the headlight switch and gotta get a center console since I’m switching to bucket seats. Link to comment Share on other sites More sharing options...
IDMJ Posted March 8, 2019 Share Posted March 8, 2019 You’re a busy guy Link to comment Share on other sites More sharing options...
dustyinthedirt Posted March 8, 2019 Author Share Posted March 8, 2019 Got a 00’ front end from a buddy Link to comment Share on other sites More sharing options...
dustyinthedirt Posted March 8, 2019 Author Share Posted March 8, 2019 9 hours ago, IDMJ said: You’re a busy guy Thanks. I feel like I do a lot and am getting not very far Link to comment Share on other sites More sharing options...
IDMJ Posted March 8, 2019 Share Posted March 8, 2019 2 hours ago, dustyinthedirt said: Thanks. I feel like I do a lot and am getting not very far I know the feeling very well. Keep at it and, all the sudden it’s nearly done.... Link to comment Share on other sites More sharing options...
JMO413 Posted March 8, 2019 Share Posted March 8, 2019 Very good work. Keep the good fight going. Link to comment Share on other sites More sharing options...
dustyinthedirt Posted March 10, 2019 Author Share Posted March 10, 2019 I’ve been tieing up loose ends in the cab. I altered a centerconsole to fit. There was only two xjs with tan interior in the pickapart. They did have three Comanches in there that I scavenged pretty hard. I may or may not have three sets of taillights... also got a passenger side window regulator (which somebody had already replaced in that vehicle so I got some hardware with it instead of drilling out rivets) and a climate control. I had to peice the console together to make it work. I got the console and back bracket from one the black trim bezel from another, and the latch from another. I had to fix the console with some JB Plasticweld, since it was broken. Also who knew wood working tools would cut plastic trim perfectly Link to comment Share on other sites More sharing options...
dustyinthedirt Posted March 10, 2019 Author Share Posted March 10, 2019 Link to comment Share on other sites More sharing options...
dustyinthedirt Posted March 10, 2019 Author Share Posted March 10, 2019 I wish I would have trimmed a little closer to the heater but it looks okay. Link to comment Share on other sites More sharing options...
dustyinthedirt Posted March 10, 2019 Author Share Posted March 10, 2019 Layed the vinyl in this morning only took 7.5 hours to do it and get the interior panels back in. It fits “okay”. I purchased this vinyl flooring almost a year ago and it’s sat unfolded and flat for that long in a spare room. Using a heat gun made it easier to manover around. I wish it would have been warm enough to leave it out side in the sun for a few hours. I will try to get the rest of the wrinkles out during final install. Now to alter the seat brackets Link to comment Share on other sites More sharing options...
dustyinthedirt Posted March 11, 2019 Author Share Posted March 11, 2019 After getting the vinyl layed and the trim in. I started on the seat brackets. I should have done this before I put the trim in. Here is a little sample of what we have going on. I’m gonna do a write up on this seat bracket alteration. It was way simpler then expected Link to comment Share on other sites More sharing options...
dustyinthedirt Posted April 6, 2019 Author Share Posted April 6, 2019 Interior is in. I haven’t mounted the console officially yet. I’m not super happy with the fitment. The seats slide really nice. They sit about 1.75-2” higher. I have way more leg room. The interior feels much more roomy. The gauge cluster lights did not work at all so I wanted to tackle that. I did the ground relocation and only had half of them after making a post and “ohms” replayed and really helped me trouble shooting it and gave me a sweet link to a electrical diagram for the truck. I really appreciate it man!! The lights where not working because of the foil on the back of the instrument gauges was slightly tarnished. A little scotch brite fixed it. Link to comment Share on other sites More sharing options...
dustyinthedirt Posted April 6, 2019 Author Share Posted April 6, 2019 The 12 ton stands from harbor freight are nicetime to start the suspension Link to comment Share on other sites More sharing options...
dustyinthedirt Posted April 8, 2019 Author Share Posted April 8, 2019 Terrible pic but the axle sorta in position. Needs to be forward a bit more. The sterling measures 12” (no brake rotors) from the outside of the leaf to the face of the hub where the wheel would seat. I believe the stock d30 is only eight and a 1/4.. but I measured from the pad where the leaf would sit to the face of the drum. Since they where already off. Link to comment Share on other sites More sharing options...
dustyinthedirt Posted April 13, 2019 Author Share Posted April 13, 2019 Clayton off road 3link crossmember is pretty nice. I’m gonna stitch it to the frame since there are only two bolts holding it and it is gonna have some serious stress on it. I can remove the middle section to drop the transmission. It is about a 1/2 inch lower. Link to comment Share on other sites More sharing options...
dustyinthedirt Posted April 29, 2019 Author Share Posted April 29, 2019 The mounts for the links on the crossmember come out Straight with the body. I need them to be a little angled to match the axle side of the links. Since the axle is almost 10” wider the control arms are pretty wide on the axle. The crossmember is around 28” center of link to center of link and the axle side is close to 43” center of link to center of link. I was able to get the rear sitting on its own weight on the sterling 10.5, pinion angle set and for big racks on each of the u bolt eliminators. We only had to jack the truck up and set down 8 times before we knew it was straight. I have a string run down the side of the truck off the back wheels trying to square the front with the rear. Link to comment Share on other sites More sharing options...
dustyinthedirt Posted May 7, 2019 Author Share Posted May 7, 2019 The links/mounts and coil buckets have all been tacked into place. I’m using a Johnny joint on the body side and a Heim on the axle. The axle sits about a inch to far forward and there isn’t much adjustment left on the joints. I’ve got to cut the tacks loose from the links pull the inserts out, cut a inch off and reweld. the springs sit about two inches further out left to right then stock so they have a litttle lean in them Link to comment Share on other sites More sharing options...
dustyinthedirt Posted May 9, 2019 Author Share Posted May 9, 2019 Made up a diagram to show how the pinion moves through articulation. I couldn’t wrap my head around it otherwise Link to comment Share on other sites More sharing options...
Swampy Posted May 14, 2019 Share Posted May 14, 2019 It is really coming together nicely man! I want to see it moving under its own power Link to comment Share on other sites More sharing options...
dustyinthedirt Posted May 14, 2019 Author Share Posted May 14, 2019 10 hours ago, Swampy said: It is really coming together nicely man! I want to see it moving under its own power Thank you! I can’t wait to see it move. I’m hoping by the end of the week I’ll be able to order driveshafts Link to comment Share on other sites More sharing options...
Pete M Posted May 21, 2019 Share Posted May 21, 2019 why does your coil have a bow to it? Link to comment Share on other sites More sharing options...
dustyinthedirt Posted May 21, 2019 Author Share Posted May 21, 2019 1 hour ago, Pete M said: why does your coil have a bow to it? At that moment the front was pushed about two inches forward from where it should have been. I had to recut my links so it could go back so they where straight. They bow out passenger to driver a little though cause of the way the truss is made Link to comment Share on other sites More sharing options...

Recommended Posts
Create an account or sign in to comment
You need to be a member in order to leave a comment
Create an account
Sign up for a new account in our community. It's easy!
Register a new accountSign in
Already have an account? Sign in here.
Sign In Now