Search the Community
Showing results for tags 'upgrade'.
Found 8 results
-
 I have found literally 0 information about this style of alternator, and can find only a few "upgrade" alternators that range between 300$ and 700$. I will not be able to buy this. Is there anyway to switch from the old style alternator to the new style in order to make replacement easier, and act as an upgrade? (Pic related, Old VS new Style mounting)
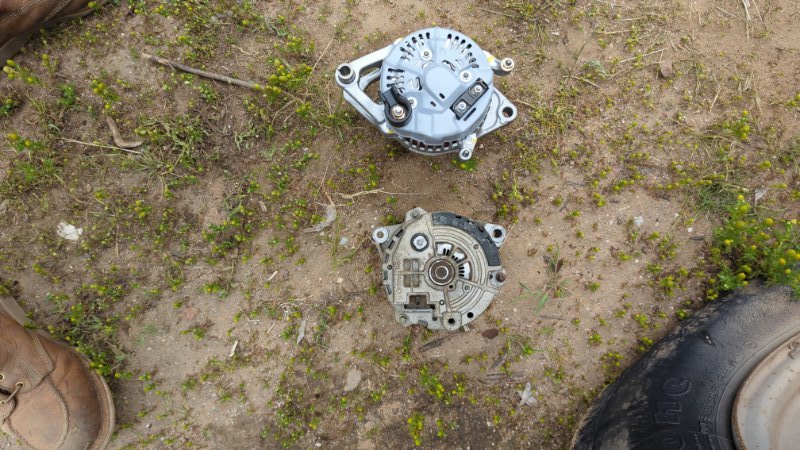
-
I'm thinking about replacing my radiator in my 88 4.0. Does paying more for a "high performance" radiator make the difference? Aluminum vs stock? I've been doing some research and came across the Mishimoto MMRAD but I'm not sure I feel like forking over $400. Does anyone have something they really like? Thanks.
-
 I know there are many threads that explain this procedure but another won't hurt from someone elses experience. So, this weekend I am starting the dual diaphragm conversion on my 1989 MJ. To start off, here are the tools and equipment I have so far: 1996 XJ Brake Booster and Master Cylinder (bought off of JC Whitney) $170 (2) 3/16 diameter bubble flared with 10mm fitting brake lines STANDARD flare tool (rented from auto parts store) (1) 12mm thread 3/16 diameter line, fitting (1) Vacuum Tool (4) 10mm stop or lock nuts (1) Line cutter The four 10mm nuts are for the brake booster. The other two bolts on the other side can use the nuts off of the stock MJ booster. I chose to buy the bubble flare lines because the 1996 MC takes bubble flare ends and not double flared. The MJ distribution valve body DOES take double flare though. So, I am going to have to flare one end of each line using the standard flare tool. Also, one of the ports on the 1996 MC takes a 12mm fitting which I will have to slide on the line before flaring again. 1996 XJ brake booster 1996 XJ master cylinder currently being bench bled using vacuum tool Vacuum tool This tool made the bleeding process a little easier. There are many ways to do it. Putting each of the hoses from both fittings into the bottle and pushing the rod in, will have the same effect. I did both methods just to be sure. That is where I am at right now. Tomorrow I will start the upgrade!! :wrench: Also there will be lots of more pictures! :clapping: :thumbsup:
 -
 Hello All! :thumbsup: So I heard somewhere that I could swap out my stock injectors (I have a 1992 4.0L in-line 6, :)) for some '4-way spray' ugraded injectors that could possibly bump up my fuel efficiency and give me a little boost in power/torque. Is this true...? I have an otherwise stock 'manche. If so, what is the model, make and possibly part number of these injectors? I 've looked a couple places, but they just mention 'Neon' or '703'...I'm not sure exactly what that means... Where could I purchse these new, once I know what I need? Many Thanks! :brows: :bowdown:
 -
 If you're anything like me, you just got back from the junkyard with a fresh batch of 136A upgrade alternators ready to kill in the mud. You just took them off the Dodge trucks because they're plentiful and right on top so they're easy to get. But in your haste, you grabbed the wrong alternator and your new one has a quick connect plug instead of the usual ring terminals. This isn't a problem. As long as you grabbed a quick connect pigtail, you're fine. If not, you can go back or try the dealer or ebay. I found one with a quick search for $17 - #RPT-52010. This is really easy wiring. They didn't even change half of it. Connect the green wire to the green wire, which goes to the PCM, and connect the other wire (colors may vary) to what you found next to the green wire. If your factory harness has a ground wire, ground it. Piece of cake. If it's your first time with the bigger alternator, you will need to introduce your grinder to your alternator bracket, upgrade your alternator V+ output wire, and you're golden. You don't need to grind a lot, it's not a big deal. Here's some diagrams and a photo of some alternators to grab some attention. Dodge 136A Alternators Typical stock wiring Dodge ALT plug
 -
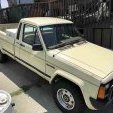
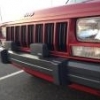
In this topic you will read about what I have done so far with my 1989 Jeep Comanche Eliminator Edition. I am simply making this topic because I like to read what other people have done and what their experiences are so I can learn from them. So if you have any questions or comments about what I have done let me know! I HAVE PICTURES!! :rotfl2: I bought it with 32,000 original miles. Exhaust----------------------------------------------------------------------------------------------------------------------------------------------------------------- Flowmaster Delta Series Exhaust High flow cat . :MJ 1: . I had the cat and muffler welded together as well as a down pipe tip welded at the end of the exhaust The cat was then welded onto the flange by the bottom scrap bar that supports the transmission I had my exhaust/intake manifold gasket go bad on me so I replaced that and if anyone has questions on how to get to it just let me know. You do have to take the injectors off which I didnt know. I would also recommend a high quality gasket so you don't have to go through that long process again. Intake------------------------------------------------------------------------------------------------------------------------------------------------------------- I bought a high performance oiled cotton air filter that you can clean with a solution. It has a warranty replacement. Good results and I like it. Here is the website: http://www.greenfilterusa.com/ :driving: Regularly clean the throttle plate. Tried the seafoam procedure to clean out the intake manifold to get the carbon out once. Id say its a good thing but do not do that often. Maybe every 50,000 miles Electrical---------------------------------------------------------------------------------------------------------------------------------------------------------- Upgraded the grounds on the engine, firewall, and inside one of the main wiring harnesses. Refer to Cruiser54's instructions! Added LED lights in my dash. Pretty cool I think. 8) I spliced the brake lights to wire in a four wire trailer plug. I did not cut the original truck brake wire though. I actually carefully just cut the insulation off and then soldered the plug wires on. This way I will always have a complete wire section for my truck brakes just in case the soldering becomes bad. No headache! :group beer: I recently added a supplemental wiring harness for the headlights to get the full voltage from the battery. I bought this: http://www.amazon.com/dp/B001P29X4G/ref=pe_385040_30332200_pe_309540_26725410_item This was definitely a good upgrade! 25% brighter lights for cheap. You could go one step further and buy new e-code bulbs and housings. I chose not too...yet. Old Lighting system with stock lights and wiring harness getting ~10 V: New wiring harness with stock bulbs: :rock on: LOTS of ground checking and such because of a low idle issue. You can find my experience in my signature........ Exterior--------------------------------------------------------------------------------------------------------------------------------------- Undercoating! As you can see I undercoated the bottom of the side panels just low enough where you cannot see if you were standing. I also coated part of my door jam so when I kick my feet off so no dirt gets inside my truck it won't scratch that surface. But where that wider coating is on top i guess you can say, is a black plastic cover that screws into those holes. So it covers the coating but I did it anyways. Painted my bumpers a nice black finish. I have a fiberglass cap on the bed. Wax and keep clean! :clapping: NEW TIRES and 2" Lift. BFG 31's with a 2" coil spacer and rear shackles. Interior------------------------------------------------------------------------------------------------------------------------------------------------ I made my own cupholder! :yes: It is an interesting concept but it works AWESOME. I used foam from a couch cushion and cut it into the shape of the console. Then dug out the holes for the cups. I made the holes a little smaller because this puts side pressure on the cups when you put them in. Results? Drinks do not move at all Insulates the drinks and the cupholder itself is easily removable if not in use New poineer speakers in the door and side panels as well as a new pioneer radio which was a needed upgrade from my 25 year old speakers. Happy with the results. I can supply the model numbers if requested. 20% tinted windows Brakes------------------------------------------------------------------------------------------------------------------------------------------------------------------- THE BEST UPGRADE :thumbsup: :wrench: Dual Diaphram Brake Booster from a 96 Cheerokee and new matching master cylinder. I actually wrote a DIY on this and just take a look. Twice the braking power of the stock system. I highly recommend this and this is a really clear writeup with a lot of views. http://comancheclub.com/topic/39437-1996-xj-dual-diaphragm-brake-booster-conversion/ Cooling/Heating---------------------------------------------------------------------------------------------------------------------------------------------------- Flushed the coolent system a few times to keep it clean. A problem a came into is that I cannot get the drain plug in the side of the block out. A 3/8 extension does not fit and that is what it looks like should be the right tool. I havent figured that out yet so I just use the petcock in the radiator. During this cold winter :fs2: ... My heat was not normal. Jeeps should be shootin out heat that will burn your skin (not really). But I was getting like 70 deg air or less. Not right. And my temp gauge was showing fine and everything was running normal. Both heater hoses were warm... Now both were warm so you wouldnt think the heater core was plugged but it was.. I reverse flushed the heater core a few times both ways and now I'm getting amazing heat. I still have that vacuum valve so I had to clamp an extra hose in order to reverse flush. That valve also stuck during the -30 deg weather and did not let coolant flow through the heater core. Any questions please ask. Update: My heat works great now. I replaced the heater control valve because it was leaking and I also back flushed my heater core which it what really made the difference. Misc.---------------------------------------------------------------------------------------------------------------------------------------------------------------------- I did have issues with my Jeep not starting due to my bad CPS Did all of Crusier54's renix tips and tricks. He did a good job with those writeups and helped a bunch. :bowdown: I have been having idling issues with a low idle. Here is the link to the thread: http://comancheclub.com/topic/42581-renix-dead-spot-and-idiling-low/ Added a Permanent Fuel Pressure Gauge on the Fuel Rail. http://comancheclub.com/topic/12565-permanent-fuel-rail-pressure-gauge/ Upcoming projects (topic will be updating)------------------------------------------------------------------------------------------------------------- Buying a high quality gasket for that damn valve cover. It is always slowly leaking oil :fs1: COMPLETED Taking the clear coat off my rims and polishing and re-clear coating 4x4 conversion Again feel free to ask questions :waving:
-
I will say I had a low idle that was hovering around 400-500 and going through Cruiser54's TPS adjustment and ground refresh, she is idling around 750 now in drive. I already did the engine and chassis ground upgrades but I did not know about the TPS,CTS,IAT, and ECU ground wires that are located in the wire harness by the firewall. Cleaned the throttle body, soldered the five ground wires together (there was orignally a crappy clamp) and adjusted the TPS to the correct spec. Idles like a champ. Before I soldered, I did the ohm's test for the three prong connecter and I had varying resistance. So, after soldering I tried again and that problem was solved. I still have a ~2 ohm reading which is a little high. But nothing to worry about I don't think. When I did the TPS adjustment, my reference voltage was 5.02 V and I adjusted to where the output voltage was .85 V. Cruiser’s Renix Sensor Ground Test This sensor ground circuit affects the CTS, TPS, IAT, MAP, ECU and diagnostic connector grounds. It’s very important and not something to overlook in diagnosing your Renix Jeep as it is common for the harnesses to have poor crimps causing poor grounds. If any or all of the sensors do not have a good ground, the signal the ECU receives from these sensors is inaccurate. Set your meter to measure Ohms. Be sure the key is in the OFF position. Using the positive (red) lead of your ohmmeter, probe the B terminal of the flat 3 wire connector of the TPS . The letters are embossed on the connector itself. Touch the black lead of your meter to the negative battery post. Wiggle the wiring harness where it runs parallel to the valve cover and also near the MAP sensor mounted on the firewall. If you have an 87 or 88 with the C101 connector mounted on the firewall above the brake booster, wiggle it, too. You want to see as close to 0 ohms of resistance as possible. And when wiggling the harnesses/connectors the resistance value should stay low. If there is a variance in the values when wiggling the wires, you have a poor crimp/connection in the wiring harness or a poor ground at the engine dipstick tube stud. On 87 and 88 models, you could have a poor connection at the C101 connector as well. Revised 06/12/2012 Put this together to simplify the TPS testing and adjusting on 87 to 90 Renix Jeeps. There are other procedures out there but half of them are wrong and don't separate out driveability testing from transmission testing like these do. Remember: You must adjust a TPS after replacing it on a Renix Jeep, unlike the later models. RENIX TPS ADJUSTMENT Before attempting to adjust your TPS be sure the throttle body has been recently cleaned. It's especially important that the edges of the throttle butterfly are free of any carbon build-up. IMPORTANT NOTE: Using the positive (red) lead of your ohmmeter, probe the B terminal of the flat 3 wire connector of the TPS . The letters are embossed on the connector itself. Touch the black lead of your meter to the negative battery post. If you see more than 1 ohm of resistance some modifications to the sensor ground harness will be necessary. The harness repair must be performed before proceeding. I can provide an instruction sheet for that if needed. MANUAL TRANSMISSION: RENIX manual transmission equipped XJs have a three-wire TPS mounted on the throttle body. This manual transmission vehicle TPS provides data input to the ECU. The manual transmission TPS has three wires in the connector and they're clearly embossed with the letters A,B, and C. Wire "A" is positive. Wire "B" is ground. Key ON, measure voltage from "A" positive to "B" ground by back-probing the connectors.. Note the voltage reading--this is your REFERENCE voltage. Key ON, back-probe the connector at wires "B" and "C". Measure the voltage. This is your OUTPUT voltage. Your OUTPUT voltage needs to be seventeen percent of your REFERENCE voltage. For example: 4.82 volts X .17=.82 volts. Adjust the TPS until you have achieved this percentage. If you can't achieve the correct output voltage replace the TPS and start over. AUTOMATIC TRANSMISSION: RENIX automatic transmission equipped XJs have a TPS with two connectors. There is a flat three- wire connector, same as the manual transmission vehicles have, and it is tested the same as the manual transmission equipped vehicles--FOR ENGINE MANAGEMENT RELATED ISSUES. However, the automatic TPS also has a square four-wire connector clearly embossed with the letters A,B,C, and D. It only uses three wires and provides information to the Transmission Control Module. Key ON, measure voltage between "A" positive and "D" ground. Note the voltage. This is your REFERENCE voltage. Back-probe the connector at wires "B" and "D". Measure the voltage. This is your OUTPUT voltage. Your OUTPUT voltage needs to be eighty-three percent of your REFERENCE voltage. For example 4.8 volts X .83=3.98 volts. Adjust the TPS until you have achieved this percentage. If you can't, replace the TPS and start over. So, if you have an automatic equipped XJ your TPS has two sides--one side feeds the ECU, and the other side feeds the TCU. If you have TRANSMISSION issues check the four-wire connector side of the TPS. If you have ENGINE issues check the three-wire connector side of the TPS. For those with a MANUAL TRANSMISSION--the TPS for the manual transmission XJs is stupid expensive. You can substitute the automatic transmission TPS which is reasonably priced. Revised 11-28-2001
-
I've searched through all the DIY pages for upgrades from Grand Cherokees. I only found two, upper control arms and the dual brake booster, and I thought there were more. Does anyone have a list of what parts to strip from a WJ if you get ahold of a parts vehicle? Or perhaps links atleast?