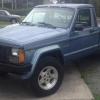
PNWAlex1/9 Posted October 7, 2014 Share Posted October 7, 2014 Picked up this 89 Pioneer 4x4 4.0 AT longbed from its original owner about 3 weeks ago. It runs decent, and it's pretty ugly: Over the last 3 weeks I've made some progress. More pics to follow Link to comment Share on other sites More sharing options...
PNWAlex1/9 Posted October 7, 2014 Author Share Posted October 7, 2014 First order of business was to make the interior clean and live able. First step was to remove the carpet and spot shampoo/stream extract the carpet. Then I disassembled the bench and sent the covers through the wash Then I adde some boards to the bottom springs because I hated the way you sank into the seat: The very first thing I did to the truck was rip down the sagging headliner to expose this: So I recovered it, actually found grey headliner material at Jo Ann fabrics for $15. 3M super 90 glue I had to straighten out the seat brackets too Link to comment Share on other sites More sharing options...
PNWAlex1/9 Posted October 7, 2014 Author Share Posted October 7, 2014 I took the opportunity to treat the rust forming on the floor pans with POR-15. This is the only rust I've found on the whole truck I had some 4x6's laying around too Link to comment Share on other sites More sharing options...
PNWAlex1/9 Posted October 7, 2014 Author Share Posted October 7, 2014 Got a set of 4 decent TJ? Wheels for $60 on craigslist Also found four 30x9.5 tires date code puts em at 4yrd old, way over half tread. Only $100! Both front and rear bumpers are way crunched on this truck. Got this front bumper from Logan's metal products for $204 shipped to my door More pics to come tomorrow Link to comment Share on other sites More sharing options...
PNWAlex1/9 Posted October 7, 2014 Author Share Posted October 7, 2014 So the interior is back together. I threw an old JVC deck in there as well, since the stock tape deck had croaked. The last thing I really want to do here is some cup holders. I think I'll get a mini console for floor shift models, and put cup holders in there. Other than that, maybe a seat cover.... New wheels and tires mounted and balanced. New front bumper installed also Link to comment Share on other sites More sharing options...
PNWAlex1/9 Posted October 7, 2014 Author Share Posted October 7, 2014 So I'd like some input on the front fenders now that they don't line up with the new bumper. I see 3 angles i can cut the flare and fender at that would look decent. I'm leaning towards the longest or the shortest option...here's a crude idea of what I'm thinking what do you guys think? Link to comment Share on other sites More sharing options...
dunnc1991 Posted October 8, 2014 Share Posted October 8, 2014 I'd cut it short and be done with it Link to comment Share on other sites More sharing options...
91Pioneer Posted October 8, 2014 Share Posted October 8, 2014 My vote is middle angle. But, to be on the safe side, do the longest cut (bottom one) first. Then if you don't like it you could cut a bit more to do the middle one, then upper one. I would not consider the upper cut, it would look funny IMHO. Did putting the boards in the seat help a lot or does it feel "hard" when you're sitting? I'm thinking of doing something similar. Link to comment Share on other sites More sharing options...
PNWAlex1/9 Posted October 8, 2014 Author Share Posted October 8, 2014 Did putting the boards in the seat help a lot or does it feel "hard" when you're sitting? I'm thinking of doing something similar. It's not bad. If you think about it you're still sitting on 2-3 inches of foam..... I haven't gone on any drives longer than about 30 mins yet so I'm not sure about longer trip comfort. If i were to do it again, I'd probably add some high denisty foam to the top before putting the cover back on. An unexpected bonus is being able to rest my right arm on the top of the bench comfortably. before my arm was at an uncomfortable awkward angle. Also if you're over 6'2" I'd not recommend it. I'm 6 foot and went from like 4 inches head room to more like 2.... Link to comment Share on other sites More sharing options...
CGCWO Posted October 8, 2014 Share Posted October 8, 2014 Really like the Logans Metal Works front bumper and just checked their website, bumper is currently on sale $159 if anyone is interested. Link to comment Share on other sites More sharing options...
88whitemanche Posted October 8, 2014 Share Posted October 8, 2014 Really like the Logans Metal Works front bumper and just checked their website, bumper is currently on sale $159 if anyone is interested.Make sure you email him before you guys make an order...He has been really behind on his work...I was waiting for 6 months until I gave in and requested my money back... He may have caught up with his schedule to do the bumpers...but EMAIL HIM FIRST!!!! Not to put him down just stating facts... Link to comment Share on other sites More sharing options...
PNWAlex1/9 Posted October 8, 2014 Author Share Posted October 8, 2014 I was waiting for 6 months until I gave in and requested my money back... He may have caught up with his schedule to do the bumpers...but EMAIL HIM FIRST!!!! Not to put him down just stating facts... Six months?! That sucks man I must've gotten lucky. I ordered mine sept 18th and got it several days ago definitely less than 2 weeks total. I recommend paying for the powder coating. It took almost $40 in paint and primer (not to mention time) to cover it inside and out. Link to comment Share on other sites More sharing options...
KuunLB Posted October 8, 2014 Share Posted October 8, 2014 Man, you did some great work! Just got me an 89 and going to be doing a lot of the same things you've done. i'm definitely gonna be looking to you for some advice. just freakin awesome work i gotta say. Link to comment Share on other sites More sharing options...
MereAnatomy Posted October 12, 2014 Share Posted October 12, 2014 Cut it at the top to avoid future regret. Taxes and Tires, the size always increases. Link to comment Share on other sites More sharing options...
PNWAlex1/9 Posted October 24, 2014 Author Share Posted October 24, 2014 I went short. Still going to modifty the cut angle a little bit and make an end cap for the flare. Also need to get some door edging for the sharp edges of the fender. This worked out nice as I was able to attach the fender liner to the remaing portion of the fender behind the bumper, and the flexible part to the bumper itself Link to comment Share on other sites More sharing options...
Lee21490 Posted October 24, 2014 Share Posted October 24, 2014 Always nice to see another CC user in town here. Link to comment Share on other sites More sharing options...
JeepUtah Posted October 25, 2014 Share Posted October 25, 2014 700$$!! I'll pay you 1000$ If only they weren't in such high demand where I live. Jealous. Link to comment Share on other sites More sharing options...
PNWAlex1/9 Posted October 28, 2014 Author Share Posted October 28, 2014 Truck died last week... Turned out to be a loose connector on the fuel pump, whoever installed this replacement carter pump was in a hurry.... Link to comment Share on other sites More sharing options...
8valvehero Posted October 29, 2014 Share Posted October 29, 2014 YO! Hey I'm in Bellingham too! I drive a black/red w topper LWB '88 & work at Fanatik Bike Co. on State St. Here's my build thread: http://comancheclub.com/topic/42813-project-sipsey-88-pioneer-long-bed/ I'll shoot you a PM with my phone number. Gimme a shout if you need anything! Link to comment Share on other sites More sharing options...
PNWAlex1/9 Posted October 29, 2014 Author Share Posted October 29, 2014 YO! Hey I'm in Bellingham too! I drive a black/red w topper LWB '88 & work at Fanatik Bike Co. on State St. Here's my build thread: http://comancheclub.com/topic/42813-project-sipsey-88-pioneer-long-bed/ I'll shoot you a PM with my phone number. Gimme a shout if you need anything! This is awesome there are already 2 local guys here in Bellingham that have reached out to help a new Jeep owner! Can't say that of the other forums I use for various reasons...thanks for the warm welcome Lee and 8valve! It's weird you work at fanatik I just saw a really cool vinyl wrap on a newer crew cab truck with Fanatik on the side. I used to work at a shop that did wraps, and that one still got my attention! We'll all have to grab a beer sometime so I can pick your brains on jeep stuff Link to comment Share on other sites More sharing options...
8valvehero Posted October 29, 2014 Share Posted October 29, 2014 Right on. Lee is a great guy with a cool truck and always wiling to help. The shop truck is a funny story- the owner strolled in to the graphics place with an energy drink can in hand as inspiration. :laughin: It's actually all airbrushed w/ no vinyl! Thursdays are a good day to grab a beer. Holla! Link to comment Share on other sites More sharing options...
PNWAlex1/9 Posted November 14, 2014 Author Share Posted November 14, 2014 Finally found the center console I wanted. I'm going to graft some cup holders into it only $30 shipped Link to comment Share on other sites More sharing options...
PNWAlex1/9 Posted November 14, 2014 Author Share Posted November 14, 2014 Started working on some underhood issues. Replaced lots of old vacuum hoses, cleaned the iacv, cleaned the grime out of the intake, and replaced the filter. This thing was oily Also replaced a fried battery to engine ground. The original cable was about 36". I found a 48" at the store, cut it to length, crimped and soldered a 4ga ring on, and split loomed it. Also added extra 8gauge cable from the block to the firewall pinch seam near the coolant bottle. Note damaged original cable I also replaced the drive belt, and got a Valve cover gasket and throttle body gasket at the store. I'm going to do cruisers' breather mod to hopefully curb some of this grime in the intake Link to comment Share on other sites More sharing options...
PNWAlex1/9 Posted November 16, 2014 Author Share Posted November 16, 2014 Finished the cup holders today. I used an old ABS plastic tool case I had laying around to use for my trim ring. Cut it to fit Cut a hole for the cup holders, and lots of hot glue later Link to comment Share on other sites More sharing options...
Motorcharge Posted November 16, 2014 Share Posted November 16, 2014 As clean as the interior is now, the sun visors really stand out. Might as well re-cover those too. They're pretty easy, they just snap open so all you have to do is glue and rewrap them and the excess just gets hidden inside. I'm jealous of that cupholder too, suddenly wish I didn't have floor shift haha. One suggestion for them, if it will fit get a flared 3" PVC pipe end at Lowe's and screw one of the cupholder spots. They make the perfect cupholders and hold everything from cans to those big foam cups McDonalds has. This is in my XJ, but I'm going to build something similar to fit in where the empty ebrake spot is in the MJ. Link to comment Share on other sites More sharing options...

Recommended Posts
Create an account or sign in to comment
You need to be a member in order to leave a comment
Create an account
Sign up for a new account in our community. It's easy!
Register a new accountSign in
Already have an account? Sign in here.
Sign In Now